
The same lab-grown diamond grades can look very different once shape enters the equation. A color grade that appears bright in a round brilliant may look warmer in an emerald cut, especially when a lab-grown diamond certificate guide is used to compare report data with actual face-up appearance, while a clarity grade that seems safe on paper can become distracting under a large step-cut table. Fancy shapes also bring visual risks that certificates do not fully capture, including bow-tie effects, uneven silhouettes, windowing, corner vulnerability, and poor face-up spread.
For the full framework, read Lab-Grown Diamond Shapes Guide.
This guide helps you use the 4Cs as a starting filter rather than a final answer. You will learn when to prioritize cut precision, when clarity or color deserves more attention, and when measurements, video, proportions, and setting fit matter more than carat weight. The goal is to choose the diamond whose tradeoffs are least visible in its shape, not simply the largest or highest-graded stone available.
| Shape Type | What to Check Closely | Common Buying Mistake |
|---|---|---|
| Round brilliant | Cut grade, light return, eye-clean clarity | Overpaying for clarity that is not visible |
| Oval, pear, marquise | Bow-tie, shape balance, tip color, length-to-width ratio | Choosing carat weight before checking face-up shape |
| Emerald, asscher | Table clarity, step pattern, windowing, color | Assuming a report grade confirms visual cleanliness |
| Radiant, cushion, princess | Sparkle pattern, corners, depth, spread | Treating all facet styles as if they look the same |
| Larger lab diamonds | Visible warmth, inclusions, poor light return | Prioritizing size without checking what size reveals |
| Custom ring designs | Exact millimeter dimensions and setting protection | Finalizing the design before selecting the stone |
Quick Questions Before You Read
Q: Can I use the same 4C targets for every diamond shape?
No. Shape changes how color, clarity, cut quality, and size appear, so each shape needs its own priorities.
Q: Is a higher clarity grade always worth paying for?
Not always. Inclusions matter most when they are visible face-up or placed under open areas like an emerald-cut table.
Q: Why is carat weight not enough for fancy shapes?
Two diamonds with the same carat weight can face up very differently depending on depth, spread, and length-to-width ratio.
Q: What should I check beyond the certificate?
Review photos, video, proportions, measurements, bow-tie or windowing, and how the stone will sit in the setting.
Why the 4Cs Change When the Diamond Shape Changes
The 4Cs are useful, but they are not shape-neutral. A VS2 oval, a VS2 emerald, and a VS2 radiant can carry very different visual risks because each shape handles light, color, inclusions, and size in its own way. That is the central rule behind evaluating lab-grown diamond 4Cs by shape: the same grade can look safer in one shape and more exposed in another.
The 4Cs refer to cut, color, clarity, and carat weight, which GIA describes as the core factors used to communicate diamond quality in a consistent way.[1] Consistent language is helpful, but it should not be mistaken for consistent visual impact across every shape.
This matters even more with lab-grown diamonds because many buyers compare larger stones within the same budget. Moving from a 1.50 carat diamond to a 2.00 carat diamond may feel like an easy upgrade on paper, but larger face-up size can make bow-ties, body color, windowing, or inclusions easier to notice. The better question is not just “What are the grades?” but “How will those grades behave in this specific shape?”
A strong diamond shape comparison starts with priorities, not definitions. Cut quality may dominate the decision for a round brilliant, while clarity visibility may matter more in an emerald cut. Color visibility may be forgiving in a busy brilliant-style radiant but more obvious in a step-cut asscher. Carat weight may look generous in an elongated pear or marquise, but only if the proportions still support attractive light return and a balanced outline.
For buyers, the practical point is not just what the report says, but how the stone performs visually and fits the intended design. A grading report helps create a consistent language for comparison, yet it does not replace the judgment needed to compare actual images, proportions, and setting requirements. This is especially true when two stones share similar grades but one has a stronger outline, cleaner table, or better movement in video.
The 4Cs Are Consistent Terms, Not Consistent Priorities
Cut, color, clarity, and carat weight mean the same thing across diamond shapes, but they do not deserve the same weight in every buying decision. Shape changes how the diamond performs visually. It determines how light travels through the stone, where the eye notices darkness, where color collects, and whether inclusions are hidden by facet activity or exposed under a broad table.
Radiant cuts, for example, often have active faceting that can make small inclusions harder to see. That does not mean clarity can be ignored, but it may allow more flexibility if the stone is confirmed eye-clean. Emerald cuts are less forgiving. Their long, open facets behave more like windows, so an inclusion under the table or a hazy area in the center can become part of the diamond’s daily appearance.
Carat weight also changes meaning by shape. A deep round diamond and an elongated oval of the same carat weight can look different on the finger because visible size depends on measurements, spread, and outline. Buyers trying to understand how to choose 4Cs for each diamond shape should start by asking which C is most likely to affect the appearance of that shape in real life.
Round Diamonds Have More Cut Guidance Than Fancy Shapes
Round brilliant diamonds usually give buyers the clearest cut framework. Major grading reports commonly provide a more standardized cut evaluation for round diamonds, which makes it easier to filter for strong light performance before reviewing the individual stone. Cut grade is not the whole story, but it is more useful for rounds than it is for many fancy shape diamonds.
Fancy shapes require a different kind of judgment. Ovals, pears, emeralds, radiants, cushions, princess cuts, marquise cuts, and asschers may not come with the same level of standardized cut guidance. That means the buyer has to rely more on measurements, length-to-width ratio, photos, 360-degree video, proportions, and visual review. A report can narrow the search, but it cannot fully show whether an oval has a distracting bow-tie or whether an emerald cut has a see-through center.
This is where many buyers make the wrong comparison. They treat a fancy shape diamond as if the report grade will predict beauty the same way it often helps with a round brilliant. For fancy shapes, the smartest approach is to use the 4Cs as a filter, then let visual evidence decide whether the stone actually works.
Fancy Shapes Shift the Buyer’s Risk
Fancy shapes do not create one universal problem; each shape shifts the risk to a different place. Ovals, pears, and marquise diamonds can show a bow-tie, a darker band across the center caused by the way light returns through the elongated shape. A mild bow-tie can be normal and sometimes gives the stone contrast, but a strong one can make the diamond look dark or uneven in everyday viewing.
Emerald and asscher cuts bring a different concern: windowing. Because these are step cut diamonds with broad, open facets, weak light return can make parts of the diamond look flat, glassy, or see-through. A high clarity grade will not fix poor step patterning, and a larger carat weight can make the problem more obvious.
Radiant and cushion cuts often need closer attention to facet style. Some have a crushed-ice appearance with many small flashes; others show broader, chunkier reflections. Neither style is automatically better, but buyers should know what they prefer before comparing grades. Princess cuts can deliver strong brilliance, but their sharp corners make setting protection more important than many first-time buyers realize.
Compliance-Safe Baseline for Lab-Grown Diamond Comparisons
Laboratory-grown diamonds should be clearly identified as laboratory-grown, and they should not be presented as mined diamonds. A lab-grown diamond and a natural diamond are both diamonds, but they have different origins, and that origin should be clear in the grading report, seller listing, invoice, or other purchase documentation where applicable.
Buyers should also separate lab-grown diamonds from diamond simulants. Simulants such as cubic zirconia or moissanite may resemble diamonds visually, but they are not the same as laboratory-grown diamonds. If a listing uses unclear language, ask whether the stone is a laboratory-grown diamond, a natural diamond, or a non-diamond simulant before comparing 4Cs.
A grading report helps document key characteristics, but it should not be treated as a guarantee of beauty, value, or sourcing ethics. Prices can change with market conditions, report type, seller channel, and stone-specific details, so exact comparisons should be verified at the time of purchase. Environmental and sustainability claims should be specific, documented, and limited to what can be substantiated.
What to Check Before You Apply the 4Cs
Before comparing grades, confirm the exact diamond shape, millimeter measurements, length-to-width ratio, grading report number, actual photos or 360-degree video, and intended setting style. These details protect buyers from false comparisons, especially when two diamonds look similar on a certificate but behave differently face-up.
The grading report should be treated as the starting point, not the final answer. A report can tell you the color and clarity grade, but it will not fully show whether the stone looks bright in motion, whether the center goes dark, whether the outline is pleasing, or whether the proportions suit the ring design. The best 4Cs for lab-grown diamond shapes depend on both documented grades and visual confirmation.
Evidence Note: What a Report Can and Cannot Prove
A grading report is most useful when it is used narrowly: to document characteristics such as carat weight, measurements, color grade, clarity grade, and other identifying details. It should not be treated as proof that the diamond is the most beautiful option, the strongest value, or the right fit for a specific ring. GIA’s 4Cs framework supports using standardized grading language for comparison, but the final decision still requires visual review in the exact shape being considered.[1]
For lab-grown diamonds, terminology and disclosure also matter. GIA explains that laboratory-grown diamonds have essentially the same chemical composition and crystal structure as natural diamonds, while FTC jewelry guidance requires marketers to avoid misleading consumers about whether a diamond is mined or laboratory-grown.[2][3] In practice, that means a buyer should expect clear lab-grown disclosure, a matching grading report where one is provided, and visual evidence that supports the seller’s description.
When a grading report is available, buyers should verify the report details through the issuing laboratory’s official report-check tool where available, then compare those details with the stone’s measurements, imagery, and seller listing.
Traceability in a diamond comparison does not mean relying on one document in isolation. A more useful approach is to connect the report number, inscription details where available, carat weight, measurements, color and clarity grades, and actual media for the exact stone. If those pieces do not line up clearly, the buyer should slow down and ask for clarification before treating the diamond as a serious option.
Cut Priority by Shape: Where Light Performance Matters Most
Cut is the most shape-sensitive of the 4Cs because it controls how the diamond handles light. In a strong stone, the eye sees brightness, contrast, sparkle, and a pattern that feels balanced. In a weak one, the diamond may look dark in the center, glassy through the middle, overly busy, or smaller than its carat weight suggests.
Evaluating diamond cut by shape means looking beyond a single grade. Round diamonds offer the most straightforward cut guidance, while fancy shapes need a closer review of light performance, outline, proportions, face-up size, and motion. For lab-grown diamond cut quality, this visual step is especially important because buyers often have enough budget flexibility to compare multiple larger stones that look similar on paper but very different in video.
In practical buying, this is where many comparisons become misleading. A seller may describe two stones as having the same color, clarity, and carat weight, but if one leaks light through the center or carries too much weight in depth, the visual result can be very different. Cut review is not only about sparkle; it is also about whether the diamond uses its weight efficiently and whether its pattern supports the style the buyer expects from that shape.
Round Brilliant: Cut Usually Comes First
Round brilliant diamonds are the shape where cut grade is usually the strongest predictor of sparkle. If a buyer wants the most reliable path to brightness and classic fire, cut should normally come before chasing a higher color or clarity grade. A well-cut round can look lively across different lighting conditions, while a weaker cut can make even high color and clarity feel underwhelming.
Where excellent or ideal-style cut information is available, it should carry real weight in the decision. That does not mean buying blindly from the grade alone. The actual stone still deserves review for its proportions, video appearance, and overall balance. But compared with fancy shapes, round brilliants give buyers a more dependable cut framework, which makes them easier to evaluate with confidence.
Oval, Pear, and Marquise: Watch the Bow-Tie
Oval, pear, and marquise diamonds can offer beautiful spread and an elongated look, but they carry one of the most important shape-specific cut risks: the bow-tie effect. This appears as a dark band or shadow across the center of the diamond. Some contrast is normal in elongated brilliant shapes, and a very slight bow-tie does not automatically make a diamond poor. The problem is when the bow-tie becomes the first thing your eye sees.
The best cut for oval lab-grown diamond options is not determined by a single number. Buyers should look at face-up video and pay attention to whether the center stays lively as the diamond moves. The same logic applies to pears and marquise cuts. A diamond with attractive measurements but a heavy dark center may disappoint more than a slightly smaller stone with better light distribution.
For elongated shapes, outline also affects cut perception. An oval that is too narrow may look stretched; a pear with uneven shoulders may look awkward; a marquise with extreme length can look dramatic but less balanced. The goal is not just maximum finger coverage. It is a shape that looks bright, centered, and intentional.
Emerald and Asscher: Avoid Windowing and Dead Areas
Emerald and asscher cuts do not hide weak light return as easily as brilliant cuts. Their appeal comes from clean geometry, broad flashes, and a calm step pattern. When the cut is weak, the center can look watery, see-through, or inactive. This is often called windowing, and it is one of the biggest reasons a step cut can look less impressive in person than it appears on a grading report.
The best cut for emerald lab-grown diamond choices usually comes down to pattern quality and visual balance. Look for steps that turn on and off as the stone moves, not a center that stays flat or transparent. Asscher cuts need similar attention, with the added importance of symmetry because the square shape makes uneven patterning easier to notice.
A common mistake is trying to solve a step-cut problem with a higher clarity or color grade. Those grades matter, but they cannot replace good light behavior. If the stone has a dead center, the diamond may still feel dull even if the report looks strong.
Radiant, Cushion, and Princess: Pattern Matters More Than the Label
Radiant, cushion, and princess cuts can all be bright, but their visual personalities vary widely. A radiant may show a crushed-ice pattern with many small flashes, or it may show broader, more defined reflections. Cushion cuts can look soft and chunky, glittery and crushed-ice, square, or slightly elongated. Princess cuts can deliver sharp brilliance, but the brightness should still look balanced across the stone.
The right choice is not always the stone with the most sparkle in a quick video. Some buyers love the fast, glittering look of crushed ice; others prefer larger flashes and more visible contrast. What matters is choosing the pattern deliberately, not discovering after purchase that the diamond’s sparkle style feels too busy or too flat for the ring.
For these shapes, the label tells you the outline, not the full appearance. Two cushions with the same carat, color, and clarity can look like very different diamonds. The better buying decision comes from comparing actual images and motion, not assuming the shape name guarantees a certain look.
Cut Review Checklist for Fancy Shapes
Review a face-up video, not just a still image or grading report.
Rotate the diamond if possible to see how the center responds in motion.
Compare two or three similar stones side by side before deciding.
Check whether the center goes dark, glassy, or see-through.
Confirm millimeter measurements, not only carat weight.
Do not rely on one grade or one number to judge fancy shape cut quality.
A fancy shape diamond should be judged by how it looks in the shape you are buying, not by round-diamond assumptions. If the visual evidence does not support the grade story, keep comparing.
Growth Method Is Identification Context, Not a Beauty Shortcut
Lab-grown diamonds are commonly produced by HPHT or CVD processes, and GIA identifies these as the two main laboratory growth methods used for gem-quality diamonds.[2] That information may appear on a report or in seller documentation, but it should not be used by itself to predict whether a diamond is beautiful, eye-clean, durable in a setting, or better suited to a particular shape. Shape-specific visual review still matters more than treating the growth method as a shortcut.
The same caution applies to broad claims about environmental or ethical superiority. A lab-grown origin may be part of a buyer’s preference, but sustainability statements should be specific and substantiated rather than assumed from the growth method alone. FTC guidance is especially relevant when sellers make environmental or sourcing claims, because marketing claims should not mislead consumers or imply benefits that are not adequately supported.[3]
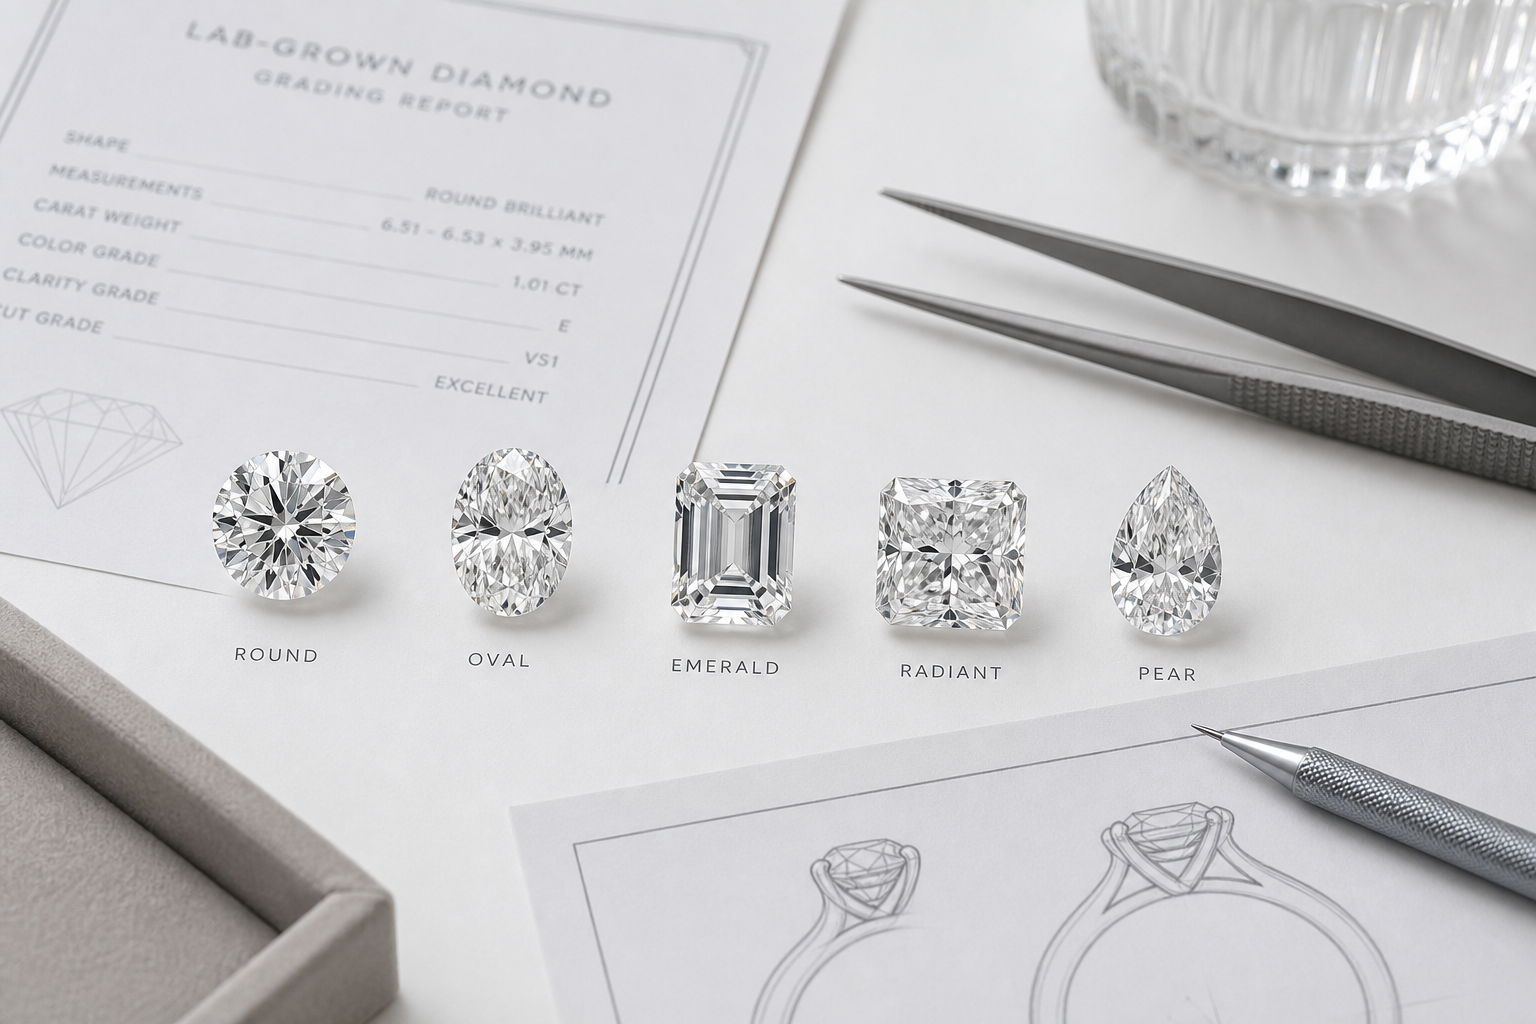
Color Priority by Shape: Which Diamonds Show Warmth More Easily
Diamond color by shape is one of the easiest places to overspend or under-filter. A lab-grown diamond color grade that looks bright and balanced in one shape may appear warmer in another because facet style, size, outline, and setting metal all affect color visibility. The goal is not to buy the highest color grade by default. The goal is to know where color will actually show.
For many buyers, near colorless diamonds offer a practical balance when the stone looks white face-up. But that judgment changes by shape. Brilliant cut diamonds often break up body color through sparkle and facet activity, while step cut diamonds may reveal it more clearly through broad, open facets. Larger stones and elongated outlines can also make warmth easier to see, especially in white metal.
Color should be evaluated as a visual preference as well as a grade. Some buyers are highly sensitive to warmth and prefer a cooler appearance even when the difference is subtle; others may not notice the same difference once the stone is set. The useful question is whether the color supports the intended look of the ring, not whether the grade sounds impressive in isolation.
Brilliant Cuts Often Hide Color Better
Round, radiant, cushion, princess, and sometimes oval diamonds can be more forgiving on color because their facet activity creates movement and brightness. Slight warmth may be less noticeable when the eye is seeing flashes, contrast, and sparkle across the stone. For buyers who are not highly color-sensitive, G-H can often be a practical range to consider, and some I color diamonds may still look pleasing depending on the shape, size, cut quality, and setting.
This flexibility has limits. A poorly cut brilliant-style diamond may show more body color because it lacks the brightness needed to distract from warmth. Larger carat weights can also make color easier to detect. A buyer choosing a 3 carat oval for a white gold ring may need to be more cautious than someone choosing a smaller round diamond for yellow gold.
The best color grade for oval lab-grown diamond options depends heavily on the individual stone. Some ovals face up bright in near-colorless grades, while others show warmth more clearly through the body or at the ends. Video and comparison against similar stones are more useful than assuming every oval behaves the same.
Step Cuts Can Reveal Color More Clearly
Emerald and asscher cuts usually deserve more color attention than busy brilliant shapes. Their broad facets create a clear, architectural look, but that same openness can make body color easier to notice. If the buyer wants an icy appearance, especially in platinum or white gold, staying higher in the color range is often the safer decision.
The best color grade for emerald cut lab-grown diamond choices is not always D or E, but the tolerance for warmth is usually lower than it is in a radiant or round. A G color emerald may look beautifully white to one buyer and slightly warm to another, depending on size, lighting, and setting. Once the diamond gets larger, small differences in color can become more visible across the open table.
Step cuts reward restraint. Saving on color can make sense if the stone still looks white face-up and the setting supports it, but pushing too low for the sake of size can undermine the clean, crisp look that makes emerald and asscher cuts appealing in the first place.
Elongated Shapes Can Concentrate Color at the Tips
Pear and marquise diamonds can show warmth near their pointed ends. The tips are thinner and shaped differently from the center, which can make color appear slightly more concentrated in those areas. Under a cut-first 4C priority, this shape-specific warmth should be evaluated across the full silhouette. This does not make pear or marquise diamonds poor choices; it simply means buyers should inspect the full outline, not just the center of the stone.
This concern becomes more important in larger diamonds and white metal settings. A near-colorless pear that looks acceptable in a small size may show more tint as the carat weight increases. Marquise diamonds can have a similar issue, especially when the buyer chooses a long, dramatic outline that draws attention to the ends.
For these shapes, color should be judged in the setting context. A pear diamond in yellow gold may look harmonious at a lower color grade than the same stone in platinum. A white metal ring, especially with a minimal setting, leaves less room for warmth to blend in.
Metal Choice Changes the Color Decision
Platinum and white gold tend to make warmth more visible because the metal creates a bright white frame around the diamond. This does not mean every diamond in white metal must be colorless, but it does mean the stone’s face-up appearance needs closer review. If a buyer wants a crisp white look, color becomes a higher priority in shapes that already reveal warmth more easily.
Yellow gold and rose gold can make near-colorless diamonds look more natural and cohesive. They do not erase body color, but they reduce the visual contrast between the diamond and the setting. This can make G-H, and sometimes lower grades in the right stone, feel more balanced than they would in a white metal setting.
The common mistake is choosing color in isolation. A color grade should be judged alongside diamond shape, size, cut style, and metal. A grade that is a smart value choice in a yellow gold cushion ring may be too warm for a large emerald cut in platinum.
Color Grade Decision Shortcut
For a bright white look in platinum or white gold, give color higher priority in emerald, asscher, pear, and marquise diamonds. These shapes are more likely to reveal warmth through open facets, pointed ends, or elongated outlines.
For round, radiant, cushion, princess, and some well-performing ovals, near-colorless grades may offer better value if the diamond looks white face-up. The key is visual confirmation. Do not pay for a higher color grade that your eye cannot appreciate, but do not chase a lower grade if it weakens the exact look that made you choose the shape.
Clarity Priority by Shape: Which Cuts Hide Inclusions and Which Expose Them
Diamond clarity by shape matters because inclusions do not behave the same way in every facet pattern. A lab-grown diamond clarity grade tells you the general level of inclusions, but it does not tell you whether those inclusions will be distracting in the specific shape you are buying. A VS2 emerald cut and a VS2 radiant cut can carry very different visual risk.
The practical question is not simply, “What clarity grade should I buy?” It is, “Where are the inclusions, how visible are they face-up, and does this shape hide or expose them?” Inclusion type, size, contrast, and location all matter. In lab-grown diamonds, some stones may show growth-related features, clouds, strain patterns, or metallic-looking inclusions depending on the individual diamond. The grade narrows the search, but visual review decides whether the stone actually works.
Emerald and Asscher Usually Need Higher Clarity Attention
Emerald and asscher cuts are the least forgiving shapes for clarity because their broad, open facets act more like windows than glitter. They do not create the same busy sparkle pattern that can distract the eye from small inclusions. If an inclusion sits under the table or interrupts the clean step pattern, it can be easier to notice during normal wear.
For many buyers, VS2 or higher is a sensible starting point for emerald and asscher cuts, especially above 1.50 carats or in a simple setting that leaves the diamond visually exposed. This does not mean every VS2 is safe or every SI1 is unacceptable. A well-placed SI1 inclusion near the edge may be less distracting than a VS2 inclusion placed directly under the table. The mistake is treating the grade as more important than the viewing area.
If you are looking for the best clarity for emerald cut lab-grown diamond options, prioritize a clean table, minimal high-contrast inclusions, and a step pattern that looks uninterrupted in video. Asscher cuts need similar care, with extra attention to symmetry because the eye is naturally pulled toward the center of the stone.
Radiant, Cushion, Princess, and Round Can Be More Forgiving
Radiant, cushion, princess, and round brilliant diamonds often hide inclusions better because their facet patterns create more light return, contrast, and movement. Small inclusions can disappear into the sparkle, especially if they are off-center, low contrast, or near the edge of the stone. This is where brilliant cut clarity can give buyers more flexibility.
In these shapes, a lower lab-grown diamond clarity grade may still be a smart choice if the diamond is confirmed eye-clean. A round brilliant or radiant in SI1 can be worth considering when the inclusion is not visible face-up without magnification. A higher grade becomes more important when the stone is larger, the inclusion is dark, or the setting leaves the diamond very exposed.
Cushions and radiants require a little more judgment because their facet styles vary. A crushed-ice pattern may hide small inclusions well, while a broader-flash cushion can make certain inclusions easier to spot. Princess cuts can be visually forgiving in the center, but inclusions near the corners deserve more attention because those points are vulnerable and should be protected by the setting.
Oval, Pear, and Marquise Need Inclusion Location Review
Oval, pear, and marquise diamonds sit between the most forgiving brilliant cuts and the most revealing step cuts. Their sparkle can help mask inclusions, but their elongated shapes create specific viewing zones that matter. Inclusions near the center are usually more concerning than inclusions near the outer edge, because the eye naturally follows the length of the stone.
Pear and marquise diamonds also have pointed tips. A tip inclusion may be hidden or partly protected by a prong, but it should not be ignored. The issue is both visual and practical: an inclusion near a delicate point can be more concerning than a similar inclusion in a less exposed area. Buyers should check whether the tip looks clean, whether the point is well shaped, and whether the setting protects it properly.
For ovals, the center matters most. If an inclusion sits in the same visual zone as a bow-tie or dark center, the stone can look busier or less clean than the clarity grade suggests. This is why eye-clean lab-grown diamond by shape evaluation should always include the actual face-up view, not only the report.
Eye-Clean Is a Visual Standard, Not Just a Grade
An eye-clean diamond has no distracting inclusions visible face-up at normal viewing distance. That standard is practical, not theoretical. A diamond may show inclusions under magnification and still look clean in real life. Another diamond may have a respectable clarity grade but show one dark crystal in a place the eye cannot ignore.
Viewing distance matters. Most people do not inspect an engagement ring from two inches away under bright grading lights. But buyers should still be cautious with large stones, step cuts, and high-contrast inclusions because those factors make clarity issues easier to see. If the diamond is meant for a minimalist solitaire, clarity visibility may matter more than it would in a busier setting.
The clearest buying rule is this: do not pay for a higher clarity grade unless it improves the visible diamond or gives you peace of mind for that shape. In many brilliant cuts, paying for VVS clarity may not change the face-up look. In emerald and asscher cuts, stretching too low can create a problem you will notice every time the diamond catches light the wrong way.
Certificate and Visual Review Check
Before choosing a diamond, compare the clarity plot or inclusion comments with magnified images and video. The report may identify the inclusion type, but the image shows whether it matters visually. Ask whether the stone is eye-clean from the top, whether any inclusion is visible without magnification, and whether inclusions sit near the table, tips, corners, or other vulnerable areas.
Do not rely on a single still image if the shape is clarity-sensitive. Rotate the stone in video when possible, especially for emerald, asscher, oval, pear, and marquise cuts. A transparent selection process should help you connect the report to the real appearance of the diamond, because clarity is only useful when it is judged in the shape where the diamond will actually be worn.
When comparing reports, make sure the document belongs to the exact stone under review and that the measurements, inscription details where available, and seller-provided media are consistent with it. A certificate is most useful when it can be connected to the actual diamond, not when it is treated as a separate marketing claim. If any detail is unclear, it is reasonable to ask for clarification before making the stone part of a final shortlist.
Carat Weight, Measurements, and Face-Up Size by Shape
Diamond carat by shape can be misleading because carat measures weight, not visible size. Two lab-grown diamonds can both weigh 2.00 carats and look noticeably different on the hand. Shape, depth, spread, and length-to-width ratio all affect lab-grown diamond face-up size, which is why millimeter measurements matter as much as the carat number.
This is especially important with lab-grown diamonds because buyers may be comparing larger stones within the same budget. A larger carat weight can be appealing, but a stone that carries too much weight in its depth may look smaller than expected. A stone with aggressive spread may look large from the top but lose brightness, structure, or elegance.
Why Two Diamonds With the Same Carat Weight Can Look Different
Carat weight tells you how heavy the diamond is. It does not tell you how much surface area you see from the top. A deep diamond stores more of its weight below the girdle, so it can face up smaller than another diamond of the same carat weight. A well-proportioned elongated diamond, such as an oval, pear, or marquise, can appear larger because the eye reads its length as finger coverage.
The tradeoff is that spread should not be chased blindly. A shallow stone may look wide but have weaker light return, while an overly deep stone may look smaller and darker. The better purchase is usually not the diamond with the biggest stated carat weight, but the one with measurements, proportions, and light performance that work together.
Useful Length-to-Width Ratio Ranges by Shape
Length-to-width ratio helps describe the outline of a diamond. It is calculated by dividing the length by the width. A round diamond is close to 1.00, while elongated shapes have higher ratios. These ranges are buyer-friendly references, not fixed rules. Some buyers prefer a shorter oval or a longer emerald cut, and the right choice depends on the ring design and personal taste.
| Shape | Common Buyer-Friendly Length-to-Width Range | What It Usually Creates Visually |
|---|---|---|
| Round | Approximately 1.00 | Balanced circular outline |
| Oval | About 1.30 to 1.50 | Classic elongated look |
| Emerald | About 1.30 to 1.50 | Elegant rectangular step-cut look |
| Radiant | About 1.00 to 1.35 | Square to rectangular brilliance |
| Cushion | About 1.00 to 1.20 | Soft square to slightly rectangular shape |
| Pear | About 1.45 to 1.75 | Graceful teardrop shape |
| Princess | About 1.00 to 1.05 | Square geometric outline |
| Marquise | About 1.75 to 2.25 | Long, dramatic spread |
| Asscher | About 1.00 to 1.05 | Square step-cut symmetry |
For engagement rings, ratio changes can affect more than appearance. A long pear or marquise may need more careful prong placement. A very rectangular radiant may feel more dramatic but less balanced in certain settings. A shorter emerald cut may look stronger and more architectural, while a longer one can look more elegant and finger-lengthening.
When Bigger Face-Up Size Becomes a Tradeoff
The shape that looks largest is not always the shape that looks best. Marquise, oval, and pear diamonds often provide strong face-up coverage for their carat weight, but the visual gain can come with bow-tie risk, fragile-looking tips, or awkward proportions if the stone is poorly selected. Emerald cuts can look elegant with generous length, but too much spread may increase windowing or reduce the crispness of the step pattern.
A warning sign is when the measurements look unusually large for the carat weight but the video shows a dull center, watery appearance, or uneven brightness. That usually means the spread is being achieved at the expense of performance. For most buyers, a slightly smaller diamond with better light behavior will look more expensive and more intentional than a larger diamond that appears flat.
Measurement Check Before Choosing Carat Size
Compare millimeter dimensions before comparing carat weight. Confirm the diamond’s length, width, depth percentage, and length-to-width ratio, then check how those measurements will sit in the intended setting. This matters most for elongated stones and custom rings, where a few tenths of a millimeter can affect prong placement, stone orientation, and the overall balance of the design.
For custom design, the stone should be chosen early enough that the setting can be built around its actual measurements. A ring designed around a generic 2.00 carat oval may not fit every 2.00 carat oval well, because the outline, depth, and ratio can vary from stone to stone.
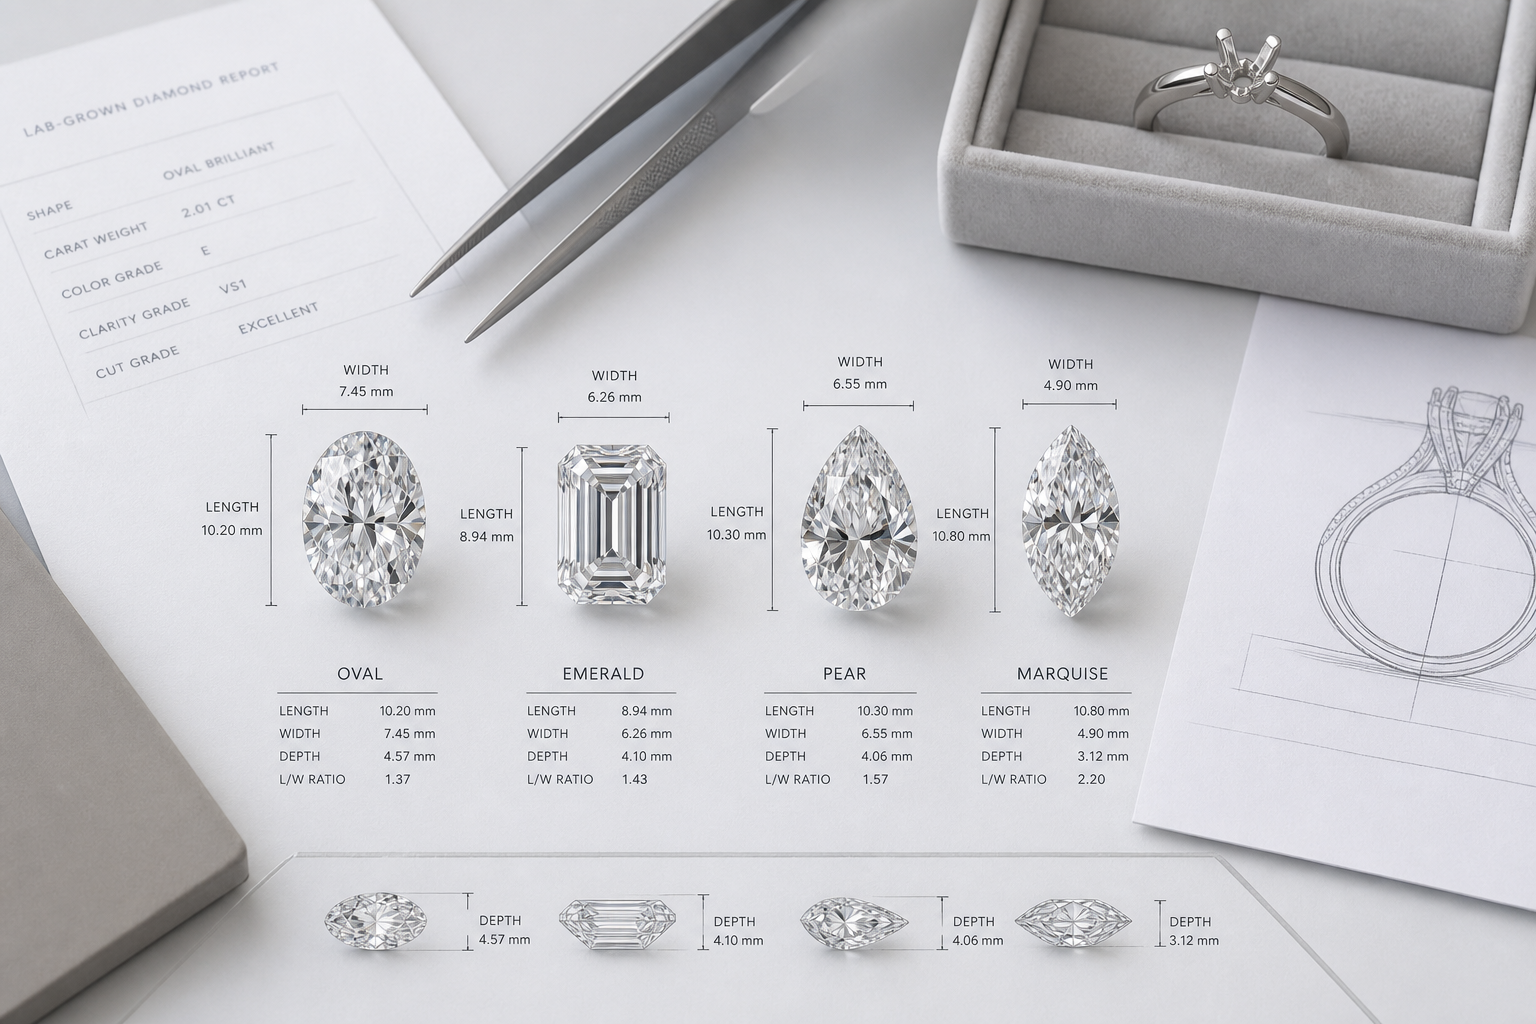
Shape-by-Shape 4C Priorities for Lab-Grown Diamonds
The best 4Cs for diamond shape selection depend on the shape’s main risk. A strong lab-grown diamond shape guide should not give one universal formula, because each cut rewards different priorities. Round diamonds usually make cut the first filter. Emerald and asscher cuts make clarity and pattern harder to compromise. Oval, pear, and marquise shapes demand visual review because outline and bow-tie can outweigh a good-looking report.
If you are deciding how to choose a lab-grown diamond shape, start with the look you want, then identify the C that most affects that shape’s beauty. From there, use the other grades as flexible guardrails rather than rigid rules.
Round Brilliant: Prioritize Cut, Then Balance the Rest
For a round diamond, cut should usually come first because this shape has the clearest relationship between cut quality and visible sparkle. A well-cut round can look bright, balanced, and lively even if you make reasonable compromises on color or clarity. This is where the report can be more helpful than it is for many fancy shapes, although actual imagery still matters.
Buyers can often be practical with clarity if the stone is eye-clean. Color depends on size, metal choice, and sensitivity to warmth, but the biggest mistake is downgrading cut to reach a larger carat weight. In a round brilliant, weak cut performance is difficult to hide.
Oval: Prioritize Bow-Tie Control, Shape Appeal, and Face-Up Balance
An oval diamond is often chosen for finger coverage and a softer elongated look, but the grade alone will not tell you whether it is beautiful. Bow-tie strength, outline, symmetry, and length-to-width ratio matter heavily. A mild bow-tie can be normal; a dark, distracting band across the center should be treated as a serious drawback.
Oval buyers can often compromise somewhat on clarity if the diamond is eye-clean and the inclusion placement is not distracting. Color deserves more attention in larger stones and white metal settings, but the first visual test should be the center of the diamond. If the middle looks dark or uneven in video, a better color or clarity grade will not fix that.
Emerald: Prioritize Clarity, Color, and Step Pattern
An emerald cut diamond is less forgiving than most brilliant shapes. Its open facets make clarity and color more visible, and its beauty depends on clean, organized flashes rather than constant sparkle. The table should look clean, the steps should feel balanced, and the center should not look glassy or see-through.
Buyers should be cautious about stretching too low on clarity, especially when inclusions sit under the table. Color also matters more if the goal is a crisp white look in platinum or white gold. Carat size can be tempting in emerald cuts, but a larger stone with visible inclusions or weak step contrast will show its compromises quickly.
Radiant: Prioritize Visual Pattern and Color Value
A radiant cut diamond can be a strong choice for buyers who want rectangular or square proportions with active sparkle. Radiants usually hide inclusions well, so clarity can often be a value area if the stone is eye-clean. The bigger decision is visual pattern: some radiants show a crushed-ice look, while others display broader, more defined flashes.
Neither pattern is automatically better. The wrong choice is buying the label “radiant” without checking whether you like that specific stone’s sparkle style. Color can be slightly more forgiving than in step cuts, but elongated radiants or larger stones may still show warmth more clearly than expected.
Cushion: Prioritize Facet Style, Spread, and Soft Outline
Cushion cuts vary so much that the name alone is not enough. A cushion may be square or elongated, chunky or crushed-ice, softly rounded or more pillow-like. The priority is to decide what style you actually want before comparing grades. Otherwise, two cushions with similar 4Cs can look like completely different diamonds.
Clarity can often be flexible when the stone is eye-clean, but spread and facet pattern deserve careful review. Some cushions carry weight deeply and face up smaller than buyers expect. If visible size is important, compare measurements closely instead of assuming carat weight will translate into presence on the hand.
Pear: Prioritize Symmetry, Bow-Tie, and Tip Appearance
A pear diamond needs a graceful outline. The shoulders should look balanced, the point should be centered, and the rounded end should not appear too flat or bulky. Bow-tie control is important because a dark middle can interrupt the teardrop shape that makes the cut appealing.
Clarity near the tip should be checked, even if a prong will cover part of that area. The setting should protect the point without making the diamond look heavy or awkward. Buyers can often compromise on clarity if the face-up view is clean, but they should not compromise on symmetry because an uneven pear is easy to notice once set.
Princess: Prioritize Cut Appearance and Corner Protection
A princess cut can deliver strong brilliance with a clean geometric outline, but its sharp corners need attention. Brightness and pattern should be reviewed in images or video, because not every princess cut has the same balance of light and contrast. A stone that looks dark in the center or uneven across the corners should not be chosen just because the carat weight is attractive.
Clarity can be forgiving in many princess cuts, but corner inclusions deserve care. The setting should protect all four corners, especially for an engagement ring worn daily. This is one shape where the diamond and setting should be judged together, not as separate decisions.
Marquise: Prioritize Outline, Bow-Tie Control, and Length-to-Width Ratio
A marquise diamond can look large for its carat weight because its length creates dramatic spread. That advantage disappears if the outline is too thin, too wide, or visibly uneven. Length-to-width ratio is central to the look: some buyers want a long, dramatic shape, while others prefer a fuller marquise with softer presence.
Bow-tie control should be checked carefully. A strong dark band across the center can make the stone look less lively despite its size. Color may also concentrate near the pointed ends, so buyers choosing white metal or a larger marquise should review color appearance rather than relying only on the grade.
Asscher: Prioritize Symmetry, Clarity, and Step-Cut Precision
An asscher cut rewards buyers who like geometry, depth, and clean structure. It is not the right shape for someone who wants maximum sparkle from every angle. Its appeal comes from symmetry and step-cut precision, which means inclusions, uneven patterns, and weak contrast are easier to see.
Clarity should usually be treated with similar caution as an emerald cut. Color can also show more clearly than in brilliant cuts, especially in larger stones. If the steps do not look balanced or the center appears dull, higher grades on paper will not make the stone feel crisp.
Shape Priority Snapshot for Buyers
| Shape | Top Priority | Where Buyers Can Often Be Flexible | Main Risk to Avoid |
|---|---|---|---|
| Round Brilliant | Cut quality | Clarity, if eye-clean | Sacrificing cut for size |
| Oval | Bow-tie control and outline | Clarity, if inclusions are not visible | Dark center or awkward elongation |
| Emerald | Clarity, color, and step pattern | Carat size, if the better stone is cleaner | Visible table inclusions or windowing |
| Radiant | Visual pattern | Clarity, if eye-clean | Buying without choosing a sparkle style |
| Cushion | Facet style and spread | Clarity, depending on pattern | Deep stones that face up small |
| Pear | Symmetry, bow-tie, and tip | Clarity, if the face-up view is clean | Uneven outline or unprotected point |
| Princess | Brightness and protected corners | Clarity, away from corners | Exposed corners or uneven light |
| Marquise | Outline, bow-tie, and ratio | Clarity, if inclusions are not central | Extreme proportions or strong bow-tie |
| Asscher | Symmetry, clarity, and step precision | Size, if clarity and pattern improve | Distracting inclusions or weak geometry |
The strongest shape-specific buying strategy is to protect the feature that gives the shape its appeal. For a round, that is light performance. For an emerald or asscher, it is clean structure. For an oval, pear, or marquise, it is graceful outline and controlled darkness. Once that priority is secure, the remaining 4Cs can be adjusted with much less risk.
Real Buyer Scenario: Choosing Between a Larger Oval and a Cleaner Emerald
The Situation: Same Budget, Different Shape Priorities
Maya is comparing two options for a white gold engagement ring: a 2.00 ct oval lab-grown diamond and a 1.80 ct emerald cut. On paper, the oval seems like the easier choice. It has the larger carat size, it looks longer on the finger, and it gives more visible coverage from the top. But the video shows a dark bow-tie through the center that appears in most angles, not just one lighting position.
The emerald cut has a smaller carat weight but a cleaner, more structured outline. Its step pattern looks calm and even, which suits the ring style Maya wants. The tradeoff is clarity: a small inclusion sits near the table, and because emerald cuts have open facets, it is easier to notice than it would be in a busier brilliant cut. This is where a lab-grown diamond buying decision becomes less about chasing one grade and more about understanding diamond shape 4C tradeoffs.
The Decision Point: Which Tradeoff Is Easier to Live With?
Maya should not choose the oval simply because it is larger. A larger oval with a strong bow-tie can become frustrating because the dark center is visible every time the ring is viewed face-up. If the bow-tie were mild and the outline were balanced, the oval could be the stronger choice for someone who wants sparkle, elongation, and finger coverage. But if the bow-tie dominates the stone, the extra size is not really an advantage.
The emerald cut asks for a different judgment. It will not deliver the same kind of sparkle as the oval, but that is not its purpose. If Maya prefers a crisp, architectural look, the emerald may be better even at a slightly smaller carat size. The question is whether the clarity tradeoff is acceptable. An inclusion under the table is a bigger issue in an emerald cut than it would be in many radiant, round, or cushion diamonds. Color grade also matters more in a white gold setting because warmth can look more noticeable against the cool metal.
The Outcome: Shape Determines the Smart Compromise
The better diamond is not automatically the one with the higher carat weight, and it is not always the one with the stronger grade in a single category. For Maya, the oval makes sense only if the bow-tie is not distracting in normal viewing. The emerald makes sense only if the inclusion is not visible enough to interrupt the clean step-cut look. The right compromise is the one whose weakness is least visible in that specific shape.
This is why asking “should I choose oval or emerald lab-grown diamond” cannot be answered by grade targets alone. If the buyer wants maximum spread and lively brilliance, a well-selected oval may be the right diamond shape for the budget. If the buyer wants clean geometry and understated reflection, the emerald may be worth choosing even at a lower carat size, provided the clarity and color are handled carefully.
What This Means in a Real Purchase
Before comparing two shapes, identify the risk that matters most for each one. For an oval, look first at bow-tie strength, outline, length-to-width balance, and how the stone performs in motion. For an emerald, look first at clarity under the table, windowing, step pattern, and color appearance in the chosen metal.
This prevents false comparisons. A VS2 oval and a VS2 emerald do not carry the same visual risk. A 2.00 ct stone and a 1.80 ct stone do not necessarily create a better or worse ring without checking face-up size, proportions, and setting fit. Shape decides which compromise matters most.
Common 4C Mistakes Buyers Make With Fancy Shape Lab-Grown Diamonds
Most fancy shape diamond buying mistakes happen when buyers apply round-diamond logic to every shape. The grades may look familiar, but the risks change. A diamond grading report can narrow the search, but it does not always show bow-tie severity, pattern preference, face-up balance, or whether an inclusion will be distracting in real wear.
The costly mistake is not choosing a slightly lower grade; lab grown diamond 4Cs analysis matters because the issue is paying for a grade that does not solve the real visual issue in that shape.
Mistake 1: Treating Cut Grade the Same Across All Shapes
Round diamonds usually give buyers more cut information to work with. Fancy shapes often require more judgment because the report may not describe light performance in the same complete way. An oval, pear, emerald, radiant, or cushion can look very different from another stone with similar grades.
For fancy shapes, visual review fills the gap. A diamond video can reveal whether the center goes dark, whether the facet pattern looks balanced, whether the outline is pleasing, and whether the stone has the style the buyer expects. A report is useful, but for fancy shapes it should not be treated as the final visual verdict.
Mistake 2: Assuming a Higher Clarity Grade Always Looks Better
A higher clarity grade does not guarantee a better-looking diamond if the inclusion is in the wrong place. A small mark near the edge of a radiant may be difficult to see, while a similar inclusion under the table of an emerald cut may draw attention immediately. Shape and inclusion location matter more than many buyers expect.
This is why “eye-clean” has to be confirmed visually. A lower clarity stone may be the smarter buy if it looks clean face-up at normal viewing distance, while a higher clarity stone with a dark or centrally placed inclusion may still bother the wearer. The mistake is treating clarity as a ranking system instead of a visibility question.
Mistake 3: Choosing Carat Weight Before Checking Measurements
Carat weight is often overvalued because it is easy to compare. Diamond measurements tell the more useful story. Two stones with similar carat weights can look different on the hand because one carries more weight in depth while the other spreads more across the top.
This mistake is especially common when comparing round, oval, marquise, and pear shapes. A marquise or oval may look larger face-up than a round of the same carat weight, but spread alone is not enough. If the stone is too shallow, too deep, or poorly balanced, the extra coverage may come with weak brightness, windowing, or awkward proportions.
Mistake 4: Ignoring the Setting
The setting can make a good diamond choice work better, or it can expose a poor match. Pear, marquise, and princess cuts need thoughtful protection because points and corners are more vulnerable than rounded outlines. Prong placement is not just a design detail; it affects durability and how secure the stone feels for daily wear.
Emerald and asscher cuts often look strong in clean, minimal settings, but that simplicity leaves less visual distraction. If the stone has an obvious inclusion, uneven step pattern, or visible warmth in a white metal setting, the design may make those issues easier to see. A setting should support the diamond’s strengths instead of asking the design to hide problems the stone selection did not solve.
Claims and Details to Verify Before Treating a Stone as Comparable
When two listings look similar, compare only like-for-like details. A lab-grown diamond with one type of grading report, media quality, seller channel, or disclosure language should not be treated as identical to another stone simply because the headline 4Cs match. Report type, measurements, growth-method disclosure, post-growth treatment language where relevant, actual imagery, and setting requirements can all change the practical decision.
If a seller makes broad statements about value, sourcing, environmental impact, or long-term performance, ask what documentation supports the exact claim. A careful seller can still make useful recommendations, but the recommendation should be tied to observable evidence such as report details, visual review, measurements, and design fit rather than unsupported guarantees.
Buyer Verification Checklist
Before purchase, confirm the details that affect real appearance, not just the headline grades. The goal is to know what to check before buying a fancy shape diamond and to reduce the chance of buying the wrong lab-grown diamond for the setting, budget, or wearer’s preferences.
Confirm the diamond grading report number and make sure the report matches the stone being considered.
Review the diamond measurements, including length, width, depth, and length-to-width ratio.
Ask for actual imagery or video, especially for fancy shapes where bow-tie, windowing, and pattern are not fully explained by grades.
Confirm whether the diamond is eye-clean from the top at normal viewing distance, not only under magnification.
Check color appearance against the intended metal, especially for white gold or platinum settings.
Confirm that the setting protects points, corners, and vulnerable areas where the shape requires it.
Get key details in writing whenever possible, especially eye-clean confirmation, measurements, and setting compatibility.
How to Build a Shape-Specific 4C Buying Strategy
The most practical way to approach how to choose lab-grown diamond 4Cs is to build the decision around shape first. A diamond buying strategy by shape prevents the common problem of setting one grade target, then forcing every diamond to fit it. That approach may look organized, but it can be too strict for one shape and not strict enough for another.
A better sequence is simple: choose the shape, identify the main visual risk, set flexible minimums, review visual evidence, and then confirm that the stone works with the ring design. This keeps budget allocation tied to what the eye will actually notice.
Step 1: Choose the Shape Before Setting Grade Targets
Do not start with “I need G VS2” before deciding on the shape. That target may be reasonable for one diamond and inefficient for another. A VS2 emerald cut still needs careful inspection because the open table can reveal inclusions. A VS2 radiant may be visually clean enough that spending more on clarity adds little benefit. The same grade does not carry the same value across different facet styles.
Shape should come first because it determines where the budget has to work hardest. Round buyers usually protect cut quality first. Emerald and asscher buyers often protect clarity and step pattern. Oval, pear, and marquise buyers need to control bow-tie, outline, and symmetry before getting distracted by a higher color or clarity grade.
Step 2: Identify the Shape’s Main Visual Risk
Every shape has a failure point that matters more than the rest. For a round diamond, weak cut precision can reduce the brilliance buyers expect from the shape. For an oval, a strong bow-tie can make the center look dark even if the stone has attractive grades. For an emerald cut, windowing or a visible inclusion under the table can undermine the clean, architectural look.
Radiant and cushion diamonds require a different kind of judgment because pattern preference matters. Some buyers like a crushed-ice appearance; others prefer broader flashes. Pear diamonds need symmetry, a graceful outline, and a well-protected tip. The practical rule is to solve the shape’s biggest visual risk before upgrading secondary grades.
Step 3: Set Flexible Minimums, Not Rigid Rules
Grade targets are useful for filtering, but they should not replace visual inspection. A flexible minimum might mean looking in a near-colorless range, prioritizing eye-clean clarity, or setting a preferred length-to-width ratio. The final choice should depend on how the diamond actually looks in photos, video, and the intended setting.
Certification matters because it provides an independent reference for the diamond’s reported characteristics, but documentation does not show every viewing condition. It does not tell you whether the pattern feels lively, whether the stone looks balanced on the hand, or whether a specific inclusion will bother the wearer. Use the report to narrow the field, then use visual evidence to choose.
At NUVU, this kind of comparison is treated as a practical selection question rather than a single-grade decision. The report helps narrow the field, but the stone still needs to make sense visually, physically, and financially for the buyer’s preferred shape and ring design.
Documentation Questions That Improve Trust
When a shortlist includes several similar diamonds, documentation questions can make the comparison more defensible. Ask whether the report identifies the stone as laboratory-grown, whether the report details match the seller’s listing, whether the measurements in the report match the stone being used for the setting, and whether the seller can explain any growth-method, treatment, inscription, or clarity-comment language that appears on the document. These questions do not replace visual review, but they help confirm that the conversation is about the exact diamond you are considering.
It is also reasonable to ask sellers to separate factual documentation from subjective recommendation. “This diamond is eye-clean in our review” is different from “this diamond has a VS2 clarity grade,” and “this report identifies the stone as laboratory-grown” is different from a broad claim about sustainability or sourcing. Keeping those categories separate helps buyers understand what is documented, what is visually assessed, and what remains a preference-based judgment.
A traceable comparison should also keep a simple record of the decision path: the report reference, the listing or quote details, the actual media reviewed, and the setting requirements that influenced the choice. This does not make a diamond better by itself, but it makes the selection easier to audit later if the buyer needs to revisit measurements, inscriptions, proportions, or design assumptions.
For NUVU, the goal is to make diamond comparison easier to understand, especially when buyers are weighing report details, visual performance, setting fit, and budget together. The most useful guidance connects each recommendation to observable evidence rather than asking the buyer to accept a grade or shape preference on trust alone.
Step 4: Match the Stone to the Ring Design
A strong loose diamond can still be the wrong choice for a particular ring. Setting compatibility affects appearance, protection, and daily wear. A pear or marquise needs prongs placed to protect the point. A princess cut needs protected corners. An elongated oval may need a setting that keeps the stone visually balanced rather than making it look too narrow or stretched.
Metal color also changes the decision. A lower color grade may look harmonious in yellow or rose gold but more noticeable in white gold or platinum. Lifestyle matters as well. A high-profile setting may show off a larger stone, but it may not suit someone who uses their hands constantly. For custom design, the stone’s actual measurements should guide the setting rather than assuming that carat weight alone is enough.
Stone-to-Setting Fit Check
Before finalizing the purchase, confirm that the selected diamond’s length, width, and depth work with the setting. Check that pointed corners or tips are protected where needed, that the prong layout does not cover an important visual feature awkwardly, and that the metal color supports the chosen color grade.
For custom rings, measurements should be reviewed before the design is finalized. This is especially important for elongated shapes, step cuts, and stones with distinctive proportions. A lab-grown diamond buying checklist should not end at the certificate; it should confirm that the stone, setting, and wearer’s preferences work together.
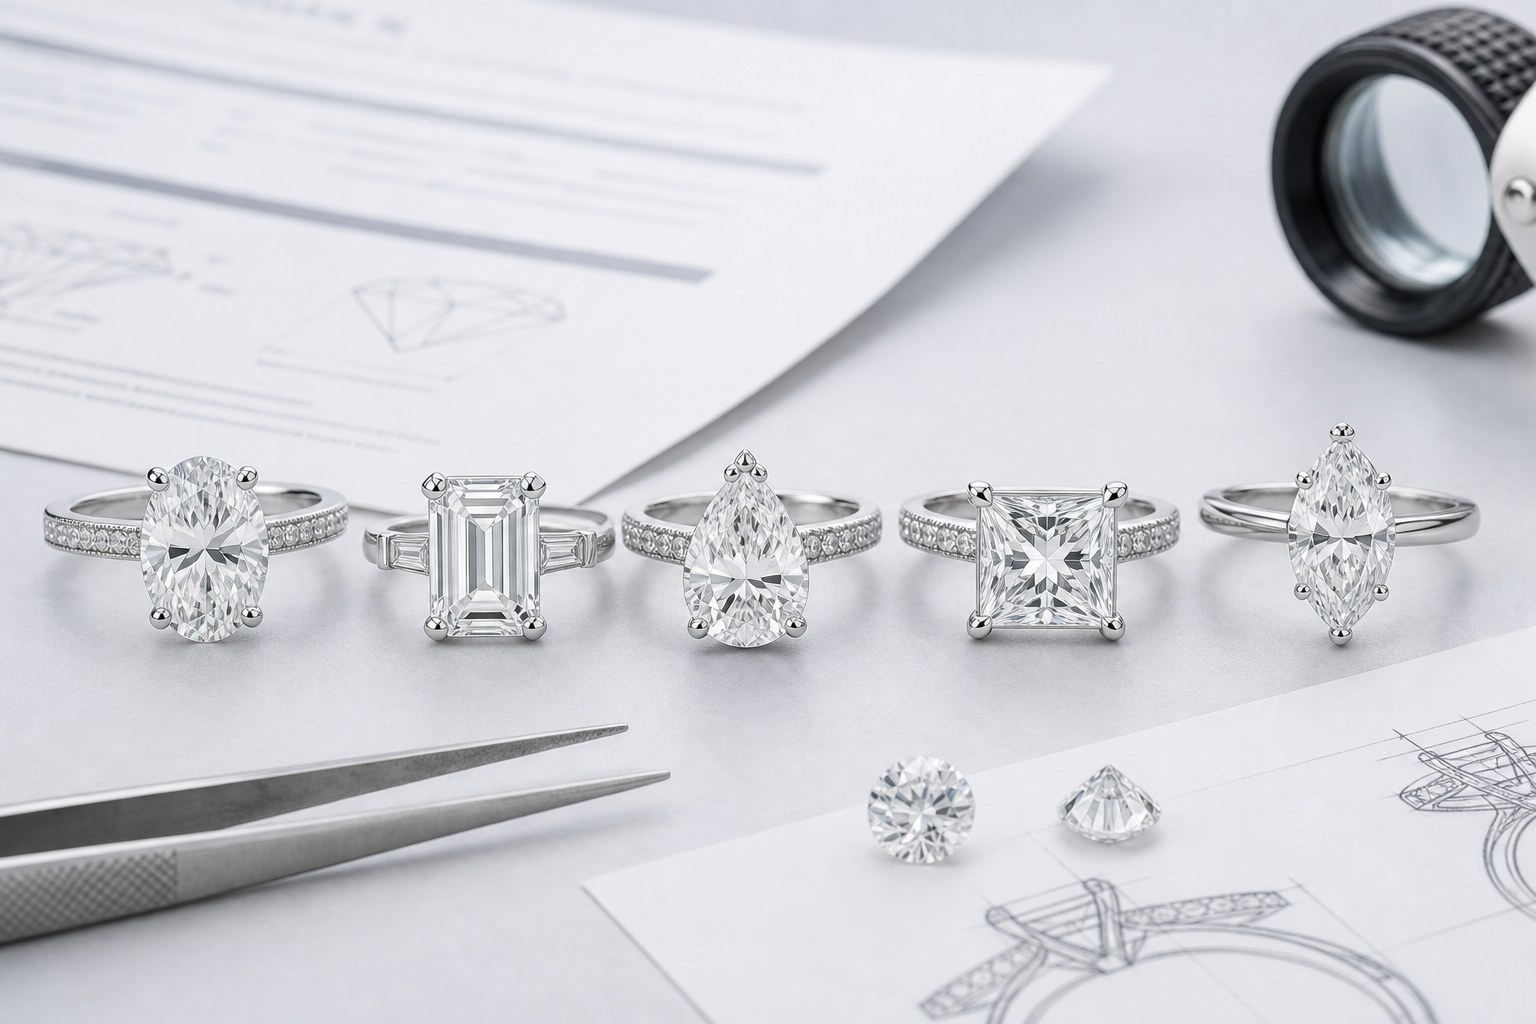
FAQ: Lab-Grown Diamond 4Cs by Shape
Do the 4Cs Matter Less for Lab-Grown Diamonds?
No. The lab-grown diamond 4Cs still matter, but they often matter differently because buyers may be comparing larger stones or higher grade options within the same budget range. A larger lab-grown diamond can make shape-specific issues easier to see, including bow-tie, windowing, warmth at the tips, or inclusions under the table.
The mistake is assuming that a strong grade on paper solves every visual concern. The smarter approach is to use the grades to narrow your options, then judge how the stone performs in its actual shape.
Which Diamond Shape Is Most Forgiving for Clarity?
Brilliant-style shapes are usually more forgiving. Round, radiant, cushion, and princess diamonds often hide small inclusions better because their facet patterns create more sparkle and visual movement. That does not mean a lower clarity grade is automatically safe, especially if an inclusion sits near the center or contrasts strongly against the stone.
Step cuts such as emerald and asscher are less forgiving because their broad, open facets make inclusions easier to notice. If you are asking what clarity you need for an emerald cut diamond, a cautious buyer usually starts around VS2 or higher and still confirms the stone is clean-looking face-up.
Which Diamond Shape Shows Color the Most?
Emerald and asscher cuts tend to show color more clearly than many brilliant cuts because they have larger, quieter facets. Pear and marquise diamonds can also show warmth near the pointed ends, especially in larger sizes or white metal settings.
Round, radiant, cushion, and princess diamonds can often mask slight warmth better because sparkle breaks up the body color. For buyers who want a bright white look in platinum or white gold, color grade deserves more attention in step cuts and pointed elongated shapes than it does in many busy brilliant cuts.
Can I Use the Same 4C Targets for Every Shape?
No. Diamond 4Cs by shape should not be treated as one universal checklist. A G VS2 target may be a sensible filter for one shape, overly strict for another, and still risky for a third if the visual issue is not captured well by the report.
For example, clarity may be the main concern in an emerald cut, while bow-tie control may matter more in an oval or pear. In a radiant or cushion, the facet pattern may affect beauty more than a small difference in clarity grade. Shape changes which compromise is easiest to live with.
Is a Round Diamond Always the Best Choice?
Not always. A round diamond has the clearest cut guidance and delivers classic brilliance when well cut, which makes it a strong choice for buyers who want predictable sparkle. It is also one of the easiest shapes to compare using cut grade and proportions.
Fancy shape diamonds can be better when the buyer wants more finger coverage, a distinctive outline, or a specific ring style. An oval, emerald, radiant, pear, or marquise may suit the design better than a round stone, but those shapes require more visual review because the grading report does not capture every shape-specific risk.
When a Question Needs a Deeper Guide
Some questions cannot be answered well in one short FAQ. If you are comparing grading reports, evaluating a specific cut style, choosing a color grade for a white gold setting, or deciding between two shapes for an engagement ring, it is worth using a dedicated guide or reviewing actual stone videos. Quick rules help with filtering, but the final decision should depend on the stone’s shape, measurements, visual performance, and setting fit.
Next Steps for Comparing Lab-Grown Diamonds by Shape
Useful Guides to Read Next
If you still need broader buying context, start with a lab-grown diamond buying guide before narrowing your grade targets. That will help you understand how certification, budget, setting style, and visual inspection work together rather than treating the 4Cs as separate decisions.
If the grading report is the confusing part, a diamond certification guide is the better next step. Reports are useful for confirming details such as carat weight, color grade, clarity grade, measurements, and growth information, but they do not fully show bow-tie strength, windowing, pattern preference, or how the diamond looks in motion.
For buyers already leaning toward a specific outline, individual diamond shape guides can help refine the decision. Round, oval, emerald, radiant, cushion, pear, princess, marquise, and asscher diamonds each reward different priorities, so shape-specific guidance is more useful than applying one fixed grade formula to every stone.
Compare Loose Lab-Grown Diamonds With Shape in Mind
When comparing loose lab-grown diamonds, do not sort by carat weight first and assume the largest stone is the best value. Start with shape, then compare measurements, length-to-width ratio, report details, photos, video, and face-up appearance. This is especially important for elongated and step-cut diamonds, where small differences in proportion or pattern can change the look more than a small difference in grade.
NUVU’s approach to diamond comparison is built around this kind of practical review: the report narrows the field, but the visual evidence decides whether the stone makes sense for the buyer’s design, budget, and expectations.
When a buyer narrows the shortlist, the most useful support is a clear explanation of why one stone is being recommended over another. That explanation should connect the report, the video, the shape-specific risks, and the intended setting rather than relying on a single headline grade. This kind of transparent comparison makes it easier to understand whether a higher grade is truly helpful or whether the budget is better used on cut performance, measurements, or setting quality.
When a grading report is provided, buyers should compare the report details with the issuing laboratory’s verification tools where available and confirm that the seller’s listing, media, and measurements refer to the same stone.
Plan a Custom Ring Around the Stone’s Shape and Measurements
If you are planning a custom engagement ring, choose the stone’s shape and measurements before finalizing the setting design. A pear, marquise, or princess cut may need more protective prong placement. An emerald or asscher may look best in a cleaner design that does not distract from the step pattern. An oval or radiant may need careful proportion matching so the ring does not feel too narrow, too wide, or visually unbalanced.
The key decision is not simply which lab-grown engagement ring style looks good in a photo. The stone must physically fit the setting, suit the wearer’s daily use, and support the visual goal of the design. For custom work, shape-specific planning prevents the common mistake of choosing a beautiful diamond that is awkward for the ring you actually want.
For made-to-order jewelry, a trustworthy process should include confirmation of the selected diamond’s measurements before production begins, clear communication about prong placement and metal choice, and a final check that the setting protects the shape’s vulnerable areas. This is especially important for pear, marquise, princess, emerald, and asscher diamonds, where the relationship between stone geometry and setting design can affect both appearance and long-term wear.
For custom design, traceability also means keeping the selected stone tied to the design file or order discussion through its measurements and report reference where available. If a stone is changed after the design is started, the setting plan should be reviewed again rather than assuming the replacement will fit the same way. Small differences in length, width, depth, corner shape, or tip position can affect prong placement and the finished look.
Final Buyer Check
Before buying, make sure you can identify the most important 4C for your preferred shape, the visual risk that shape is known for, and the proof you need before committing. For some diamonds, that proof may be a clear face-up video. For others, it may be a closer look at the clarity plot, measurements, color appearance in the chosen metal, or setting compatibility.
Also be cautious with broad claims around value, sustainability, or sourcing. Lab-grown diamonds can offer a different production path from mined diamonds, but specific environmental or sourcing statements should still be supported by documentation and transparent communication. For a buyer, the strongest decision is one where the report, imagery, seller details, and setting plan all point to the same conclusion.
The right choice is not always the highest grade or the largest carat weight. It is the diamond whose tradeoffs are least visible in the shape you want and well suited to the jewelry you plan to wear.
[1] GIA, “The 4Cs of Diamond Quality,” Gemological Institute of America, access context.
[2] GIA, “Laboratory-Grown Diamonds,” Gemological Institute of America, access context.
[3] Federal Trade Commission, “Guides for the Jewelry, Precious Metals, and Pewter Industries,” Federal Trade Commission, 2018 revisions and access context.
Disclosure: This article is for general educational purposes only. Diamond grading, pricing, availability, specifications, and seller policies can change, and readers should verify important details through grading reports, official laboratory tools, seller documentation, or qualified professionals before making a purchase decision. Laboratory-grown diamonds should be clearly distinguished from natural diamonds, and environmental or sourcing claims should be supported by specific documentation.