
Selecting the right lab-grown diamond shape is a foundational step that directly influences cost, visible size, and long-term durability, often outweighing standard grading metrics. While carat weight and color grades provide a starting point, the physical proportions of a cut determine how light interacts with the stone, how much face-up spread it delivers, and how well it withstands daily wear. Many buyers focus heavily on heavier stones or rely exclusively on grading certificates, only to discover optical patterns like bow-tie effects or setting vulnerabilities once the jewelry arrives. Laboratory-grown diamonds should be clearly identified as laboratory-grown, and they should not be presented as mined diamonds.
This guide breaks down how each shape performs in real-world conditions, explaining why certain cuts may carry price premiums and which dimensions often translate to visible impact. By prioritizing precise millimeter measurements, crown angles, and verified light return over certificate data alone, buyers can evaluate stones with greater clarity. The following sections will help you match a specific shape to your budget, lifestyle, and design goals, ensuring your selection aligns with both visual preferences and structural requirements.
| Shape Category | Primary Verification Focus | Frequent Buyer Oversight |
|---|---|---|
| Round Brilliant | Crown angle (34–35°) & table percentage | Focusing on premium pricing without verifying actual light return |
| Elongated Cuts (Oval, Marquise) | Length-to-width ratio & face-up millimeter spread | Overlooking dark bow-tie patterns that may appear under mixed lighting |
| Pointed Shapes (Pear, Princess) | V-prong or bezel compatibility for structural support | Assuming standard prongs will adequately protect vulnerable corners |
| Step Cuts (Emerald, Asscher) | Facet symmetry & clarity documentation | Expecting light reflection to minimize visible inclusions |
| All Fancy Shapes | Direct video analysis alongside laboratory report metrics | Relying exclusively on reports that may not detail cut quality |
Quick Questions Before You Read
Q: Does a higher carat weight guarantee a larger-looking diamond?
Carat measures mass, not face-up size. Shallow proportions or weight distributed below the girdle can make a stone appear smaller than a lighter, well-proportioned alternative with optimized table and crown angles.
Q: Why do lab reports often miss visual flaws like bow-ties?
Standard grading documents focus on baseline metrics like color and clarity, but they do not universally grade cut quality for fancy shapes. Light leakage and shadowing typically require direct video analysis in varied lighting conditions to identify.
Q: Which shapes are generally more resilient for daily wear without specialized settings?
Round, cushion, and oval shapes often distribute impact more evenly and may withstand routine wear with standard prong configurations. Pointed shapes like pear or marquise frequently require V-prongs or bezels to reduce the risk of corner chipping.
Q: Should I prioritize a loose stone or a pre-set ring?
Choosing a loose stone first can allow buyers to verify precise proportions, inspect symmetry, and select a setting that supports structural weak points. Pre-set rings may obscure critical dimensions and limit proportion-matching options.
Why Shape Dictates Your Diamond Budget & Experience
Shape is often the first decision that influences the direction of a diamond purchase. Before reviewing color grades, clarity ratings, or carat weights, the geometry selected establishes a baseline for cutting considerations, light behavior, and long-term wear. Many buyers treat shape as a purely aesthetic preference, but it operates as a structural and economic variable. Different forms interact with rough material differently, require distinct cutting approaches, and respond to light in predictable ways. Choosing a shape first creates a practical framework for evaluating other tradeoffs.
How Shape Determines Rough Yield & Cutting Economics
Lab-grown diamonds begin as rough crystals that typically form in specific structural patterns during growth. The final shape selected determines how much of that starting material is retained through the cutting process. Round brilliant cuts are designed to optimize light return, which often requires shaping away a portion of the original crystal. Elongated or square geometries may align more closely with certain crystal forms, preserving more material during faceting. Higher rough utilization does not automatically make elongated shapes less expensive across all sizes, but it can influence baseline manufacturing costs. Even in laboratory production, where crystal growth establishes the starting material, yield considerations often affect the initial pricing structure for each shape.
The Relationship Between Geometry, Light Performance & Wear
Once a shape is selected, its facet arrangement, crown angle, and girdle thickness influence how light travels through the stone. Shapes with balanced pavilion angles and table percentages are generally calibrated to reflect light back toward the viewer. Flatter proportions or excessively wide tables may increase face-up spread but can sometimes reduce brightness by allowing light to exit through the bottom or sides. Geometry also influences physical resilience. Shapes with sharp points or thin outer edges may concentrate stress, making them more susceptible to chipping during routine contact. A stone that appears strong on paper typically performs best when its structural design aligns with its intended use.
Why Shape Selection Should Precede the 4Cs
The 4Cs refine a selection, but shape often defines the viewing experience. A given color grade in a step-cut diamond will appear different than the same grade in a brilliant-cut stone, because facet geometry changes how color is perceived. Clarity characteristics that remain subtle under a complex facet pattern may become more visible in a more transparent cut. Cut grading standards also vary by shape; round brilliant diamonds typically receive strict proportional benchmarks, while fancy shapes are often evaluated primarily on polish and symmetry, with cut quality assessments varying by laboratory. Evaluating carat weight or clarity without a fixed shape can lead to inefficient budget allocation. You may pay for metrics that are less noticeable in practice because the geometry affects their visibility. Locking the shape first allows you to allocate resources where they typically matter most for that specific form.
In practical buying, this is where comparisons can become unclear. Establishing shape first creates a stable evaluation framework, allowing color, clarity, and carat to be weighed against realistic visual expectations rather than abstract grade thresholds.
Expert Authentication Insight
Review proportion estimates by measuring the stone with a digital millimeter caliper and comparing the results to standard proportion ranges for that shape. Check the actual girdle thickness and pavilion depth against typical yield expectations for that geometry. Stones that fall outside expected tolerances may concentrate weight in the belly or bottom, which can affect cost without improving face-up appearance. This simple cross-check helps separate stones optimized for visual performance from those cut primarily to meet a carat target.
Round Brilliant: The Baseline for Performance & Pricing
The round brilliant cut often serves as a reference point for optical performance and market pricing. It is the shape most frequently evaluated against widely recognized ideal proportion ranges, which can provide buyers with a consistent grading baseline that many fancy shapes do not share. This consistency involves careful cutting. Creating a round diamond requires precise facet alignment across numerous planes, leaving limited tolerance for misalignment. Grading laboratories typically evaluate round diamonds using defined ranges for table percentage, crown angle, pavilion depth, and girdle thickness. Deviations from these ranges may still result in an acceptable report grade, but visual brightness and scintillation can vary.
Symmetry Requirements & Ideal Cut Parameters
Round diamonds are generally assessed against specific tolerance windows. A well-proportioned round brilliant typically features a table between fifty-three and fifty-eight percent, a crown angle around thirty-four to thirty-five degrees, and a pavilion depth near forty to forty-one percent. These ranges are calibrated to encourage light reflection back through the top of the stone rather than allowing it to escape through the pavilion. When proportions are adjusted to preserve carat weight, the diamond may appear less vibrant under standard indoor lighting. Symmetry assessment helps ensure that facets align cleanly, the table sits centered, and the girdle outline remains circular. Even minor misalignments can affect fire and disrupt the light pattern associated with the shape.
Market Pricing Premiums & Lab-Grown Availability
Prices can vary because of cut precision, report type, seller channel, size, shape, availability, and documentation. Buyers should compare like-for-like specifications before treating one stone as a better value. In many buying situations, lab-grown round diamonds may carry a price premium compared to certain fancy shapes due to cutting complexity, established grading standards, and consistent consumer interest. This demand often means that pricing for well-cut rounds can remain relatively stable even as production scales. At NUVU, the buyer-first approach is to make comparison clearer, especially around report details, visual evidence, setting fit, and documentation.
Setting Flexibility & Design Considerations
The circular geometry of a round brilliant often simplifies jewelry engineering and expands setting options. Standard four-prong and six-prong configurations can distribute pressure evenly around the girdle, which may reduce the risk of metal fatigue or stone movement over time. Round stones also integrate cleanly into bezel settings, halo designs, and pavé bands without requiring extensive custom angle adjustments. If you plan to update or redesign a piece later, the widely recognized nature of the round shape typically supports compatibility with many mounting styles. This versatility can be as relevant as the initial selection, because it may keep future adjustments more straightforward.
Expert Authentication Insight
Evaluate light return consistency by rotating the stone under a single directional light source while viewing it through a ten-power loupe. Look for facet misalignment, an off-center culet, or an uneven girdle outline that disrupts the symmetry pattern. Grading reports assign polish and symmetry grades, but they may not capture subtle alignment differences that become visible under everyday lighting. A stone with consistent symmetry typically shows a balanced light pattern without noticeable dark patches or misaligned reflections.
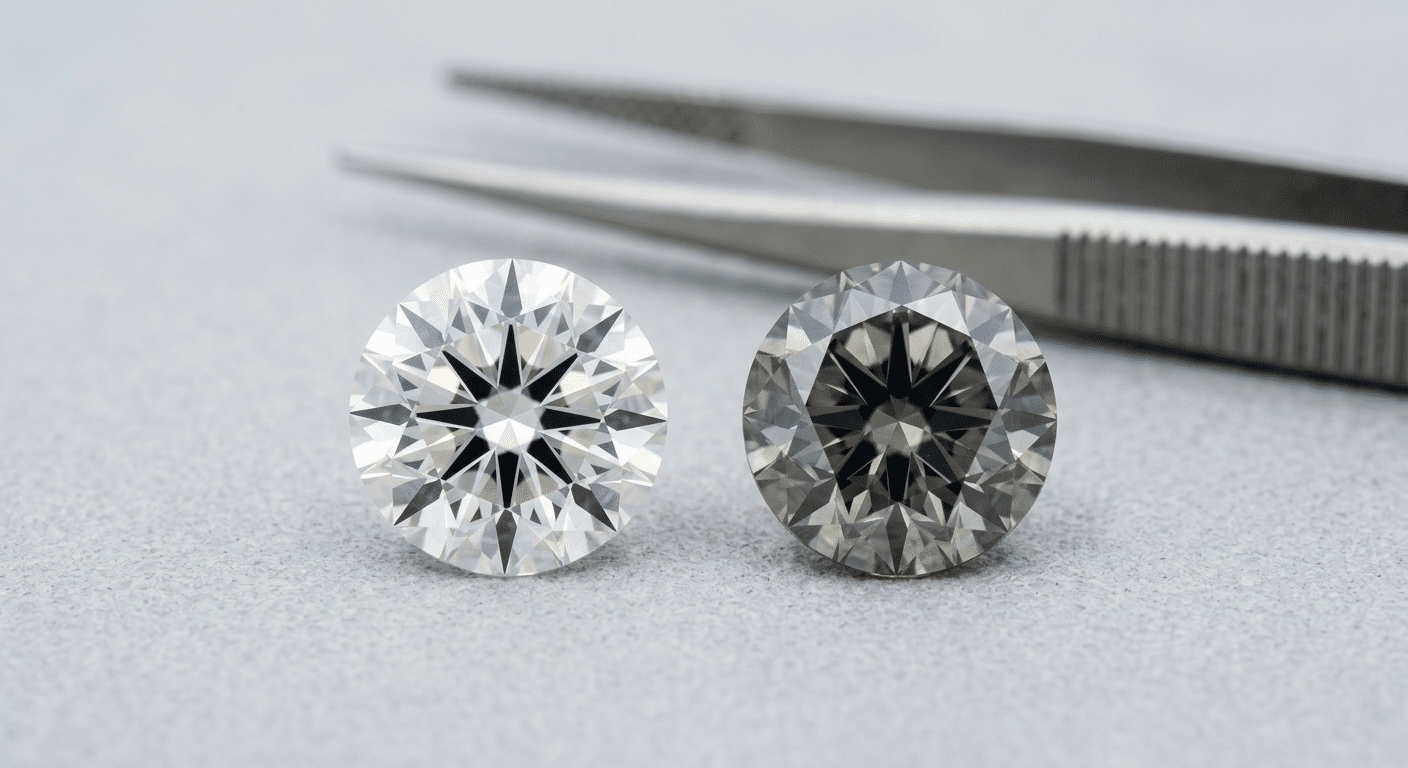
Fancy Shapes: Elongation, Light Patterns & Structural Tradeoffs
Fancy shape diamonds operate on different optical principles than the round brilliant, and understanding those differences supports more accurate evaluation. These shapes generally fall into three cutting categories: brilliant-cut, step-cut, and mixed-cut. Each category interacts with light, clarity characteristics, and structural stress differently. Elongated geometries like ovals, marquise, and pears may maximize face-up spread per carat, but they can also introduce light distribution patterns and grading variations that differ from round stones. Moving outside the round category often requires adjusting how performance is assessed, because standardized cut grades are less common for these forms.
Step-Cut vs. Brilliant-Cut: Clarity Tolerance & Face-Up Behavior
Step-cut shapes such as emerald and Asscher feature long, parallel facets arranged in a stepped pattern. This design emphasizes clarity and color by creating a reflective, open effect, but it can also make inclusions, internal graining, and color zoning more apparent, which is why they often benefit from documented clarity grades. Brilliant-cut fancy shapes like ovals and cushions use overlapping facet patterns to scatter light, which may minimize the visibility of minor internal characteristics. Mixed cuts, which combine a step-cut crown with a brilliant-cut pavilion, attempt to balance transparency with light return. The choice between these styles often depends on whether you prefer a clear, structured appearance or a highly scattered light pattern that prioritizes brightness over transparency.
Bow-Tie Effects, Windowing & Light Distribution in Elongated Shapes
Elongated shapes can show optical patterns that grading reports rarely quantify: bow-tie effects and windowing. A bow-tie appears as a darker horizontal area across the center of the stone, often resulting from pavilion facets cut at angles that direct light away from the viewer. Windowing occurs when the center of the diamond becomes highly transparent, allowing the background to show through. Both patterns relate to facet alignment and table width relative to length. Cutters may minimize these effects by adjusting pavilion angles and maintaining balanced crown heights, but extreme length-to-width ratios can sometimes make them more noticeable. Identifying these patterns typically requires visual inspection rather than certificate grades.
Facet Count, Symmetry Limits & Grading Report Variance
A grading report helps document key characteristics, but it should not be treated as a guarantee of beauty, value, or sourcing ethics. Many grading laboratories do not assign standardized cut grades to all fancy shapes because proportion ideals can shift across different length-to-width ratios and facet arrangements. Instead, reports often list polish and symmetry grades alongside measurements, leaving buyers to interpret how those metrics translate to real-world appearance. A symmetry grade of Excellent or Very Good can indicate clean facet alignment and a balanced outline, but it does not automatically confirm optimal light return. The absence of a universal cut classification means that two diamonds with identical report grades may differ face-up. Independent verification through video review and proportion analysis can help clarify performance.
Because standardized cut grades are absent for many fancy shapes, evaluation often shifts from relying on certificate letters to assessing visual consistency. Buyers should also recognize that official grading terminology requires clear distinction of laboratory origin to maintain accurate market descriptions. Comparing multiple stones side-by-side under different lighting conditions can show how minor ratio adjustments affect face-up appearance and setting compatibility.
Expert Authentication Insight
Identify bow-tie severity and windowing by rotating the diamond under diffused natural light and then under a direct overhead source. Map darker areas against the pavilion facet pattern and measure the table-to-length ratio to locate where light distribution shifts. Stones with moderate bow-tie effects often perform well when set, but pronounced dark bands or large transparent centers may indicate a cut focused on weight retention. Verifying these traits before purchase helps ensure the shape aligns with your visual expectations.
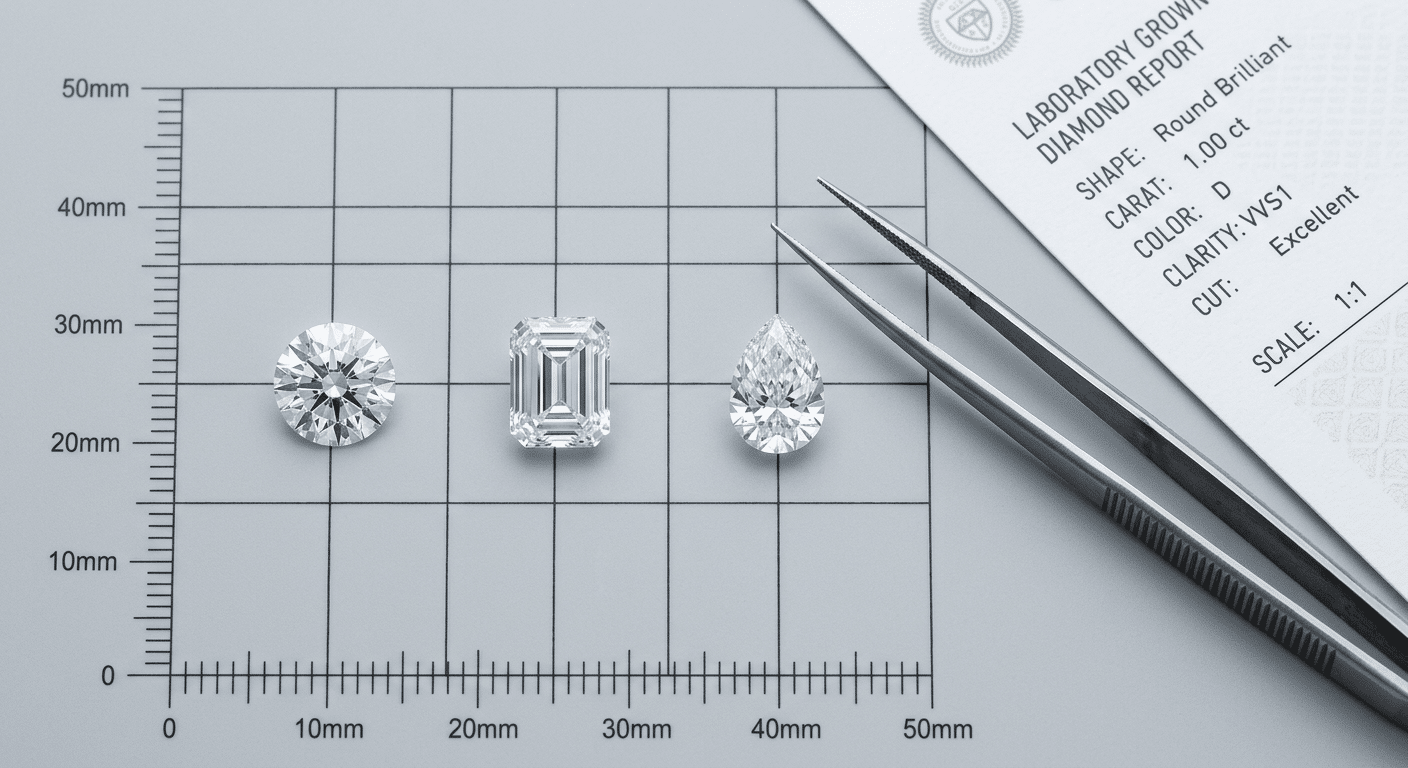
How Shape Drives Price Per Carat in Lab-Grown Diamonds
Lab diamond price by shape is often influenced by more than just the 4Cs. Before color or clarity grades are applied, geometry can establish baseline production considerations. Different shapes interact with raw material differently, require varying polishing steps, and align with distinct market demand patterns. Understanding why some lab diamond shapes may carry different pricing involves examining cutting economics alongside documentation.
Rough Utilization Rates & Manufacturing Considerations
Lab-grown diamonds originate as crystalline rough, typically forming in specific structures. Converting that raw material into a finished stone requires strategic cutting. Round brilliant cuts often require shaping that uses more of the original crystal, while step cuts and elongated fancy shapes may align efficiently with certain rough forms, retaining more weight during initial sawing. Polishing time can compound these factors. Complex facet arrangements and symmetry requirements may increase processing steps, which can influence baseline pricing structures even in automated environments.
Shape-Specific Premiums & Market Activity
Pricing tiers often reflect manufacturing considerations and consumer search patterns. Round brilliant and oval cuts may maintain steady inventory turnover, which can support their positioning in pricing comparisons. Market activity often shows that widely recognized shapes may attract broader buyer interest, while less common geometries can require more targeted searching or longer evaluation periods. Prices can change with market conditions, report type, seller channel, and stone-specific details, so exact comparisons should be verified at the time of purchase. Shapes with lower visibility or higher cutting variability may appear at different price points, but that difference does not automatically indicate superior value.
Why Identical Grades May Yield Different Prices
Two diamonds with matching color and clarity grades may carry different prices because grading approaches vary by geometry. Round brilliants typically receive cut grades based on measurable proportion parameters. Many fancy shapes receive polish and symmetry assessments, leaving face-up light performance and facet alignment to visual verification. A G-color oval with balanced proportions may deliver strong brightness and finger coverage, while an E-color round with a deeper pavilion might command a different price due to grading consistency and buyer preference. Lab grown diamond value comparison should weigh visual performance and structural documentation alongside certificate metrics.
For lab-grown diamonds, pricing clarity often depends on consistent grading documentation and transparent communication across supply stages. Identical 4C grades from different reports may not reflect the same market positioning, so verifying actual proportions and visual performance remains a useful step before finalizing a selection.
Expert Authentication Insight
Cross-reference report grade with actual millimeter dimensions and proportion ratios. Review weight-to-face-up-area efficiency to identify stones that may prioritize carat retention over optical performance.
Visual Size vs. Carat Weight: The Face-Up Reality
Carat measures mass, not diameter. A diamond visual size assessment depends largely on how that weight is distributed across the table, crown, and pavilion. Buyers who focus solely on carat weight may overlook proportion variables that determine actual face-up size. Reviewing millimeter specifications and table percentages can show how geometry creates perceived coverage and when a lighter stone may offer broader coverage than a heavier one.
Table Percentage, Crown Angle & Perceived Diameter
Table width and crown angle work together to influence how much of the stone projects upward. A broader table can increase apparent spread, making the diamond look larger from a standard viewing distance. However, if the crown angle becomes too shallow to support that wide table, light may exit through the sides rather than reflecting back to the eye. The result can be a stone that measures large but shows less contrast. Balanced cutting typically maintains table expansion alongside proper crown angles, preserving light return while maximizing the millimeter measurements relevant for daily wear.
Shape-Specific Spread Characteristics & Measurement Standards
Elongated and step-cut geometries rely on length-to-width ratios to define their silhouette. Oval cuts often perform well between 1.35 and 1.50 ratios, balancing elongation with proportional harmony. Pear and marquise shapes may require careful ratio management to prevent extreme tapering that can affect structural points and setting alignment. Emerald and cushion cuts spread differently due to their stepped facet patterns, which emphasize transparency over maximum diameter. Grading laboratories record these measurements on reports, but minor variations in millimeter spread or ratio can influence visual balance and ring fit.
When a Lower Carat May Outperform a Higher Carat Visually
A carefully proportioned stone with a balanced pavilion and optimized table may cover more surface area than a heavier diamond cut to retain maximum carat weight. The heavier stone may concentrate mass in the lower half, which contributes less to visual impact. Buyers prioritizing perceived size may look for stones with balanced depth percentages and wider table spreads within safe structural limits. Understanding how a lab diamond looks typically involves evaluating proportion data alongside carat weight, ensuring the selection focuses on visible coverage rather than concentrated mass.
Prioritizing face-up spread has practical limits. Cuts that are overly shallow or feature excessively wide tables may affect durability or allow noticeable light distribution changes during wear. A balanced proportion range often supports both visible size and long-term stability.
Expert Authentication Insight
Verify face-up area with digital calipers and transparent overlay templates. Compare actual length-to-width ratio and table spread against grading report dimensions to identify cuts that may concentrate weight below the girdle or over-extend the table.
Daily Wear, Setting Compatibility & Lifestyle Fit
Diamond durability extends beyond the Mohs hardness scale. Shape geometry influences where stress concentrates, how prongs should be engineered, and which metal profiles may support long-term security. Matching a diamond shape to daily wear habits and setting design can reduce maintenance needs and preserve structural integrity over time.
Pointed Corners & Edge Considerations in Pear, Marquise & Princess
Shapes with acute angles introduce predictable stress points. The tips of pear and marquise cuts, along with the corners of princess cuts, may experience more direct impact during routine activities. Thinner girdle sections at these edges can increase chipping risk when struck against hard surfaces. Cutters may thicken the girdle at critical junctions, but this requires precise metalwork during setting. Without adequate protection, repeated contact may increase maintenance frequency and affect long-term stability.
Prong Configurations & Security for Everyday Exposure
Prong design should align with a stone’s structural considerations. V-prongs can shield vulnerable tips by wrapping metal around the corners, distributing contact forces across a wider area. Double prongs add support for elongated shapes, while bezel settings encircle the girdle for reinforced coverage. Channel and tension settings remove direct prong contact, which may work best for shapes with uniform edges and documented girdle thickness. Metal wear, cleaning frequency, and activity levels all influence which configuration maintains secure retention without frequent maintenance.
Metal Band Width, Profile & Shape Integration
Band engineering influences how a ring supports its center stone under routine stress. Tapered shanks and cathedral shoulders can lift pointed shapes away from the finger, reducing direct contact while distributing weight toward the ring base. Wider, flat-profile bands can stabilize elongated stones but may alter the intended silhouette if the basket lacks proper structural planning. The metal band profile should align with the diamond girdle thickness and prong design to encourage balanced weight distribution and prevent shifting during active wear.
For buyers, the practical focus is not just how the stone looks in isolation, but how the setting interacts with its geometry. Matching prong placement and metal reinforcement to the shape’s physical profile may reduce long-term maintenance and help preserve the intended aesthetic.
Expert Authentication Insight
Review corner and girdle thickness using a magnified loupe and gentle pressure mapping. Identify thinner areas, polished edges, or prong contact points that may require reinforcement for daily wear.
The Paper vs. Reality Gap: Specs That Mislead
A grading report is a documentation tool, not a guarantee of visual performance. Certificates record measurable attributes, but they cannot capture how light moves through a stone or how it appears on the hand. Industry guidance consistently notes that grading documents establish baseline characteristics, but they do not substitute for direct visual inspection of light distribution or setting compatibility. Understanding what a report confirms and what it leaves out supports more grounded selection.
What Grading Reports Confirm & What They Omit
Standard grading documents typically verify color grade, clarity characteristics, carat weight, polish quality, and basic symmetry. These metrics help establish baseline quality and maintain inventory consistency. However, reports generally do not document bow-tie severity in elongated cuts, light return consistency across varying angles, precise facet alignment for fancy shapes, or real-world visual balance. Grading laboratories measure what can be standardized across many stones. They do not evaluate how a specific rough crystal was optimized or how the finished geometry performs under natural light. A diamond may receive strong clarity and color grades while still showing noticeable light distribution differences or an unbalanced face-up profile.
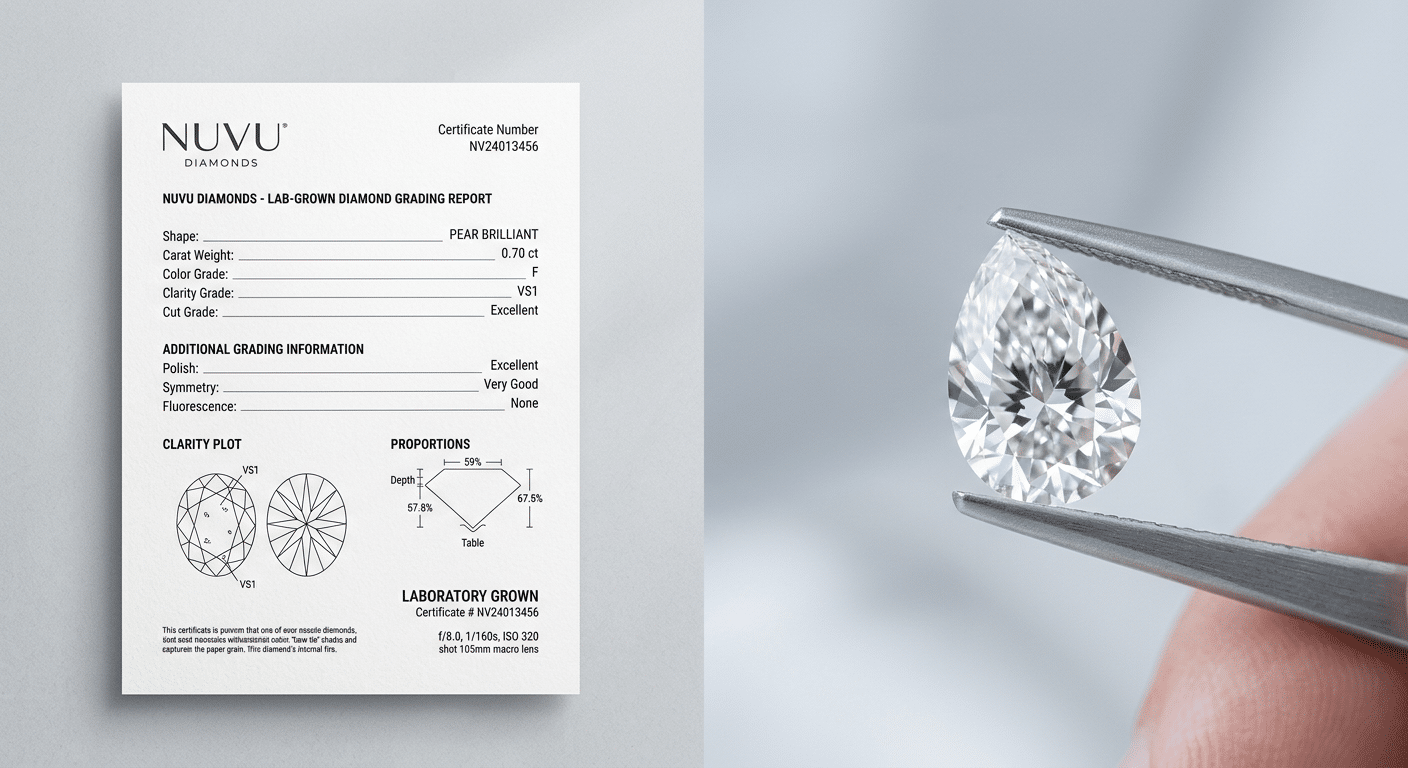
Depth Percentage Considerations & Weight Distribution
Depth percentage on a certificate represents total height relative to average diameter, but it does not show where that weight is concentrated. A stone can fall within a standard depth range while still holding weight in a thick girdle or an angled pavilion. This concentrated mass increases the carat number without expanding face-up area, which may make the diamond look smaller than its weight suggests. When cutting prioritizes weight retention over optical spread, the added depth can sometimes alter light pathways, creating darker zones or reduced brightness. The grading report will list depth percentage as a standard metric, but it may not distinguish between a proportionally balanced stone and one that emphasizes heavier yield.
Why Video, Proportions & Symmetry Support Paper Grades
Final evaluation typically extends beyond the certificate. Video review under diffused daylight, direct overhead lighting, and lower light conditions can show how a diamond handles contrast and brightness in everyday environments. Proportion ratios provide insight into how the cutter balanced the rough material. Table width, crown height, and pavilion angle together influence whether light reflects back toward the viewer or exits through the bottom. Facet symmetry affects the sharpness of light patterns and the consistency of brightness. Grade letters establish a baseline, but proportions and visual confirmation help determine whether a specific stone matches your expectations.
Sustainability and sourcing discussions should also be treated as verification questions rather than marketing assumptions. Environmental and sustainability claims should be specific, documented, and limited to what can be substantiated. A comprehensive evaluation combines grading data, visual review, and verifiable sourcing information.
Expert Authentication Insight
Evaluate weight distribution by cross-referencing reported carat weight with actual millimeter spread and girdle measurements. Use proportion analysis to identify depth-focused cuts that meet standard grading thresholds but may reduce face-up size or brightness. A diamond positioned for weight retention often shows a noticeable difference between its carat number and its physical footprint. Prioritize stones where proportions align with visual performance, not just certificate benchmarks.
When a grading report is provided, buyers should verify the report details through the issuing laboratory’s official report-check tool where available, and compare those documented metrics with the stone’s actual visual behavior under multiple lighting conditions.
A Shape-Based Decision Framework for First-Time Buyers
Choosing a diamond shape often begins with defining your primary consideration before browsing inventory. First-time buyers may lose clarity by comparing color or clarity grades across different geometries without establishing priorities first. A structured approach links shape characteristics to budget allocation, visual goals, and daily wear requirements. This method can reduce guesswork and help ensure the stone supports both the intended setting and long-term use.
Priority Mapping: Budget, Visual Impact & Long-Term Wear
Define your leading priority and match it to the shape that typically supports it. If maximizing face-up size within a fixed budget is the main goal, elongated brilliant cuts like oval or marquise often deliver more millimeter spread per carat than round or square alternatives. If durability for active, everyday wear is a primary concern, round brilliant or cushion shapes with softened corners may reduce edge stress and simplify prong security. When visual impact and clarity tolerance drive the decision, brilliant-cut shapes naturally minimize the visibility of minor inclusions through light scattering, while step cuts like emerald or Asscher may benefit from higher documented clarity grades to maintain a transparent appearance. Aligning the shape with your main consideration helps avoid overpaying for metrics that may not significantly impact your wearing experience.
When to Choose Loose Stones vs. Pre-Set Jewelry
Pre-set rings offer convenience when standard sizes and widely available shapes align with your timeline and design preferences. They may work well for straightforward purchases where exact proportion matching is less critical. Loose diamond selection becomes relevant when precision matters. Choosing the stone first allows proportion matching, intentional metal allocation, and setting engineering tailored to specific millimeter dimensions and structural needs. This approach is often useful for custom projects, specific band widths, or when you want prong placement and metal reinforcement to align closely with the shape’s geometry.
Integrating Shape Selection with Custom Design Timelines
For custom jewelry, stone measurements and setting compatibility should be confirmed before finalizing a purchase. Shape often influences the planning and timeline of custom production. CAD modeling typically accounts for the stone’s exact length-to-width ratio, corner geometry, and girdle profile before prototyping begins. Shapes with sharp points may require reinforced prong placements and additional validation steps to support long-term security. Step cuts may require precise channel or bezel alignments that affect metal thickness and band curvature. Clarifying these engineering considerations early helps reduce mid-process adjustments, supports material efficiency, and maintains realistic scheduling expectations.
For custom design, clarity comes from matching the stone to the setting, budget, and wearer’s daily use—not from selecting grades in isolation. Finalizing measurements and visual performance before CAD modeling or prototyping helps align the project with practical expectations.
Expert Authentication Insight
Complete a pre-purchase review that combines grading report data, independent millimeter measurements, video review under mixed lighting, and a prong-setting compatibility check. Confirm that the stone’s proportions match your visual expectations and that the chosen setting provides adequate support for its most exposed edges. This structured review can help ensure the diamond aligns with your priorities, supports routine wear, and integrates smoothly into the final design.
Before purchase, buyers should confirm documentation, return terms, resizing policies, and after-sales support directly with the seller. Careful comparison of visual evidence alongside certificate data typically supports a more confident purchase decision.
[1] Federal Trade Commission, “Environmental Claims: Summary of the Green Guides,” FTC, advertising and compliance guidance.
[2] Gemological Institute of America, “New Descriptive Terminology for Laboratory-Grown Diamonds (2025),” GIA, terminology and disclosure standards.
[3] Federal Trade Commission, “Advertising Lab-Grown Diamonds, Gemstones & Pearls (The Jewelry Guides),” FTC, grading report and advertising boundaries.
Disclosure: This article is for general educational purposes only. Diamond grading, pricing, availability, specifications, and seller policies can change, and readers should verify important details through grading reports, official laboratory tools, seller documentation, or qualified professionals before making a purchase decision. Laboratory-grown diamonds should be clearly distinguished from natural diamonds, and environmental or sourcing claims should be supported by specific documentation.