
Buying a loose lab-grown diamond gives you full control over customization and pricing, but it also shifts the responsibility for verification and mounting squarely onto you. Laboratory-grown diamonds share the same fundamental optical and physical properties as natural diamonds, but they originate in controlled environments rather than geological formations. Many buyers mistakenly chase flawless paper grades, overlooking how face-up appearance and long-term security actually depend on precise cut execution, shape-specific clarity thresholds, and professional bench craftsmanship. This guide walks you through the practical steps needed to evaluate stones beyond the standard grading report, allocate your budget realistically between the gem and the setting, and verify optical performance before production begins. By focusing on measurable proportions, multi-lighting inspections, and a structured CAD-to-delivery workflow, you will learn how to select a stone that delivers reliable everyday brilliance while avoiding rushed compromises during custom fabrication.
| Buying Focus | Common Pitfall | Practical Alternative |
|---|---|---|
| Certificate Data | Assuming grades guarantee real-world brilliance | Verify optical performance with reflector imaging and varied lighting |
| Budget Split | Overspending on the loose stone | Reserve a meaningful portion for custom setting, bench labor, and secure mounting |
| Clarity & Color | Insisting on D/FL grades for every purchase | Adjust grades to shape tolerance; brilliant cuts mask inclusions better than step cuts |
| Design Workflow | Approving generic CAD without precise stone specs | Match CAD modeling to exact millimeter dimensions and request wax approvals |
| Visual Size | Chasing exact carat weight | Prioritize face-up millimeter spread and proportion metrics over weight numbers |
Quick Questions Before You Read
Q: Does a top-grade certificate guarantee a beautiful lab-grown diamond?
No. Reports confirm measurements and baseline grades but cannot capture cut execution or light performance. Always verify with reflector images or side-by-side lighting tests before finalizing.
Q: How much of my budget should go to the setting versus the loose stone?
Reserve a meaningful portion of the total budget for the custom setting, bench labor, and secure mounting. Underfunding this stage often leads to rushed craftsmanship or fragile prongs.
Q: Can I safely choose a lower clarity or color grade?
Often yes, depending on the shape. Brilliant cuts like rounds or ovals naturally hide minor inclusions, while step cuts require stricter clarity thresholds to maintain a clean appearance.
Q: How long does the custom process take after selecting the stone?
The process typically spans several weeks, depending on design complexity, material availability, and seller workflows.
Who Actually Benefits from Buying Loose Lab-Grown Diamonds
Purchasing a loose lab-grown diamond is not a universal upgrade over retail jewelry. It is a specific buying strategy that rewards buyers who know exactly what they want and are willing to coordinate the pieces themselves. If your project requires precise control over stone selection, transparent pricing, and a custom finish, starting with a loose stone makes financial and practical sense. If you prefer to walk out of a store with a finished ring in hand, the loose stone route will likely add friction without adding value.
Project Readiness vs Retail Convenience
Retail jewelry is built for immediacy. You see the finished piece, try it on, and leave. Buying a loose diamond shifts the timeline. You are responsible for securing the stone, sourcing or designing the setting, and coordinating with a CAD designer or master setter to bring everything together. This process typically requires additional time for sourcing, design, and mounting. The tradeoff is control. You decide the exact millimeter dimensions, the metal purity, and how the stone will sit on the finger. For buyers planning a custom engagement, an anniversary reset, or a multi-stone design, that planning phase can be an investment in precision. Laboratory-grown diamonds should be clearly identified as laboratory-grown, and they should not be presented as mined diamonds.
Budget Allocation When Buying Unset
When you buy a pre-set piece, a portion of the price may cover brand positioning, retail overhead, and inventory holding costs. Purchasing a loose lab-grown diamond can redirect that budget toward measurable factors: carat size, cut precision, and metal weight. Depending on market conditions and seller inventory, this approach may allow buyers to prioritize different specifications within a similar overall budget range. That said, loose sourcing introduces costs that retail buyers rarely consider. Setting fabrication, labor, design revisions, shipping insurance, and independent verification all draw from the same budget pool. A realistic loose diamond purchase accounts for these expenses upfront, preventing the common mistake of overspending on the stone and leaving insufficient funds for a secure, well-proportioned setting. In practical buying, sourcing a loose stone often reveals that lower upfront costs must be weighed against documentation clarity and supply chain consistency. Buyers typically benefit more from verifying cut reports, return terms, and setting compatibility than chasing the absolute lowest per-carat rate.
Buyer Profiles That Win With Loose Sourcing
Loose lab-grown diamonds often align well with four clear scenarios. First, custom engagement planners who want to align the exact stone with a specific setting architecture rather than forcing a stone into a mass-produced band. Second, buyers creating multi-stone arrangements or side-stone upgrades that require exact color and clarity matching. Third, anyone replacing a damaged or lost stone in an existing heirloom setting, where millimeter precision dictates whether the new stone seats properly. Fourth, value-driven shoppers who prioritize cut quality and visual performance over brand recognition or retail convenience. If your priority is immediate wear, zero design involvement, or a fixed retail return policy, loose stone purchasing may not be the most practical path.
Expert Authentication Insight
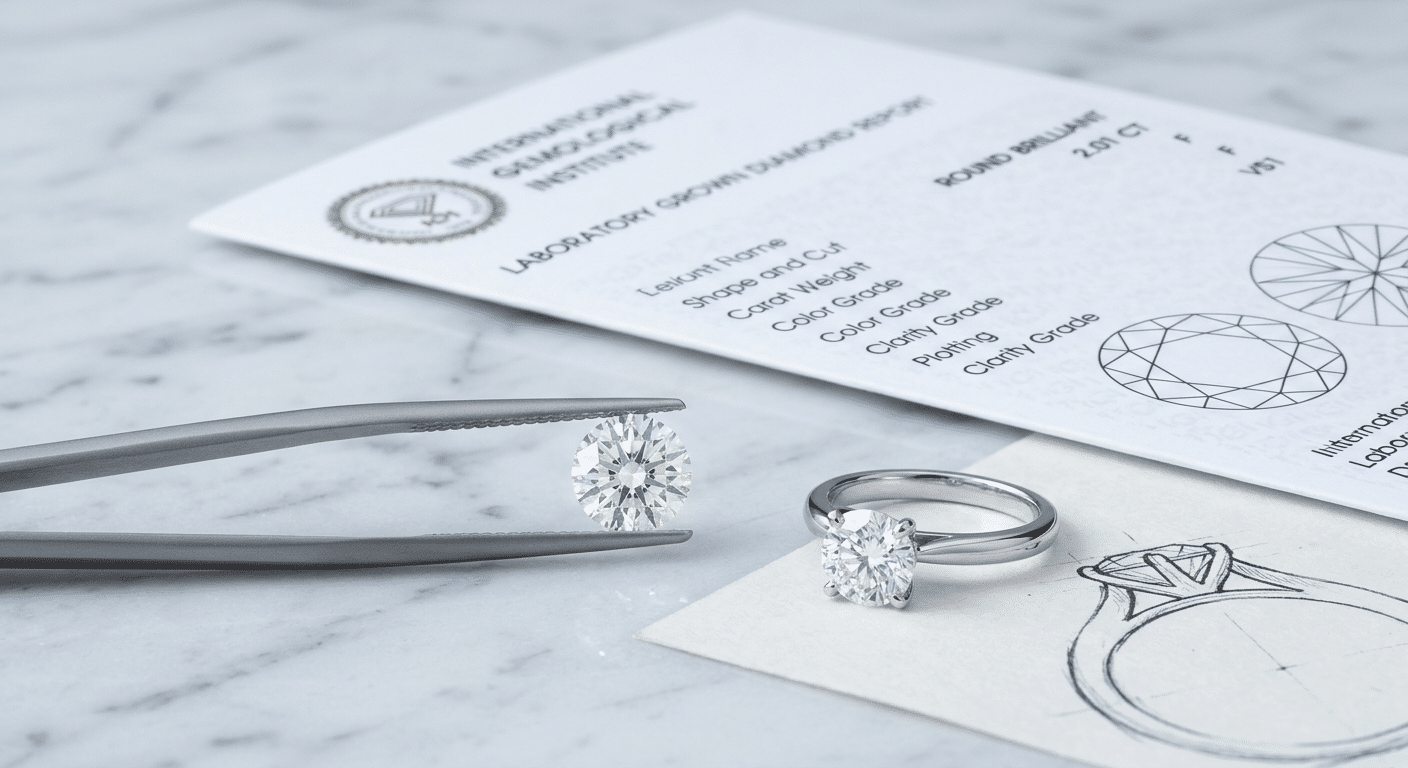
Before finalizing any loose purchase, verify the stone’s provenance under controlled lighting. Use a 10x loupe to locate the laser inscription on the girdle and cross-reference it directly with the grading certificate. A mismatched or poorly etched number is worth investigating before proceeding. Inspect the girdle polish and facet junctions under a UV or blue-light source. Look for micro-scratches, inconsistent polishing lines, or residual handling marks that suggest the stone was previously set, re-cut, or poorly stored. A clean, properly inscribed girdle can help confirm the stone matches the report and has not been subjected to unnecessary prior mounting cycles.
Variables to Lock In Before Comparing Stones
Browsing loose lab-grown diamonds without a fixed framework quickly turns into an endless loop of specification tweaks. The most efficient buyers define their non-negotiables before looking at inventory. You need a clear sequence that moves from structural requirements to visual preferences. Start by locking your shape and budget ceiling. Confirm the setting style and metal type you plan to use. Only then establish your acceptable clarity and color range, followed by your cut priority. Specifications must serve the final piece, not exist in isolation. When you anchor your search to these variables first, you eliminate incompatible stones and focus only on options that will actually work in production.
Shape and Setting Compatibility Mapping
Not every shape fits every setting architecture. Pointed stones like marquise, pear, and princess cuts require reinforced V-prongs or protective bezels at their vulnerable corners to prevent chipping during daily wear. Round brilliants integrate smoothly into halo settings and traditional four- or six-prong baskets. Oval and cushion cuts often need custom seat preparation to align with the setting’s gallery rail. Choosing your setting style before finalizing the stone prevents costly rejections later. If your setting has a fixed seat depth or narrow prong spacing, a stone with a thick girdle or oversized table simply will not fit. Structural compatibility must precede aesthetic preference.
Carat Weight vs Face-Up Spread Planning
Carat weight measures mass, not visible size. Two one-carat stones can appear drastically different on the finger depending on how the weight is distributed. A shallow stone may look larger face-up but sacrifice light return, while a deeply cut stone retains excellent fire but appears smaller than its weight suggests. Buyers working within fixed setting dimensions should prioritize millimeter spread and ideal proportions over exact carat weight. Target the face-up dimensions your setting requires, then verify that the crown angle and pavilion depth support strong light performance. Visual size matters more than the number on the scale once the stone is mounted.
Clarity and Color Thresholds by Shape
Facet arrangement dictates how flaws and color present themselves under normal viewing conditions. Brilliant cuts like round, oval, and cushion naturally scatter light across dozens of facet junctions, which masks minor inclusions and color tints effectively. Step cuts like emerald and asscher feature long, open planes that act like windows into the stone’s interior. Inclusions and body color become highly visible, making VS1 or higher clarity grades essential for a clean appearance. Similarly, near-colorless grades in the G to J range often perform identically to D through F stones once set in yellow or rose gold. Metal choice and ambient lighting neutralize slight body color, allowing you to redirect budget toward cut precision without compromising visual impact. For buyers evaluating these thresholds, the practical point is not just what the report says, but how the stone performs visually and fits the intended design. Different grading laboratories may apply slightly different evaluation standards, so a single letter grade should always be cross-checked with the actual inclusion plot and metal compatibility.
Expert Authentication Insight
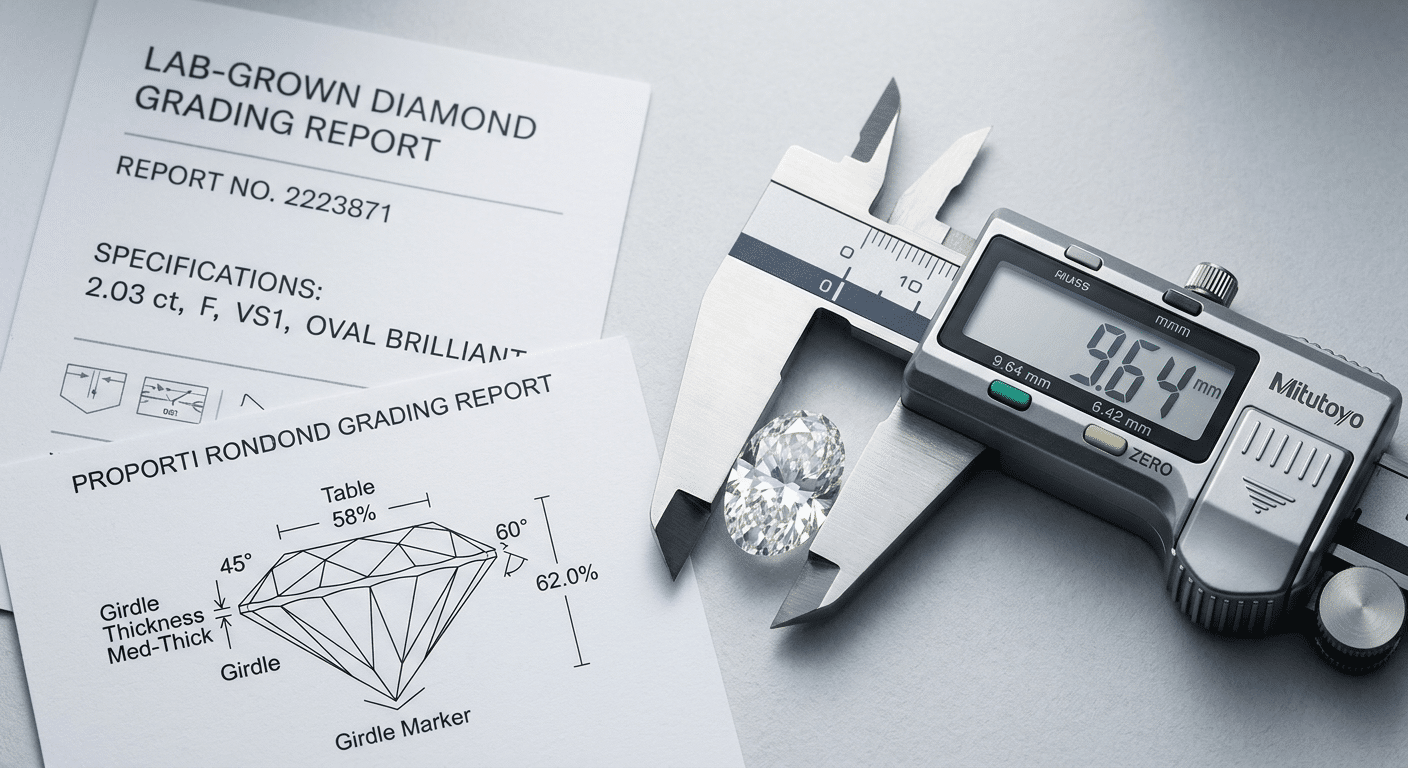
Verify physical dimensions against the grading report using a digital caliper before any purchase commitment. Measure the length-to-width ratio independently and check girdle thickness at multiple points. Cross-reference these readings with a proportion scope or diamond viewer to detect deviations from the stated cut parameters. Stones with inconsistent girdles or misaligned facet junctions may suggest variations in the production process. Even a minor 0.1 millimeter variance can disrupt setting alignment and compromise light return. Dimensional consistency can help verify that the stone matches both the report and your setting requirements.
Decoding Lab Diamond Pricing: What Actually Drives the Numbers
Two loose lab-grown diamonds with identical carat, color, clarity, and cut grades can carry significantly different price tags. The discrepancy rarely reflects arbitrary markup. It usually traces back to cut execution consistency, certification reputation, inventory turnover rates, and the seller’s operational model. Pricing in the lab-grown market rewards transparency, and industry terminology standards emphasize clear disclosure so buyers understand how laboratory-grown stones are classified and reported.[1] When you evaluate value through proportions, verified light return, and realistic total project costs, the numbers align with measurable quality rather than marketing positioning.
Why Identical Grades Yield Different Prices
Grading reports establish boundaries, but they do not capture execution quality. A stone graded Excellent for cut may still exhibit slightly uneven symmetry or suboptimal table-to-crown alignment, which impacts its market value. Documentation standards and consistency across grading reports can influence pricing, but buyers should evaluate the specific characteristics listed rather than assuming one laboratory’s grade directly matches another’s. Fluorescence, inventory age, and seller overhead further shift pricing. Wholesale channels and direct-to-manufacturer sourcing may reduce certain retail holding costs, which can influence baseline pricing. Premium pricing in this market typically reflects verified optical performance, reliable documentation, and consistent supply chain standards rather than artificial scarcity.
The Hidden Cost of Cut Compromises
Aggressively discounted stones frequently sacrifice precision where it matters most. Symmetry deviations, uneven polish, or shallow pavilion angles reduce light return and create visible dullness under indoor lighting. A stone that looks acceptable on a certificate can appear lifeless in natural daylight or evening environments. These compromises rarely reveal themselves until after mounting, at which point resetting or exchanging the stone introduces labor fees, shipping costs, and project delays. Paying a modest premium for a stone with verified proportion alignment, strong contrast patterns, and consistent facet junctions protects long-term satisfaction. Cut quality is the only variable that directly dictates how the stone performs visually, making it a critical factor to consider. In many buying situations, a modest premium for verified proportion alignment and consistent documentation pays off by reducing post-purchase verification friction. Price differences often reflect how carefully a seller manages inventory turnover, cutting standards, and transparent reporting rather than arbitrary markup.
Total Project Cost vs Stone-Only Price
Focusing exclusively on the loose stone price distorts the financial reality of custom jewelry. The final cost includes the setting fabrication, bench labor, design revisions, potential resizing, and independent certification verification. A well-priced stone paired with an underfunded setting often results in poor security, inadequate metal weight, or misaligned prong placement. Allocate budget to the components that directly impact wearability and longevity. If the stone budget consumes a large majority of the total project allowance, you may leave insufficient resources for secure mounting and professional finishing. A balanced allocation ensures the stone is supported by craftsmanship that matches its quality.
Expert Authentication Insight
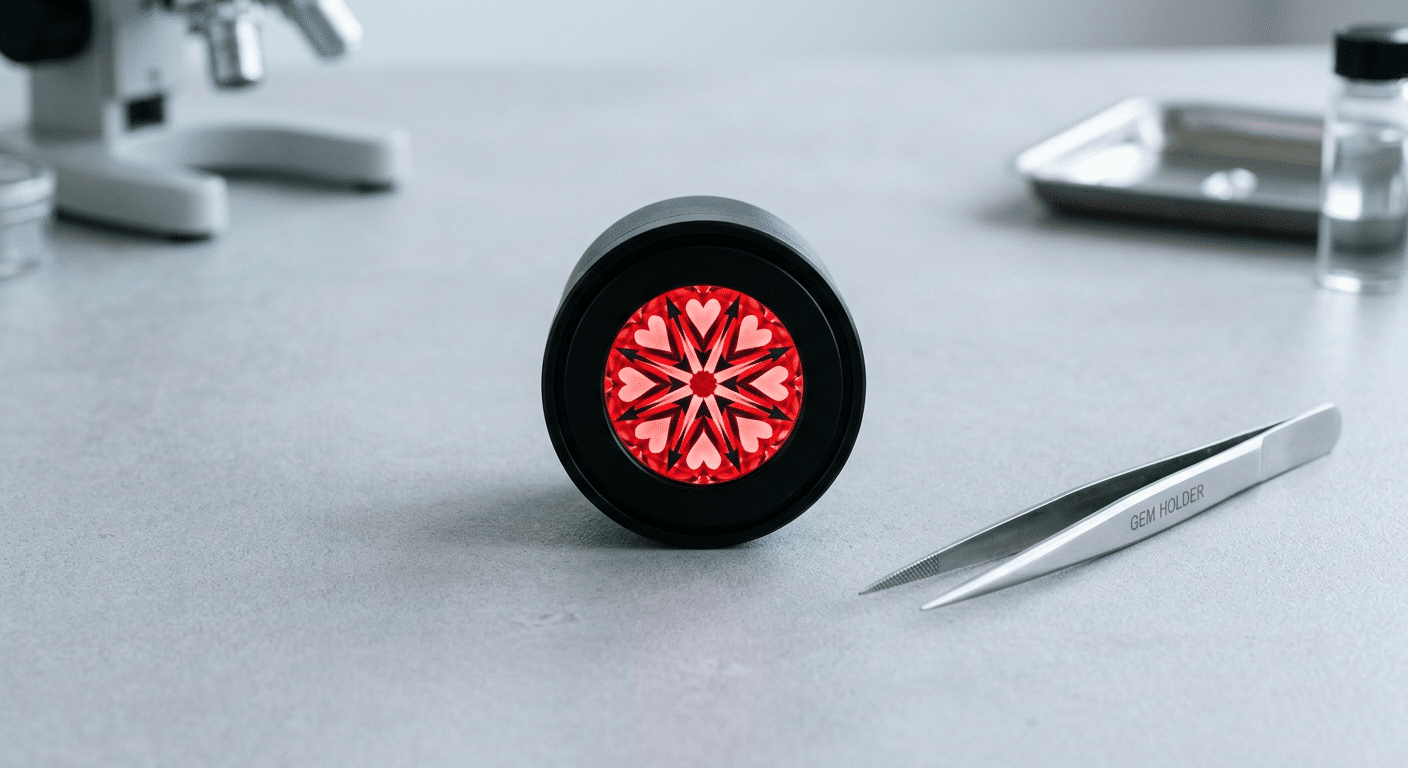
Request raw ASET or IdealScope imagery from the seller before finalizing any purchase. These reflector tests map light return, contrast distribution, and facet alignment far more accurately than standard photography or certificate cut grades alone. Verify that the stone displays symmetrical red return patterns with clear, structured dark contrast. Excessive white leakage or uneven shadowing indicates windowing, shallow cutting, or misaligned pavilion angles. Cross-reference the optical pattern with the grading report’s stated cut parameters to identify discrepancies that pricing alone will not disclose. Visual light performance confirms whether the stone delivers the brilliance promised by its grade.
Certification Reality Check: What Reports Confirm and What They Miss
A grading report is a reference document, not a substitute for visual evaluation. For a brand like NUVU, the goal is to treat certification as a baseline verification system rather than a definitive quality guarantee. When used correctly, a lab diamond certification gives you the exact measurements and standardized grades needed to compare stones objectively. When treated as a final answer, it leaves critical gaps in how the stone will actually perform once mounted.
What a Grading Report Actually Verifies
A reputable diamond grading report documents measurable, repeatable data. It confirms the exact carat weight, maps the boundaries of the color grade, and documents clarity characteristics with a plotted diagram. More importantly, it records precise millimeter dimensions, table percentage, crown and pavilion angles, and polish and symmetry grades. These numbers create a reliable baseline for side-by-side comparison.[2] If two loose stones share identical grade reports but differ in price, the divergence almost always lies in cut execution consistency, fluorescence intensity, or the laboratory’s grading standards.
Certificate Limitations Buyers Overlook
Standard reports cannot capture real-world light performance. A stone can earn an Excellent or Ideal cut grade on paper while still exhibiting subtle windowing, uneven contrast, or weak scintillation under natural daylight. Reports also cannot fully document girdle finish consistency, internal strain patterns, or how a mounting will alter color perception. A platinum band will intensify warmth in a near-colorless stone, while yellow gold often masks slight body color entirely. Different laboratories may apply varying evaluation thresholds, making direct cross-lab grade comparisons difficult without reviewing proportion data and visual media. The report documents controlled laboratory conditions, not guaranteed visual beauty or setting compatibility. For buyers evaluating reports, the useful question is not which laboratory is universally superior, but whether the report documents the characteristics that matter for your specific setting and lighting conditions. Advertising and disclosure guidance consistently notes that grading reports are reference tools, not guarantees of visual performance.[3]
A grading report helps document key characteristics, but it should not be treated as a guarantee of beauty, value, or sourcing ethics.
When a grading report is available, buyers should verify the report details through the issuing laboratory’s official report-check tool where available, and compare those details with the stone’s visual evidence before purchase.
Verification Workflow for Loose Stones
Use certification as a checkpoint, not the final word. Begin by matching the laser-etched report number on the girdle to the certificate using a standard loupe or magnifier. Cross-check the millimeter dimensions against a digital caliper to ensure the face-up spread aligns with your setting requirements. Review the inclusion plot alongside high-magnification imagery to confirm that mapped characteristics match the actual stone’s position and size. Request video footage shot under neutral daylight and warm incandescent lighting to evaluate light return and contrast. Finally, buyers should confirm the seller’s documentation, return terms, and independent verification options before finalizing payment.
Expert Authentication Insight
Physical diagnostic: Perform a loupe-based inclusion plot verification by matching the report’s diagram to the actual stone under 10x magnification. Check for crystal inclusions, feather edges, and internal strain lines that may not be fully captured in the certificate’s summary but affect long-term durability and light performance.
Shape Selection and Visual Performance Beyond the 4Cs
Choosing a shape is a performance decision as much as an aesthetic one. While the 4Cs provide a grading framework, the geometry of the cut dictates how light moves through the stone, how inclusions reveal themselves, and how the piece interacts with daily wear. Understanding these structural differences prevents buyers from applying round brilliant expectations to fancy cuts, or from prioritizing carat weight over face-up spread.
Brilliant vs Step Cut Light Mechanics
The distinction comes down to facet arrangement and light return mechanics. Brilliant cuts use a complex network of triangular and kite-shaped facets designed to maximize sparkle, scintillation, and fire. This chaotic light pattern naturally masks minor clarity characteristics, making them highly forgiving across VS and even some SI grades. Step cuts, like emerald and Asscher shapes, rely on long, parallel facets and a lower pavilion angle to create clean, mirror-like reflections. The visual effect is elegant and architectural, but it leaves little room to hide inclusions or color zoning. Buyers drawn to step cuts typically need to prioritize higher clarity thresholds and tighter color boundaries to maintain the intended geometric clarity.
Fancy Shape Cut Tolerances and Tradeoffs
Non-round shapes operate on stricter cut tolerances. Ovals, pears, and marquises require precise length-to-width ratios to avoid awkward silhouettes, and their facet patterns must be carefully aligned to mitigate the bow-tie effect—a dark shadow that stretches across the center of the stone. Unlike round brilliants, fancy shapes lack a universal ideal proportion system, meaning two stones with identical grades can look completely different face-up. Pointed ends also introduce structural vulnerability. Pear and marquise tips are prone to chipping if not properly protected by V-prongs or bezel settings, while oval girdles can become dangerously thin at the curved ends if cut for maximum spread rather than durability.
Shape-to-Finger Proportion Matching
The right shape aligns with hand anatomy and wear habits. Elongated silhouettes like ovals and emeralds create a lengthening effect that often works well on shorter or wider fingers. Round and cushion cuts distribute visual weight more evenly, making them a natural fit for broader hands or those who prefer a balanced, traditional profile. Setting elevation matters just as much as shape. Higher settings showcase light return but increase snag risk, while lower bezel or flush settings prioritize security and daily comfort. Matching the shape to both the wearer’s proportions and their lifestyle ensures the ring remains practical long after the initial purchase.
Expert Authentication Insight
Physical diagnostic: Use a polarizing filter and rotating turntable to detect internal strain patterns and facet misalignment. Observe facet junction symmetry and girdle polish consistency under oblique lighting to identify cut execution quality that standard grades may not fully reflect.
Bridging Loose Stones to Custom Design: Practical Execution
Custom jewelry design is a structured engineering process, not an open-ended creative exercise. Once the loose stone is selected, its exact millimeter profile, girdle thickness, and pavilion depth dictate every architectural decision in the setting. Skipping this alignment phase leads to poorly secured stones, compromised light performance, or costly redesigns later in the build.
Setting Architecture and Stone Dimensions
A setting must be engineered to the stone, not the other way around. Millimeter measurements determine the seat diameter, while table percentage and crown height influence how deeply the stone sits within the band. Girdle thickness directly affects prong grip; a thin girdle requires deeper, more secure prong bases to prevent rocking or slippage, whereas a thick or uneven girdle may need seat adjustments to sit flush. Off-the-shelf or mass-produced settings rarely account for these tolerances, which is why custom mounting can provide better alignment with specific stone tolerances. Every proportion should be mapped before metal fabrication begins.
CAD Modeling and Wax Approval Workflow
The digital design phase translates stone metrics into a precise three-dimensional model. During CAD drafting, the focus shifts to proportion verification, prong clearance, and estimated metal weight. Buyers should review the rendered model from multiple angles, paying close attention to how the prongs align with the girdle, whether the gallery rail allows adequate light transmission, and how the band tapers to meet the stone. This is the stage to request structural adjustments before any metal is cast. Establishing clear revision limits and approving a physical wax or resin model ensures that proportions, scale, and comfort align with expectations before moving to final casting. At NUVU, this phase is treated as a practical alignment check rather than a purely creative exercise. The CAD model must correspond exactly to the selected stone’s millimeter dimensions, crown height, and pavilion depth before metal is cast, which helps prevent costly revisions and ensures the final mounting supports both security and light performance.
For custom design, stone measurements and setting compatibility should be confirmed before finalizing a purchase.
For custom design, trust comes from matching the stone to the setting, budget, and wearer’s daily use—not from choosing grades in isolation. Confirming measurements, setting compatibility, and documentation before finalizing the stone helps prevent costly revisions.
Mounting Execution and Final Quality Control
Bench setting requires controlled pressure, precise seat preparation, and systematic tension testing. A skilled setter seats the stone without applying uneven force that could chip delicate girdle edges or distort the prong alignment. After the stone is locked in place, the piece undergoes a series of quality checks: verifying symmetry, ensuring prong tips are polished and uniform, confirming the girdle is not exposed or pinched, and testing that light return remains unobstructed by misplaced metal or excessive gallery work. Post-setting verification helps confirm that the final piece matches the original design intent without compromising stone security or visual performance.
Expert Authentication Insight
Physical diagnostic: After mounting, use a loupe to verify prong tip alignment, seat contact points, and girdle clearance. Check for tool marks, uneven metal flow, or stress fractures near the stone, and confirm that the setting does not obstruct critical light entry angles.
Common First-Time Buyer Mistakes and How to Avoid Them
The process of selecting a loose lab-grown diamond often unravels when buyers prioritize theoretical perfection over real-world results. The grading report provides a useful baseline, but it does not dictate how a stone will actually look on your hand, how it will interact with a specific setting, or whether it will deliver the visual performance you expect. Recognizing where first-time buyers consistently misstep can save thousands in budget and prevent costly design revisions.
Chasing Perfect Grades Over Visual Performance
It is tempting to target D color and flawless clarity because the grading scale makes them sound like the ultimate standard. In practice, those grades may offer diminishing returns once the stone leaves the lab and enters a setting. Mounted jewelry rarely exposes minor color differences to the naked eye, especially when paired with white gold or platinum. A VS2 clarity stone with well-positioned inclusions near the girdle will often look identical to a VVS1 under normal lighting, yet it costs significantly less. Redirecting that portion of the budget toward cut precision and setting craftsmanship may better support long-term wearability and visual impact.
Skipping Proportion and Light Performance Data
A certificate will list a cut grade, but that single letter does not capture how light actually moves through the stone. Table percentage, crown angle, and pavilion depth work together to determine whether a diamond exhibits sharp brilliance, muted contrast, or a dark central void. Buyers who skip proportion analysis frequently end up with a stone that grades well on paper but looks lifeless in person. Reviewing actual light performance data, such as ASET or IdealScope imaging, reveals whether the facet alignment is optimized or whether the cut sacrifices brightness for carat retention. A slightly higher price for verified light return may offer better long-term satisfaction. Conversely, prioritizing a report grade over visible cut execution can lead to compromised visual results. Reflector imaging and proportion data should be evaluated together, as neither alone guarantees how the stone will look on the hand. In practice, buyers who compare reported angles with actual light performance media can more reliably identify stones that deliver consistent brightness without overpaying for marginal grade differences.
Misaligned Budget and Setting Expectations
Many buyers allocate nearly their entire budget to the loose stone, only to discover later that the setting, design labor, and metal weight push the project past their original limit. Custom settings are not off-the-shelf commodities. Heavier gold alloys, precise prong engineering, and detailed milgrain or pavé work require measurable bench time. When the setting budget is underestimated, the result is often a rushed compromise: thinner metal that bends more easily, simplified detailing that does not complement the stone, or a complete pause in production while additional funds are gathered. A realistic approach reserves a meaningful portion of the total budget for the setting, labor, and post-production verification. This ensures the final piece matches the quality of the stone rather than undermining it.
Expert Authentication Insight
Before finalizing any loose stone purchase, request a side-profile video recorded under neutral lighting. This simple step reveals crown height, pavilion depth, and girdle finish in a way flat photography cannot. Cross-reference the video angles with the exact proportion measurements on the grading report. Any mismatch between the visual profile and the documented numbers often signals hidden windowing, light leakage, or structural weaknesses that will become obvious once the stone is mounted. If the seller cannot provide clear profile footage or the angles look inconsistent with the reported cut, buyers may want to request additional clarification or reconsider the selection. Verification should not depend on assumption.
Next Steps: How to Proceed With Confidence
Research loses its value if it does not translate into a structured buying process. Moving from comparison to purchase does not require perfect certainty, but it does require a clear sequence. When you lock your variables, verify the data, and align expectations with your chosen jeweler or designer, the process stops feeling like a gamble. It becomes a series of deliberate checkpoints.
Verification Before Commitment
The final step before any financial commitment is a straightforward cross-check. Match the laser inscription number to the grading report. Verify that the millimeter dimensions align with the certificate and your setting requirements. Review high-resolution video under at least two lighting conditions to confirm that inclusions, fluorescence, and facet symmetry match the written description. Finally, confirm the seller’s return policy, verification timeline, and shipping insurance coverage. If any of these elements are vague, delayed, or conditional, the transaction carries unnecessary risk. Transparency should be the baseline, not an afterthought.
Prices can change with market conditions, report type, seller channel, and stone-specific details, so exact comparisons should be verified at the time of purchase.
Inventory Exploration With Structured Filters
Searching through loose lab-grown diamond inventories is most effective when you filter by performance metrics rather than generic grade dropdowns. Start with your locked shape and budget ceiling, then narrow by table percentage, depth range, and verified light performance data. Use clarity filters to exclude stones with inclusions positioned in the central table or under the main facets. This approach quickly removes stones that will disappoint in person while surfacing options that deliver strong visual impact within your parameters. Inventory platforms that document optical behavior alongside grades, such as those used at NUVU, help buyers compare actual performance metrics rather than relying on isolated certificate numbers. For wholesale and custom sourcing, this kind of consistency often matters as much as the headline price. The goal is structured comparison, not endless scrolling.
Design Consultation and Timeline Alignment
Custom jewelry requires a structured workflow to prevent miscommunication and delays. Once you select a stone, share the exact millimeter dimensions, girdle thickness, and setting preferences with your designer. Discuss metal alloy choices, prong styles, and any structural requirements dictated by the stone shape. Establish clear revision checkpoints during the CAD phase, and request a physical wax or resin model approval before bench work begins. Realistic timelines typically span several weeks from design approval to final polishing, depending on complexity and metal sourcing. Rushing the approval stage rarely saves time. It usually results in costly remakes or compromised stone security.
Expert Authentication Insight
Before the final shipment leaves the workshop, request a pre-shipment video recorded under both standardized daylight and warm indoor lighting. The footage should include a live dimension readout from a calibrated digital micrometer alongside the loose stone. Compare this live measurement with the grading report and the CAD model to ensure all values align within a narrow tolerance. Confirm that the laser inscription remains fully legible and matches the certificate exactly. This final verification closes the loop between documentation, design, and physical delivery, ensuring the stone you approved is the stone you receive.
[1] GIA, “New Descriptive Terminology for Laboratory-Grown Diamonds,” GIA News & Press. New Descriptive Terminology for Laboratory-Grown Diamonds
[2] FTC, “Jewelry Guides,” FTC News & Events. Jewelry Guides
[3] FTC, “Advertising Lab-Grown Diamonds,” FTC Business Guidance. Advertising Lab-Grown Diamonds
Disclosure: This article is for general educational purposes only. Diamond grading, pricing, availability, specifications, and seller policies can change, and readers should verify important details through grading reports, official laboratory tools, seller documentation, or qualified professionals before making a purchase decision. Laboratory-grown diamonds should be clearly distinguished from natural diamonds, and environmental or sourcing claims should be supported by specific documentation.