
Two loose lab-grown diamonds can look similar on paper yet carry noticeably different prices. The difference often comes from details that are easy to miss in certified loose lab-grown diamonds: exact millimeter spread, proportions, grading report type, shape-specific risks, visual performance, treatment disclosure where relevant, and whether the stone will suit the intended setting. A lower price may reflect a smart tradeoff, but it can also hide weak documentation, poor cut balance, or a diamond that looks smaller or darker than expected.
For the full framework, read Loose Lab-Grown Diamonds Buying Guide.
This guide helps you judge value beyond the headline carat, color, clarity, and cut grades. You’ll learn when a premium may be justified, when a near-milestone size may save money, how shape affects pricing, and why images, reports, and measurements should be checked together before comparing offers. The goal is not to find the cheapest stone, but to identify the diamond that gives a strong visual result for the total project cost.
For buyers, the practical point is that a grading report narrows the shortlist, but it does not replace visual review. Two stones with similar paperwork can still differ in brightness, spread, and how well they fit a specific ring design.
Evidence note: Because lab-grown diamond pricing changes with live inventory, supplier access, seller channel, and documentation quality, this guide avoids treating any single price as universal. Instead of relying on fixed price tables, use the framework below to compare stones with similar shape, size, report details, measurements, and visual evidence at the time you are actually ready to buy.
Origin disclosure note: Laboratory-grown diamonds and natural diamonds are both diamonds, but they have different origins. A loose lab-grown diamond should be clearly identified as laboratory-grown and should not be presented as a mined diamond. Diamond simulants are a separate category and should not be confused with laboratory-grown diamonds.
| What You’re Comparing | What to Check | Why It Affects Price |
|---|---|---|
| Carat size | Exact weight and millimeter spread | Near 1.00, 1.50, and 2.00 ct, small weight changes can raise price noticeably |
| Cut and proportions | Table, depth, angles, symmetry, video | Better light return and face-up appearance can justify a higher price |
| Shape | Bow-tie, shape profile, facet pattern, dark areas | Fancy shapes vary more visually, even with similar grades |
| Color and clarity | Visible tint and eye-clean appearance | Higher grades only add value if the difference can be seen or matters for the design |
| Report and disclosure | Verified report, treatment notes where available, matching stone details | Clear documentation reduces comparison risk and supports fair pricing |
| Total project fit | Setting style, measurements, seller support | A cheap loose stone may cost more later if it does not fit the design well |
Quick Questions Before You Read
Q: Is the cheapest lab-grown diamond usually the strongest value?
Not always. It can be a good buy if the tradeoff is sensible, but weak reports, poor visuals, or bad proportions can make it risky.
Q: Should I focus more on carat weight or millimeter size?
Check both. A slightly lighter diamond with strong spread can look nearly the same size while costing less.
Q: Does a grading report guarantee the diamond will look beautiful?
No. A report helps document details, but images, video, proportions, and eye-clean appearance still matter.
Q: Are CVD and HPHT prices easy to compare?
Only if the specific stone’s appearance, disclosure, report, and performance are reviewed together.
Why Similar Loose Lab-Grown Diamonds Can Have Different Prices
Two 2.00 ct oval lab-grown diamonds with grading reports can both be listed as F color and VS1 clarity, yet one may cost noticeably more than the other. That difference is not random, and it is not always a sign that one seller is overcharging. The loose lab-grown diamond price usually reflects details that are not fully captured in the first line of a product listing.
The visible specs give you a starting point, but they do not tell the whole story. Exact measurements, cut precision, face-up appearance, report type, growth method, inventory source, seller channel, and margin can all affect the final number. Lab-grown diamond pricing works more like a layered comparison than a simple grade-based formula.
In practical buying, this is where many comparisons become misleading. If one listing includes clear photos, a full report, and a measured stone profile while another relies on broad grades and marketing language, the lower price may simply be compensating for more uncertainty. Buyers should separate what is documented from what is only implied.
This is why buyers often ask why lab diamonds cost different amounts when the listings look almost identical. The better question is not “Which one is cheapest?” It is “What am I getting, and what am I giving up, at this price?”
The Short Answer: Price Reflects More Than the 4Cs
Carat, color, clarity, and cut still matter, but they are not equal in how they affect value. Carat weight often drives the first price impression, while cut quality usually drives how impressive the diamond looks in real life. Color and clarity can matter a lot in some stones and much less in others, depending on shape, size, setting metal, and how visible the differences are to the eye.
Beyond the 4Cs, the price can reflect shape demand, exact millimeter spread, length-to-width ratio, polish and symmetry, documentation, visual transparency, and whether the stone has strong images or video available. A diamond with better documentation and clearer visual proof may cost more because it carries less buying uncertainty.
The seller’s sourcing model also matters. A stone sold through a low-service listing platform may be priced differently from a stone offered with more review, communication, setting guidance, or custom design support. The extra cost is not automatically worth paying, but it should be evaluated instead of ignored.
The Buyer Mistake: Comparing Only the Headline Specs
The most common mistake is comparing only carat, color, and clarity, then assuming the lower price is the better value. That shortcut can work only when the stones are genuinely comparable, and many are not.
A cheaper diamond may have weaker cut precision, less attractive proportions, a smaller face-up spread, a visible bow-tie in an elongated shape, or video that does not clearly show how the stone performs. It may also have unclear availability, limited documentation, or measurements that make it harder to fit into the setting you want. Those details can explain a lower price more honestly than the headline specs do.
The reverse can also be true. A higher price is not justified simply because a listing looks more polished or uses stronger language. If the report, measurements, proportions, and visual media do not support the premium, the buyer should be cautious. Price only becomes meaningful after the comparison is controlled.
The Fair Comparison Method
Start by comparing stones within the same shape and a narrow carat range. Then match the report type as closely as possible, review the exact measurements, and check whether the face-up size supports the carat weight. A 2.00 ct diamond that carries extra depth may not look meaningfully larger than a slightly lighter stone with better spread.
Next, compare cut-related indicators: cut grade where available, proportions, polish, symmetry, and the actual look of the diamond in photos or video. For fancy shapes, pay close attention to outline, dark zones, bow-tie effect, and length-to-width ratio, because the report may not tell the full visual story.
Only after that should you judge the price. A fair comparison usually follows this sequence: carat range, shape, report, measurements, cut indicators, color and clarity range, visual media, setting compatibility, and total project cost. If one stone is cheaper but fails several of those checks, the lower price may be a warning rather than a win.
What This Means in a Real Purchase
Maya is comparing two 1.80 ct round lab-grown diamonds for a solitaire ring. Both appear near-colorless, both have similar clarity grades, and both fall within her budget. One is less expensive, but the listing provides limited cut information and no clear video. The other costs more, but it has stronger cut details, verified measurements, and visual media that shows balanced brightness.
If Maya chooses only by price, the cheaper stone looks tempting. But for a solitaire, the center diamond is fully exposed, so cut and visual performance carry more weight than a small savings. In this case, the stronger-value stone may be the more expensive one because it reduces the risk of buying a diamond that looks dull, small for its weight, or poorly matched to the design.
Carat Weight, Measurements, and the Price Jumps Buyers Notice
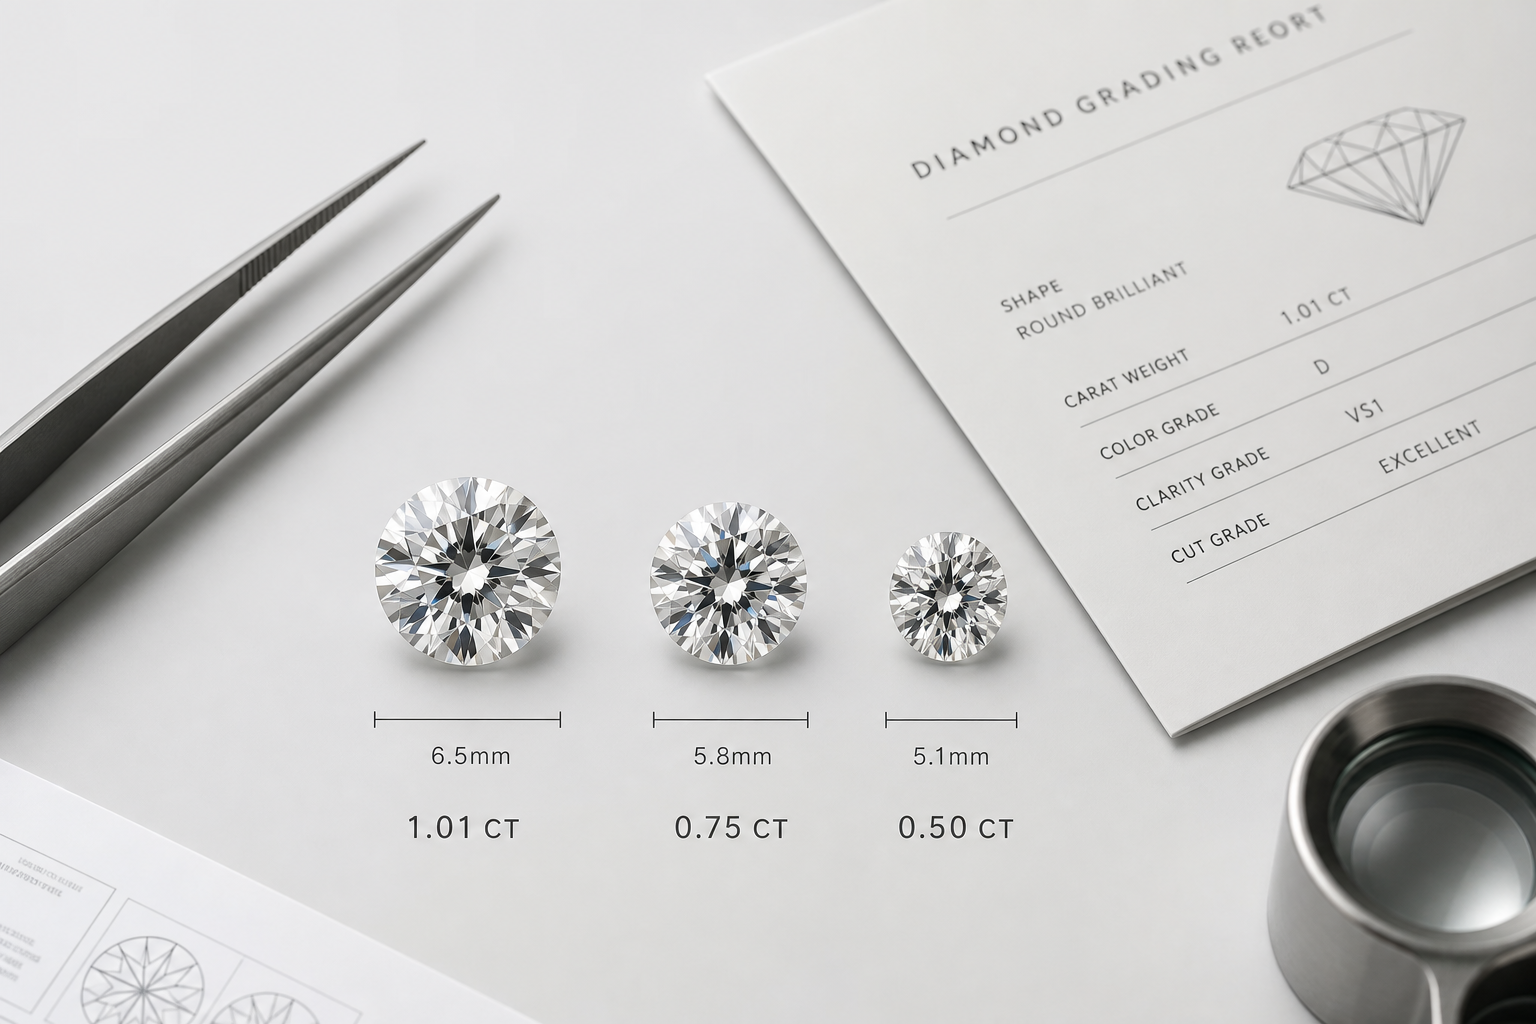
Carat affects price because it measures weight, and larger diamonds generally require more material and are compared against higher-demand size categories. But carat does not tell you how large the diamond will look once it is set. For buyers trying to judge loose lab diamond value, the more useful comparison is diamond measurements vs carat: how much visible size are you getting for the weight you are paying for?
This matters because two diamonds with the same carat weight can have different millimeter dimensions. One may spread well across the top and look its weight. Another may carry more weight in depth, which can increase carat without giving the buyer much visible size. That is where lab-grown diamond carat price becomes more than a simple bigger-costs-more equation.
Why Price Often Rises at Popular Size Milestones
Buyers tend to focus on familiar size points: 1.00 ct, 1.50 ct, 2.00 ct, and 3.00 ct. These milestones are easy to search, easy to compare, and often feel psychologically important. A diamond that crosses one of these thresholds may attract more attention than a similar stone just below it.
That does not mean every 2.00 ct diamond automatically commands a sharp premium over every 1.95 ct diamond. Pricing depends on the full stone. But buyers should know that milestone sizes can influence demand, and demand can influence price. If your goal is value, looking slightly under a milestone can sometimes open stronger options without a visible sacrifice.
For example, a well-cut 1.90 ct or 1.95 ct diamond may look nearly identical in size to a 2.00 ct stone once set, especially if the measurements are close. If the 2.00 ct option costs more mainly because it reaches the milestone, the smaller stone may be the smarter purchase.
Why Two Stones with the Same Carat Can Face Up Differently
A 2.00 ct diamond can look larger or smaller depending on shape, proportions, and face-up dimensions. Round diamonds are usually compared by diameter, while ovals, emeralds, cushions, radiants, pears, and marquise cuts need length and width considered together. A long oval may look larger from across the room than a deeper cushion of the same weight, even though both are listed at 2.00 ct.
The key risk is paying for weight that does not improve appearance. Extra depth can make a diamond heavier without making it look larger from the top. In some cases, added depth may also affect light performance, though that depends on the full proportion set rather than depth alone.
For a ring buyer, millimeter size often matters more than the carat number people talk about. The setting is built around physical dimensions, not just weight. A diamond that looks strong on paper can still feel underwhelming if its spread is poor for its carat.
Useful Measurement Context to Include
Measurement comparisons are most useful when they come from the actual grading report or seller-provided specifications for the exact diamond, not from a generic online chart alone. Approximate size charts can help you notice when a stone looks unusually deep or unusually spread for its weight, but they should not be treated as a universal standard for beauty or value.
Use measurements as a screening tool, not a pass-fail rule. If a round diamond measures smaller than expected for its carat, ask why. It may be carrying weight in depth, or the proportions may be less efficient for visible size. If a stone measures unusually large for its weight, review the cut and visual performance carefully, because spread alone does not guarantee beauty.
Fancy shapes need a different type of judgment. With ovals, pears, emeralds, radiants, cushions, and marquise cuts, length-to-width ratio affects both style and perceived size. A wider cushion can feel substantial but less elongated; a narrow oval can look larger on the finger but may show a stronger bow-tie or feel too stretched if the ratio is extreme.
Buyer Verification Checklist
Before paying more for carat weight, compare the stone’s carat with its millimeter dimensions, depth percentage, table percentage, and visual media. The practical question is simple: is the extra weight improving the diamond’s appearance, or is it hidden in the body of the stone?
Check whether the measurements make sense for the intended setting. A stone that looks attractive loose may still need specific prong placement, basket dimensions, or band proportions. If you are choosing between two similar weights, the stone with better spread, stronger cut information, and clearer visual proof often deserves more consideration than the stone with the slightly higher carat number.
Shape Demand and Cutting Yield: Why Some Lab Diamond Shapes Cost More
Shape affects price because it changes demand, cutting decisions, visual spread, and availability. The lab-grown diamond shapes price conversation is not as simple as “round costs more” or “fancy shapes are cheaper.” A shape may cost more because buyers want it, because strong examples are harder to find, or because the cutting has to meet tighter visual expectations.
Round, oval, emerald, radiant, pear, cushion, and marquise diamonds are not priced only by style preference. They use rough differently, show size differently, and reveal imperfections differently. A lower-priced shape is not automatically a better deal if the individual stone has poor symmetry, awkward proportions, or a look that does not suit the setting.
Round Diamonds: Strong Demand and Cut Expectations
Round brilliant diamonds are often judged more closely for cut quality because buyers expect strong brightness, fire, and balance. This can influence round lab-grown diamond price when a stone has excellent cut information, attractive proportions, and reliable visual performance.
The advantage of rounds is that they are easier to compare than many fancy shapes. Cut grades and proportion data are more standardized, which gives buyers a clearer screening path. The downside is that strong comparison data can also make weaker stones easier to spot. A round diamond with a tempting price but poor proportions may not be a bargain; it may simply be priced according to its limitations.
If visual performance is the priority, round diamonds often reward careful selection. A slightly smaller round with better cut precision can look more alive than a heavier one with compromised proportions, especially in a solitaire where the diamond’s light return is the main visual feature.
Elongated Shapes: Visual Size, Demand, and Shape Quality
Oval, pear, marquise, and elongated cushion diamonds often appeal to buyers because they can look larger face-up than some other shapes of the same carat weight. That visible spread is part of their appeal, and it can support demand. Oval lab-grown diamond price, in particular, can reflect both popularity and the difficulty of finding stones with a pleasing outline and controlled bow-tie effect.
The tradeoff is that elongated shapes require more visual judgment. A stone can have strong color and clarity grades but still look uneven if the outline is lopsided, the ends are poorly shaped, or the dark bow-tie across the center is distracting. Some bow-tie is common in elongated brilliant cuts, but severity matters. If it dominates the stone in normal viewing, a lower price may not compensate for the visual compromise.
Length-to-width ratio also changes the value equation. A softly elongated oval may feel classic and balanced, while a very narrow oval may look larger but less harmonious in some settings. A marquise can deliver impressive finger coverage, but the points and symmetry need careful review. A pear shape can be elegant, but shoulder balance and point alignment matter more than many first-time buyers expect.
Step Cuts and Radiants: Different Clarity and Pattern Expectations
Emerald and Asscher cuts have open, mirror-like facets that make clarity characteristics and growth features easier to notice. This does not mean every step cut needs the highest clarity grade, but it does mean the buyer should be stricter about visible inclusions, transparency, and facet pattern. A lower-clarity emerald cut may be priced attractively, yet still be the wrong choice if the inclusion sits in an obvious location.
Radiants and cushions behave differently. Their brilliant-style faceting can hide some clarity features better, but they introduce other judgment points: crushed-ice appearance, dark zones, uneven sparkle, and outline shape. A radiant with strong measurements and lively patterning may justify a higher price over another radiant with the same grades but a less attractive face-up look.
This is where shape affects selection as much as price. The right value grade for one shape may be a poor target for another. A VS2 clarity may be more than enough in many brilliant cuts, while a step cut of the same size may need closer review before the buyer can feel confident.
Stone-to-Setting Fit Check
Shape should be evaluated with the setting in mind, not as an isolated listing detail. An elongated diamond may look impressive in a solitaire, but it may require different prong placement, a longer basket, adjusted halo proportions, or a band width that keeps the ring visually balanced.
Before choosing the stone, confirm the exact measurements and how they will work in the intended design. A diamond that appears to offer excellent size for the price can become less practical if the setting needs major adjustment or if the proportions do not suit the wearer’s hand. The better purchase is the stone that fits the design as well as the budget.
For custom design, trust comes from matching the stone to the setting, budget, and wearer’s daily use—not from choosing grades in isolation. Before finalizing a loose diamond, buyers should confirm how its length, width, depth, girdle, and corner or point structure will be handled in the setting, especially for elongated, step-cut, and pointed shapes.
Cut Quality and Visual Performance: The Price Factor Buyers Should Not Ignore
Cut quality is one of the most important reasons two loose lab-grown diamonds with similar specs can be priced differently. Carat, color, and clarity may look comparable in a product grid, but lab-grown diamond cut quality determines how well the stone returns light, how balanced it looks face-up, and whether the weight is being used efficiently.
This is where buyers can make or lose real value. A diamond with stronger cut precision may cost more because it looks brighter, more balanced, and more lively in normal wear. A cheaper stone may still have attractive grades on paper, but if the proportions are weak or the stone has dark areas, shallow sparkle, or excess depth, the lower price may reflect a visible compromise.
Why Better Cut Can Cost More Even at the Same Carat
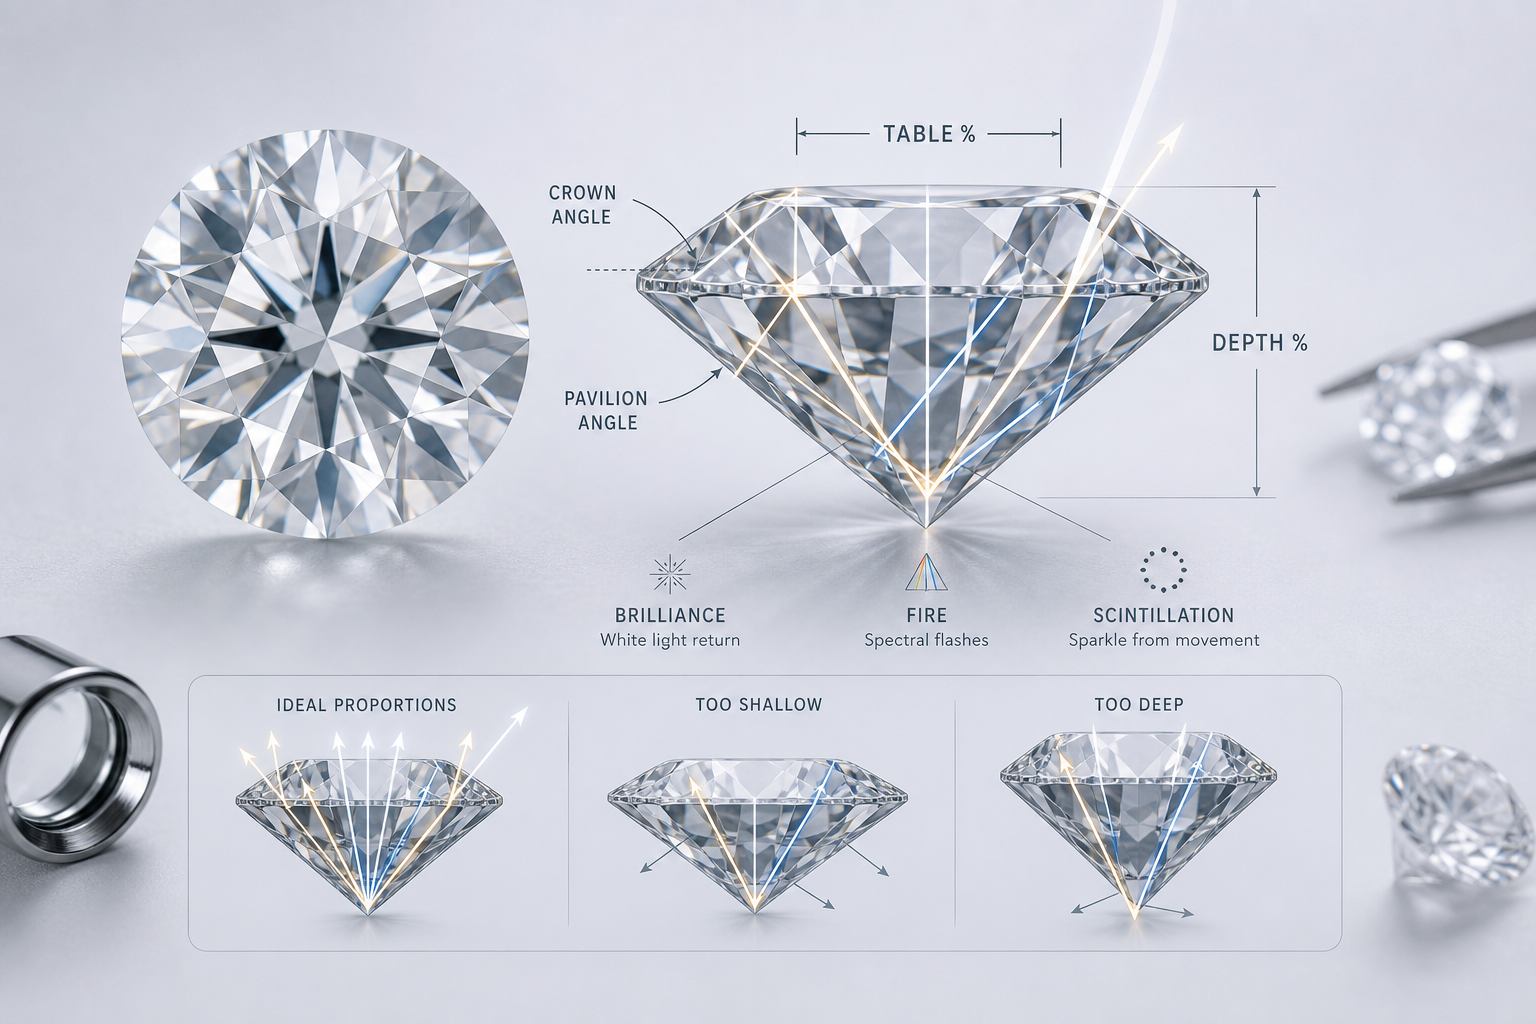
A better-cut lab-grown diamond often makes better use of its weight. Two stones can both weigh 2.00 ct, but one may carry more of that weight in the right places, with a balanced table, depth, crown, and pavilion. The other may hide weight in excess depth, which can make it look smaller from the top even though the carat number is the same.
For buyers trying to find a strong-value lab-grown diamond, this matters more than chasing the highest color or clarity grade. A bright, well-proportioned F VS2 diamond may look more appealing than a D VVS2 diamond with weaker visual performance. Paying more for cut can be justified when the difference is visible in brightness, contrast, symmetry, and face-up size. Paying more only for a grade that does not improve the look of the finished ring is often less useful.
Cut also affects risk. Poorly chosen proportions can create leakage, dull areas, or a stone that looks flat in certain lighting. These issues are not always obvious from the report alone, especially when the listing uses limited photos or no video. A small price difference becomes meaningful if one diamond gives you stronger visual evidence and the other asks you to guess.
Round Brilliant Proportion Review
Round brilliant diamonds are easier to screen than many fancy shapes because cut quality is more commonly described through report data and proportion measurements. A grading report may include a cut grade, and the listed table, depth, crown, and pavilion information can help buyers identify stones that deserve closer review.
- Table percentage: review whether the table appears balanced with the rest of the stone’s proportions.
- Depth percentage: check whether depth supports both visible size and attractive light behavior.
- Crown angle: consider how crown structure may influence fire, brightness, and overall appearance.
- Pavilion angle: review it together with crown angle and depth rather than judging it alone.
These details should be interpreted together, not one number at a time. A diamond does not become excellent because one measurement looks attractive, and it does not automatically become poor because one number sits outside a buyer’s preferred range. The real question is whether the full combination produces a bright, balanced stone with good spread and no obvious performance issues.
When you compare lab-grown diamonds, use proportion details as a filter, then move to images and video. A round diamond with solid proportions, strong symmetry, good polish, and clear visual media is usually a safer value than a lower-priced stone with missing cut details or an unusually deep profile.
Fancy Shape Cut Review: What the Report May Not Fully Tell You
Fancy shapes need more visual judgment because cut information is often less standardized across listings. Ovals, pears, cushions, emerald cuts, radiants, marquise cuts, and Asschers may not be judged with the same direct cut-grade clarity that buyers often expect from round brilliants. That makes the report useful, but incomplete.
For elongated brilliant shapes such as oval, pear, marquise, and elongated cushion, the buyer should look closely at outline, symmetry, length-to-width ratio, and bow-tie effect. A mild bow-tie can be normal, and best color grade choices should be considered alongside face-up appearance, but a heavy dark band across the center can weaken the look of the stone and should affect how you judge price. A cheaper oval is not automatically a better deal if the outline is uneven or the center looks dark in video.
For step cuts such as emerald and Asscher, the priorities shift. These shapes do not hide visual issues the same way brilliant cuts can. The facet pattern should look clean, orderly, and balanced, and the stone should not appear glassy, dull, or visibly interrupted by inclusions or growth features. A higher price may be reasonable when the stone has a crisp pattern, pleasing symmetry, and stronger visual transparency.
Radiants and cushions sit in a different category. They can hide some clarity features well, but their sparkle patterns vary widely. Some look lively and evenly distributed; others show crushed, uneven, or dark areas. The price should be judged against the actual pattern you see, not only the grades listed beside the stone.
Report and Visual Review Check
A grading report should be part of the decision, not the entire decision. Check the report for measurements, table, depth, polish, symmetry, cut details where available, and any notes that may affect appearance. Then compare that information with high-quality photos and a 360-degree video of the actual diamond when available.
The strongest buying decision comes from matching paperwork with visual evidence. If a stone has attractive specs but poor images, no video, or unclear proportions, the discount may be hiding uncertainty. If another stone costs slightly more but gives you stronger cut data, clear media, and a more convincing face-up appearance, the higher price may be buying reduced risk rather than just a nicer listing.
At NUVU, the grading report is treated as a starting point for comparison, not the final answer. The report helps narrow the field, but cut behavior, proportions, and actual appearance determine whether the diamond makes sense for the intended ring or jewelry design.
Color and Clarity Grades: When Paying More Makes Sense and When It May Not
Color and clarity influence loose lab-grown diamond pricing, but they do not always affect beauty in proportion to their cost. A higher grade may be worth paying for in certain stones, settings, and sizes. In other cases, the extra money produces little visible difference once the diamond is set and worn.
The key is not to choose the lowest grade possible. The smarter approach is to understand where grade improvements are visible and where they are mostly psychological. Lab-grown diamond color clarity price differences can be meaningful, but they should be judged against the stone’s shape, size, setting metal, and actual appearance.
Color: Why One Grade Can Affect Price More Than Appearance
Color grades from D through F are considered colorless, while G and H are commonly treated as near-colorless in many buying situations. D and E can command higher prices because they sit at the top of the grading scale, but the visible difference between E, F, and G may be small to many buyers, especially once the diamond is mounted.
The tradeoff becomes practical with comparisons such as an F vs G lab-grown diamond. If both stones are well cut and visually bright, a G color may offer better value in a yellow gold or rose gold setting because the warmer metal can make tiny color differences less noticeable. In platinum or white gold, some buyers may prefer F or better, particularly for larger stones or step cuts where body color can be easier to detect.
H color can also make sense for buyers who prioritize size, cut, or budget, but it should be evaluated with more care in white metal settings and in larger diamonds. I color may be acceptable for some designs, especially warm-toned settings, but it is less forgiving for buyers who are highly color-sensitive. The mistake is assuming that one color grade is always the right value point. The setting and the wearer’s sensitivity change the answer.
Clarity: Why Eye-Clean Matters More Than Grade Alone
Clarity grades describe the presence and visibility of inclusions or internal features under grading conditions. They do not automatically tell you whether the diamond will look clean to the naked eye. For many buyers, “eye-clean” is the more useful standard than chasing the highest clarity grade available.
A VS1 vs VS2 lab-grown diamond comparison is a good example. A clean-looking VS2 may be the better purchase if the inclusions are small, light, off to the side, or hidden by the facet pattern. Paying more for VS1 can make sense when the stone is larger, the shape is less forgiving, or the VS2 inclusion sits in a visible location. It makes less sense when the difference cannot be seen without magnification.
VVS grades can be appealing for buyers who want a very high clarity grade for personal preference or symbolic reasons, but they are not always the most useful use of budget. If the goal is visual beauty in an engagement ring, the extra money may be better spent on cut quality, stronger face-up appearance, or a more suitable shape.
Shape-Specific Color and Clarity Sensitivity
Shape changes how much color and clarity matter. Emerald and Asscher cuts have broad, open facets that act almost like windows into the stone. They can show inclusions, growth features, and body color more readily than many brilliant-cut shapes. For these cuts, spending more on clarity or color may be justified, especially in larger carat weights.
Round, oval, pear, marquise, cushion, and radiant cuts use brilliant-style faceting that can disguise some clarity features through sparkle and facet movement. This does not mean clarity stops mattering, but it often gives buyers more flexibility. An eye-clean VS2 may look excellent in a brilliant cut, while the same grade in an emerald cut may require closer review.
Size also changes the recommendation. A 1.00 ct stone can be more forgiving than a 3.00 ct stone because larger diamonds create more surface area for color and inclusions to be noticed. As carat weight rises, buyers should become more cautious about stretching too far down in color or clarity unless they have strong visual confirmation.
What to Check Before You Decide
Before paying more for a higher color or clarity grade, review the diamond’s actual images and video. Magnified photos help identify inclusion type and location, but they can also make harmless features look more dramatic than they will appear in real life. Normal-view images and video are just as important because they show whether the issue is visible without magnification.
Ask whether the diamond is eye-clean under normal viewing conditions, especially if you are considering VS2 or SI1. If the seller makes an important claim about eye-clean appearance, treatment disclosure, or visual quality, get it confirmed in writing. A lower grade can be a smart value choice when the compromise is invisible in normal wear. It becomes a poor tradeoff when the feature distracts from the stone or conflicts with the setting you plan to use.
Certification, Report Type, and Documentation: Why Paperwork Affects Price
Documentation affects price because it affects confidence. Loose lab-grown diamonds with grading reports give buyers a documented basis for comparison, which is especially important when stones look similar online. A report does not make a diamond beautiful by itself, but it reduces the risk of relying only on a seller’s description.
This is why two diamonds with similar listed specs may be priced differently if one has more recognized documentation, clearer report details, or easier verification. Buyers are often willing to pay more when the paperwork makes the stone easier to confirm and compare. The premium is not only for the paper; it is for reduced uncertainty.
Documentation boundary: A grading report is best understood as a record of the laboratory’s observations and grading results for a submitted stone. It should not be treated as a promise of market value, a guarantee that the stone will be visually preferred by every buyer, or proof that a seller’s price is competitive. The report is strongest when it is matched with the exact stone, current images or video, and clear seller terms.
Report interpretation note: A grading report helps document key characteristics, but it should not be treated as a guarantee of beauty, value, or sourcing ethics. Buyers should read report details alongside visual evidence, measurements, seller documentation, and the intended jewelry use.
What a Grading Report Helps Confirm
A lab-grown diamond grading report usually helps confirm the stone’s carat weight, measurements, color grade, clarity grade, polish, symmetry, fluorescence, and laboratory-grown identification. For round brilliants, the report may also include cut grade and proportion details that help buyers evaluate performance. Some reports include an inscription number that can be matched to the diamond when available.
Measurements are especially important because they connect the report to the actual physical stone. A report showing carat weight without dimensions would be far less useful for price comparison. For a loose diamond, millimeter size, depth, and table help buyers judge whether the stone is using its weight efficiently and whether it is likely to fit the intended setting.
The report also creates a common language between buyer and seller. Instead of relying on vague phrases like “high quality” or “very clean,” the buyer can compare documented grades and proportions. That does not eliminate judgment, but it makes the conversation more precise.
One limitation worth remembering is that paperwork does not settle every buying question. A report can confirm what the stone is graded as, but the buyer still needs to judge whether those details support the intended metal color, ring style, and wearing preferences. That is especially important when the setting is custom or when the stone will be viewed in different lighting conditions.
Why Report Type Can Influence Price
Report type can influence price because the market places different levels of confidence in different grading documents. An IGI GIA lab-grown diamond report comparison should be handled carefully: the point is not that one report automatically makes a stone better, but that widely recognized grading labs can make a diamond easier for buyers to understand, verify, and compare.
A diamond with a report from a commonly recognized laboratory may cost more than a similar stone with limited paperwork or a less familiar document. That price difference reflects buyer trust, resale communication, and ease of verification, not a guarantee that the diamond will look better in person. A poorly cut diamond with a recognized report is still a poorly cut diamond.
For online buyers, documentation has extra value because the stone is being judged before it is seen in person. If the report is missing, vague, or difficult to verify, the price should usually be lower to reflect that added uncertainty. If the seller asks a premium price without clear documentation, the buyer should slow down.
When a grading report is available, buyers should verify the report details through the issuing laboratory’s official report-check tool where available, then compare those details with the listing, images, video, and measurements for the exact stone.
What a Report Does Not Prove
A report does not prove that the diamond is visually beautiful. It may not show bow-tie severity in an oval, pear, or marquise. It may not reveal whether an emerald cut has a pleasing facet pattern or whether a radiant has uneven dark zones. It does not show how the diamond performs in every lighting environment.
A report also does not prove that the price is competitive. Two diamonds can have similar reports and still differ in value because one has better visual performance, better measurements, stronger media, or more suitable proportions for the intended setting. The report confirms certain facts; it does not decide whether the stone is the right buy.
Setting compatibility is another limit. A report may show dimensions, but it will not tell you whether the stone works well with a specific prong style, halo design, band width, or custom setting plan. For custom jewelry, the report should be reviewed alongside the design requirements, not separately from them.
How to Verify This Before Buying
Start by matching the report number in the seller listing to the grading document. If an inscription is listed, confirm that it corresponds with the report details when possible. Use the grading lab’s online verification tool if available, and check that the carat weight, measurements, color, clarity, and shape match the stone being offered.
Then compare the report with actual images or video of the diamond. The report may tell you what the diamond is graded as, but the media helps show how it looks. If the listing has no clear visuals, unclear availability, or inconsistent details, the paperwork alone is not enough to justify confidence.
Before purchasing, confirm the exact stone is available, the report belongs to that stone, and the measurements work for your intended setting. Documentation should support the buying decision, not replace it.
Growth Method, Post-Growth Treatment, and Production Source
Growth method is not usually the first factor a buyer should use to judge price, but it can explain why two stones with similar grades are not priced the same. A CVD lab-grown diamond and an HPHT lab-grown diamond are created through different production processes, and those differences can affect supply, color availability, visual character, and buyer confidence in certain cases.
The mistake is assuming the method label alone tells you whether a stone is better. It does not. A well-cut, transparent CVD stone can be a stronger buy than a poorly selected HPHT stone, and the reverse can also be true. The right question is not simply CVD vs HPHT lab diamonds price, but whether the method has any visible or documented effect on the specific diamond you are considering.
Disclosure note: Growth method and post-growth treatment should be read as disclosure details, not as automatic quality rankings. If a seller uses CVD, HPHT, untreated, or treatment language as a reason for a price premium, ask what the report or visual review actually shows. The method may be relevant, but it should not override cut, transparency, measurements, and overall appearance.
Why Growth Method Can Appear in Price Discussions
CVD and HPHT are different ways of growing diamond crystal. CVD growth typically builds diamond layer by layer in a controlled chamber, while HPHT growth uses high pressure and high temperature conditions closer to the environment in which natural diamonds form. For a buyer, the technical process matters only when it influences the stone’s appearance, grading, availability, or disclosure.
In some listings, growth method may be connected to color tone, transparency, or production consistency. Some buyers also have a preference for one method because they have read that certain HPHT diamonds can produce high color grades, or that certain CVD diamonds may need additional treatment to improve color. Those generalizations are too broad to use as buying rules. The individual diamond still has to be judged by its report, proportions, video, and face-up appearance.
Price differences tied to growth method are usually secondary to more visible factors such as cut quality, measurements, and grade balance. If two stones are otherwise comparable and one costs more only because of the method label, the buyer should ask what practical benefit that method creates. If the answer is not visible, documented, or relevant to the setting, it may not be worth paying extra for.
Post-Growth Treatment and Buyer Interpretation
Some lab-grown diamonds may undergo post-growth treatment to improve color or overall appearance. This does not automatically make the diamond a poor choice. In lab-grown diamond pricing, the more important issue is whether treatment is disclosed clearly and whether the final stone looks good, grades properly, and fits the buyer’s expectations.
A treated stone can still be attractive and fairly priced if the documentation is transparent. The risk comes from unclear listings, vague seller language, or a price that seems low without enough explanation. If treatment information is available on the grading report, it should be read alongside the stone’s color grade, visual media, and seller description. A lower price may be reasonable if the buyer understands what is being purchased.
Buyers should avoid treating “untreated” as an automatic upgrade unless the rest of the diamond supports the premium. Paying more for an untreated stone with weaker cut, less appealing proportions, or poor visual performance is not a better value simply because the treatment box looks cleaner.
When growth method or post-growth treatment is relevant, buyers should look for clear disclosure in the grading report or seller documentation. The absence, presence, or wording of treatment information should not be guessed from price alone.
Production Consistency, Matching, and Availability
Production source matters most when a buyer needs consistency rather than just one attractive center stone. A solitaire engagement ring may only require one well-chosen diamond. Earrings, side stones, three-stone rings, tennis bracelets, and custom layouts can be more sensitive to matching, calibrated sizes, color consistency, and predictable availability.
This is where production consistency can influence price. A supplier that can provide well-matched pairs, repeatable sizes, or consistent batches may charge more than a source offering isolated stones at lower prices. For a single loose diamond, that premium may not matter. For a pair of oval earrings or a custom band requiring multiple stones, inconsistent supply can create design problems that cost more to solve later.
Availability also affects pricing. If a specific size, shape, color, and clarity combination is abundant, sellers may compete more aggressively. If the request is narrow, such as a matched pair with close measurements and similar visual character, the price may reflect the difficulty of finding stones that work together, not just the grades printed on the reports.
Sustainability and sourcing claims should also be handled carefully. A production method or inventory source does not automatically prove a lower-impact or more responsible supply path. Buyers who care about those issues should look for documentation, clear disclosure, and a willingness from the seller to explain what is actually known versus what is only suggested by marketing language.
Environmental and sustainability claims should be specific, documented, and limited to what can be substantiated. Broad green language is less useful than clear information about production practices, energy context, material handling, disclosure standards, and what the seller can actually support for the diamond or jewelry being discussed.
Buyer Verification Checklist
- Check whether the grading report discloses growth method or treatment information.
- Ask the seller how growth method or treatment details are documented, especially if the listing makes those details part of the price.
- Compare the stone’s actual appearance instead of judging only by CVD or HPHT terminology.
- Review video for transparency, color tone, and any visual characteristics that may not be obvious from the grade alone.
- For pairs or multi-stone jewelry, confirm matching standards for size, color, clarity, shape, and overall appearance.
Inventory Source, Seller Channel, and Supplier Margin
The final price of a loose lab-grown diamond is not determined only by the diamond itself. It also reflects how the stone reaches the buyer. A diamond may pass through a producer, cutter, grading lab, supplier, platform, retailer, or custom jeweler before it is sold. Each step can add cost, service, selection value, or margin.
This does not mean every higher-priced seller is overcharging or every lower-priced seller is a better source. A lower-margin seller may offer a sharper price with less guidance. A higher-service seller may include more review, communication, custom setting advice, or documentation support. The buyer’s job is to understand what is included in the price instead of assuming all sellers are offering the same experience.
Policy and service boundary: Seller policies can materially affect the total value of a loose diamond purchase, but they should be confirmed directly with the seller before payment. Do not assume return terms, resizing options, exchange rules, warranty coverage, shipping timing, or custom-order flexibility from general marketing language.
Why the Same Stone May Appear Through Different Sellers
Some loose lab diamonds are listed through shared supplier feeds or inventory networks. This means the same stone, with the same report number, may appear on more than one website at different prices. The difference can come from each seller’s margin, business model, presentation quality, inspection process, or level of support.
This is one reason a loose lab diamond supplier price is not always visible to the final buyer. The consumer sees the retail listing, not every cost and markup behind it. Two sellers may be working from the same upstream inventory but offering very different buying experiences. One may simply pass along the listing details; another may help review the report, check availability, discuss setting fit, and answer questions before purchase.
If the exact same report number appears at noticeably different prices, the lower price is worth investigating, but not blindly choosing. Confirm that the stone is actually available, that the report matches, and that the seller’s terms are clear. A cheaper listing that cannot be fulfilled, verified, or properly supported is not a real saving.
Owned Inventory vs Virtual Inventory
Owned inventory means the seller has direct control over the diamond or has already committed to holding it. This can make inspection, photography, availability confirmation, and quality control easier. It may also mean a narrower selection or a price that reflects the cost of carrying stock.
Virtual inventory means the seller lists diamonds available through supplier networks. This can give buyers access to a much wider range of carat weights, shapes, grades, and price points. The tradeoff is that availability and inspection may depend on the supplier’s response, and the seller may not have physically reviewed the diamond before it appears online.
Neither model is automatically better. Owned inventory can be useful when a buyer values inspection and certainty. Virtual inventory can be useful when a buyer wants more options or is comparing a narrow specification range. The weaker choice is any model where the seller cannot clearly explain availability, documentation, and what has or has not been reviewed.
Service Level as Part of the Price
A lab-grown diamond margin can cover more than markup. It may also support consultation, stone comparison, custom setting guidance, communication, quality checks, and post-purchase coordination. Those services can matter, especially when the loose stone is being used for an engagement ring or custom jewelry project.
The important distinction is whether service is real and useful. A higher price is easier to justify when the seller helps reduce decision risk: confirming the report, reviewing proportions, checking visual media, explaining setting compatibility, and clarifying terms before purchase. A higher price with vague service language and no meaningful support deserves more scrutiny.
Wholesale lab-grown diamonds are often discussed as if they are automatically the strongest route to savings, but wholesale logic does not always translate cleanly to a single consumer purchase. In that context, a loose lab diamond buying guide helps frame why wholesale pricing may involve volume, trade relationships, payment terms, sourcing commitments, or reduced service expectations. For a one-stone buyer, the better question is whether the final package of price, documentation, support, and reliability makes sense.
In sourcing or wholesale conversations, documentation, consistency, and communication often matter as much as the headline specification. Buyers comparing multiple stones should ask how matching standards are defined, how substitutions are handled if availability changes, and which details will be confirmed before a commitment is made.
What to Confirm in Writing
- Whether the exact diamond is currently available.
- Whether the report number matches the listing and the stone being sold.
- Whether the seller has inspected the diamond or is relying on supplier-provided data.
- Whether the stone’s measurements are suitable for the intended setting.
- What photos, videos, or additional review can be provided before purchase.
- What shipping expectations apply.
- What return, exchange, or cancellation terms apply to loose stones.
- What terms apply if the diamond is part of a custom design project.
For custom work, these details are not administrative extras. They can determine whether the chosen stone actually works in the design and whether a pricing advantage survives the full purchase process.
How to Compare Loose Lab-Grown Diamond Prices Fairly
Learning how to compare lab-grown diamond prices starts with controlling the comparison. If one stone is 1.92 ct and another is 2.05 ct, one has stronger cut information, one has no video, and one is from a different report type, the lower price does not tell you much. You are not comparing equal choices.
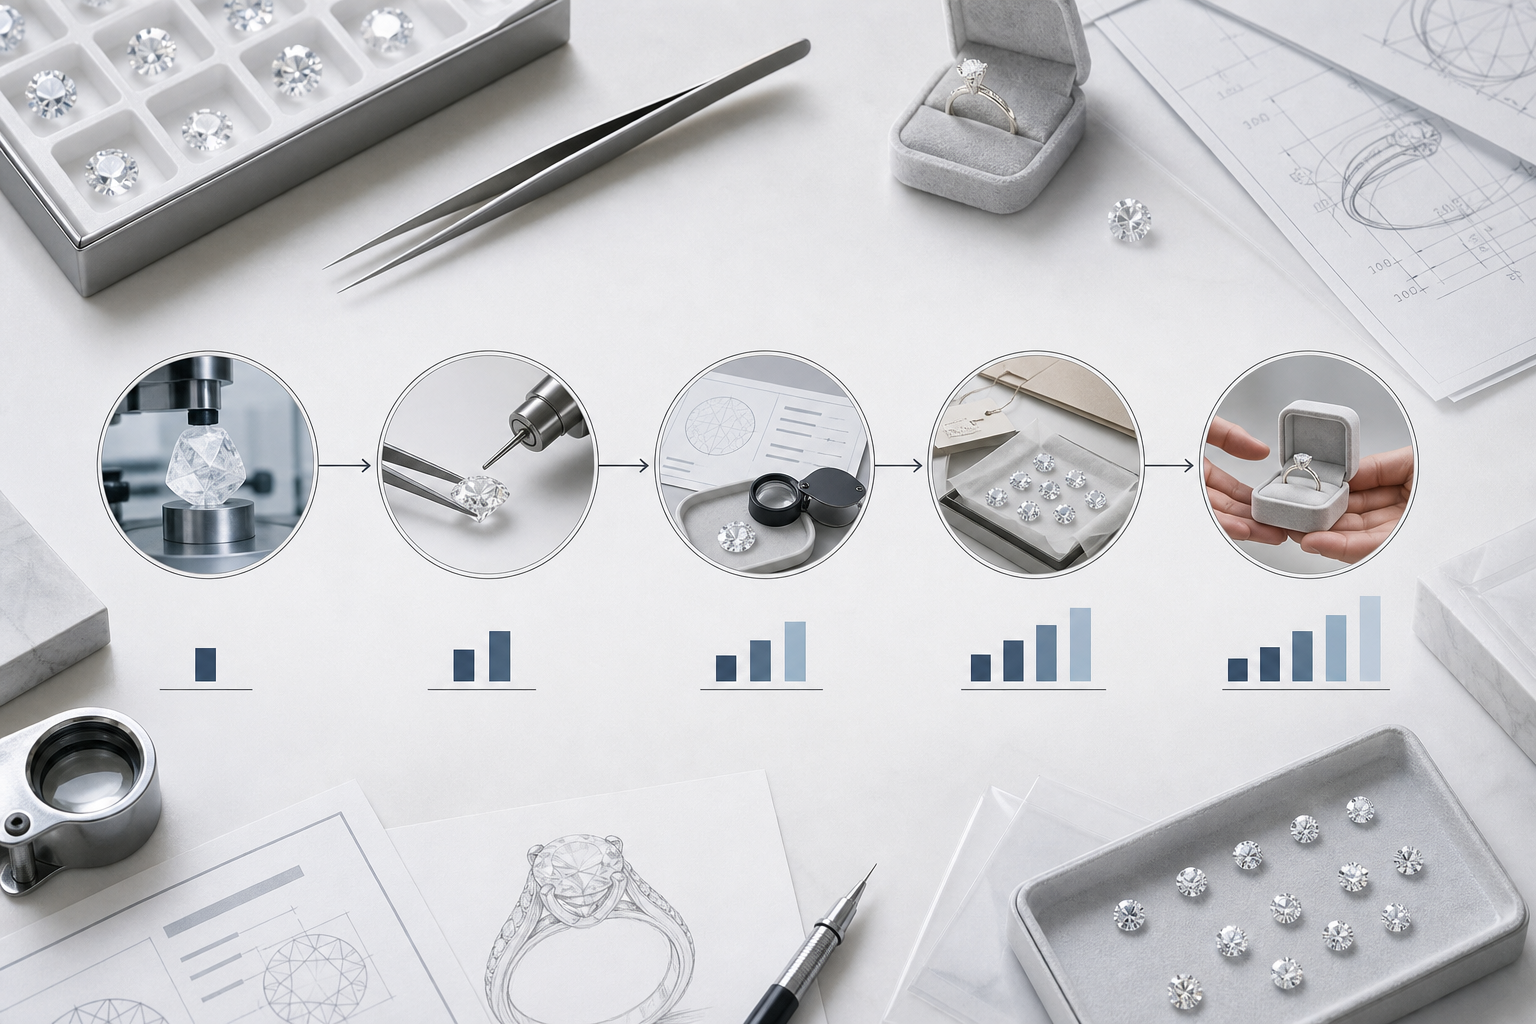
A fair comparison narrows the field first, then judges value. This keeps buyers from overreacting to one attractive price or overpaying for a grade difference that will not improve the finished ring. A strong-value loose lab diamond is usually the one with the strongest balance of appearance, documentation, dimensions, and total cost, not the one that wins a cheapest-first sort.
Price evidence check: If a seller claims a stone is “below market,” “wholesale,” or “the best price,” compare that claim against the exact details being offered: report type, report number, measurements, visual media, availability, return terms, and whether the stone has been reviewed by the seller. Without those controls, a price claim can sound persuasive while comparing unlike stones.
Prices can change with market conditions, report type, seller channel, and stone-specific details, so exact comparisons should be verified at the time of purchase. A useful price comparison is current, like-for-like, and tied to the actual stone being considered.
Build a Comparable Shortlist First
Start by building a shortlist of diamonds that are close enough to compare honestly. If the stones are too different, the price gap may be explaining the difference rather than revealing a bargain.
- Carat: stay within about 0.05 to 0.10 ct when possible.
- Shape: compare the same shape, since pricing and visual spread vary by cut style.
- Color: stay within one color grade for a fair comparison.
- Clarity: stay within one clarity grade unless one stone is clearly eye-clean and the other is not.
- Report: compare similar report types when possible.
- Measurements: check that face-up size is similar, not just carat weight.
This step prevents one of the most common buying mistakes: comparing a better-documented, better-proportioned stone against a cheaper listing that only looks similar in the product grid. If the shortlist is not comparable, the pricing conclusion will be weak.
Separate Must-Haves from Flexible Preferences
Before you buy a loose lab-grown diamond, decide which standards are non-negotiable and which are preferences. This keeps the search practical and prevents budget from being spent in the wrong place.
Must-haves should usually include eye-clean appearance, a verifiable grading report, attractive visual performance, compatible measurements, and seller terms that are clear before payment. If the stone is for a custom ring, physical fit should also be treated as a must-have, because a beautiful diamond can still be wrong for a specific setting.
Flexible preferences are where buyers can often save. D color instead of F may not be necessary for every ring. VVS clarity may not create a visible benefit over a verified eye-clean VS stone. Hitting exactly 2.00 ct may matter emotionally, but a 1.90 to 1.98 ct stone with better spread or stronger cut can sometimes be the smarter purchase. A specific supplier may also be flexible if another seller provides equal documentation, clearer visuals, and better communication.
Use a Value Ranking Instead of a Cheapest-First Sort
A cheapest-first sort is useful for finding the bottom of the market, but it is a poor way to choose a diamond. Low price should start a question, not end the decision. Ask what is missing, weaker, less documented, or less convenient compared with the next few options.
Rank each stone by the factors that affect the finished result: visual performance, report verification, measurements, grade balance, seller transparency, setting compatibility, and total project cost. Price belongs in that ranking, but it should not overpower everything else. A slightly higher-priced stone can be the better value if it removes uncertainty and looks stronger in the final design.
At NUVU, we usually encourage buyers to compare the diamond and the intended setting together, especially for custom jewelry. A stone that looks like a deal on its own may become less practical if its measurements, shape outline, or availability create problems during the setting process.
Buyer Comparison Checklist
- Report number verified.
- Carat weight and millimeter measurements compared.
- Cut, proportions, polish, and symmetry reviewed where available.
- Photos or 360-degree video reviewed for the actual stone when possible.
- Color and clarity evaluated against the setting metal and design.
- Growth method or treatment disclosure checked if available.
- Setting compatibility confirmed before purchase.
- Total cost reviewed, including the diamond, setting, taxes, shipping, and any custom work.
- Seller terms confirmed in writing before payment.
If three to five stones pass this checklist, the final decision becomes clearer. The right choice is usually the diamond with the least meaningful compromise, not necessarily the lowest listed price.
When the Cheapest Lab-Grown Diamond Is a Good Deal and When It Is a Warning Sign
A low price is not automatically a problem. Cheap lab-grown diamonds can be legitimate value buys when the lower cost comes from a clear, acceptable tradeoff: a slightly lower color grade, a less popular shape, a size just below a major carat milestone, or a seller operating with lower overhead. The risk begins when the reason for the low price is unclear.
The right question is not, “Why is this diamond cheaper?” It is, “What am I giving up, and does that matter for the ring or jewelry I’m making?” If the compromise has little visible effect once the stone is set, the lower price may be smart. If the compromise affects beauty, verification, or fit, the savings can disappear quickly.
Legitimate Reasons a Stone May Cost Less
Some affordable loose lab-grown diamonds cost less because they sit in a value-friendly part of the market. A 1.90 ct stone may be priced more attractively than a 2.00 ct stone, even if the face-up size difference is hard to notice. A G or H color diamond may cost less than an E or F color diamond while still looking bright in many settings, especially in yellow or rose gold. A VS2 diamond may offer better practical value than a VVS stone if both appear clean to the naked eye.
Shape can also create real price differences. A less in-demand shape, or a stone with a length-to-width ratio that appeals to fewer buyers, may be priced more competitively without being poor quality. Older inventory, promotional pricing, efficient sourcing, or a lower-service selling model can also reduce the listed price. These are not warning signs by themselves; they are only concerns if documentation, visuals, or availability are weak.
Lower service can be part of the tradeoff. A seller may offer a sharper price because they provide less consultation, fewer images, limited setting guidance, or a more self-service buying experience. That can work for a confident buyer who knows exactly what to verify. It is less ideal for someone choosing a center stone for a custom engagement ring, where measurements, prong placement, and setting proportions matter.
Warning Signs Behind a Very Low Price
The most serious warning sign is missing or unverifiable documentation. If the listing does not show a grading report number, if the report details do not match the listed stone, or if the seller cannot explain basic discrepancies, the low price should be treated with caution. Lab-grown diamond price differences are easier to accept when the paper trail is clear.
Another concern is weak visual information. A listing with no actual photos, no 360-degree video, unclear measurements, or generic stock imagery gives the buyer very little basis for judgment. This matters because a diamond can look fine on paper but still have poor light return, distracting dark areas, an obvious bow-tie effect, haziness, or an unattractive outline.
Poor proportions can also explain a low price. A diamond may carry attractive carat weight but hide too much of that weight in depth, making it look smaller than expected from the top. In that case, the buyer is paying for weight that does not improve the appearance of the finished piece.
Vague treatment disclosure is another reason to slow down. Post-growth treatment is not automatically a reason to reject a stone, but the information should be disclosed where available and consistent with the grading report. The same applies to availability. If a seller cannot confirm whether the exact stone is available, or pushes the buyer to act immediately without answering basic questions, the low price is doing too much of the selling.
How to Decide Whether the Lower Price Is Worth It
A lower price is worth considering when the compromise is visible only on paper and does not weaken the final result. For example, choosing G color instead of F may be sensible if the stone still faces up white to your eye and suits the metal color. Choosing VS2 instead of VS1 may also make sense if the inclusion is small, off-center, and not visible under normal viewing.
The lower price becomes less attractive when the tradeoff affects the part of the diamond you will notice every day. Weak cut, poor transparency, distracting dark zones, a visible bow-tie, or a poor face-up size can make a stone feel disappointing even if the report grades look strong. In a ring, visual performance usually matters more than squeezing one more grade out of the listing.
Setting fit can also change the decision. A bargain elongated oval may be less useful if its measurements do not suit the intended solitaire, halo, or three-stone design. A deep stone may create height issues. A very wide stone may require a different setting style than planned. If fixing the mismatch requires a redesigned setting, the “deal” may not be a deal.
What to Ask the Seller
- Is this exact stone currently available?
- Can I see the grading report and verify the report number?
- Are photos or 360-degree videos of the actual diamond available?
- Do the measurements suit my intended setting?
- Is the diamond eye-clean under normal viewing conditions?
- Are any growth method or treatment details disclosed on the report?
- What policies apply to loose stones, returns, exchanges, or custom settings?
If the seller can answer these questions clearly, a lower-priced stone may deserve serious consideration. If the answers are vague, delayed, or inconsistent, the price gap is probably not the most important issue.
Final Buying Framework: Choosing Value, Not Just the Lowest Price
The strongest loose lab-grown diamond value usually comes from balance, not from chasing the lowest number. A well-priced stone should make sense across the whole decision: shape, size, measurements, visual performance, documentation, setting fit, and seller support. If one of those pieces is missing, the price needs to be low enough to justify the added uncertainty.
This lab diamond price guide is built around one practical idea: compare diamonds the way they will actually be bought and worn. A stone is not just a carat weight and a report grade. It is a physical object that needs to look good, fit the design, and come with enough documentation for a confident decision.
The final choice also depends on the buyer’s goal. A solitaire engagement ring, a custom pendant, a matching pair of earrings, and a wholesale-style multi-stone project do not place the same weight on size, matching, documentation, and service. Value is not one universal formula; it is the best compromise for the specific use.
The Smart Order of Comparison
Start with shape and target size range. Shape affects face-up size, setting design, and price behavior, so it should be decided before comparing dozens of stones across unrelated categories. Then set realistic color and clarity ranges based on the setting metal, stone size, and your own sensitivity. For many buyers, this creates more value than insisting on top grades that may not look meaningfully different once worn.
After that, compare cut, proportions, and measurements. This is where many price differences become easier to understand. A diamond with stronger visual performance, better face-up spread, and cleaner proportions can justify a higher price even when the listed 4Cs look similar to a cheaper option.
Next, verify the report and actual visuals together. The report should match the listing, but the images or video should confirm whether the stone looks appealing in practice. Finally, confirm setting compatibility and total cost, including the mounting, design work, shipping, taxes where applicable, and any service or policy differences that affect the purchase.
Where to Spend More
Spend more when the upgrade improves what you will actually see or reduces a real buying risk. Better cut, stronger brightness, balanced proportions, attractive shape outline, and reliable visual documentation are often worth more than a higher clarity grade that adds no visible benefit.
Reliable documentation is also worth paying for when it removes uncertainty. If you plan to buy loose lab-grown diamond options with grading reports, the report should help confirm identity, measurements, and grading details. It should not be treated as proof that the stone is automatically beautiful, but it does make comparison more grounded.
Seller support can also justify a higher price when the purchase involves a custom ring or a setting that requires careful fit. At NUVU, the most useful comparison is often not “Which diamond is cheapest?” but “Which stone gives a strong result for this design, this budget, and this wearer?” That is especially true when millimeter measurements, prong style, and overall ring proportions need to work together.
Where to Save Without Sacrificing Much
One of the easiest places to save is just below a carat milestone. A 1.90 ct or 1.95 ct diamond may offer nearly the same visual presence as a 2.00 ct stone, depending on measurements, while avoiding some of the demand pressure around the round number. The same logic can apply near 1.00 ct, 1.50 ct, and 3.00 ct thresholds.
Color can also be a flexible area. D, E, and F grades are appealing, but G or H may be a better value for many buyers, especially if the stone is well cut and the setting metal is forgiving. In white metals, some buyers prefer staying in the near-colorless range; in yellow or rose gold, a slightly warmer grade may still look harmonious.
Clarity is another area where buyers often overspend. A verified eye-clean VS2 can be a smarter choice than a higher-clarity stone if the difference is not visible without magnification. In some cases, an eye-clean SI1 may be worth considering, but only with careful review of the inclusion type, location, transparency, and actual visuals.
Flexibility can reduce cost as well. If you are open to a less in-demand shape, a slightly different ratio, or a longer sourcing timeline, you may find better value without lowering the quality of the finished piece. The key is to save on factors that do not damage appearance, documentation, or setting fit.
Next Step for a Buyer
Build a shortlist of three to five comparable stones rather than sorting through endless listings. Keep the shape, size range, report type, color, clarity, and measurements close enough that the comparison is fair. Then evaluate each stone by visual performance, documentation, face-up size, setting compatibility, seller transparency, and total project cost.
If the diamond is for a custom engagement ring, confirm the loose stone’s measurements before buying it. A beautiful diamond can still be the wrong choice if it sits poorly in the intended setting, changes the ring’s proportions, or requires design adjustments the buyer did not expect.
For buyers who want a more guided process, NUVU can help compare loose lab-grown diamonds with grading reports and the finished design in mind, so the stone is judged not only by its report but by how well it supports the final piece.
Before purchase, buyers should confirm the seller’s documentation, return policy, resizing terms, custom-order terms, and after-sales support in writing. These details are part of the total value comparison, especially when a loose stone will be used in a custom setting.
For any loose lab-grown diamond purchase, the most useful trust signal is alignment between the report, the actual stone, and the final jewelry plan. Before a buyer commits, the report details, millimeter measurements, growth or treatment disclosures where available, and visual media should all point to the same stone and support the same design decision.
FAQ
Why are two lab-grown diamonds with the same carat, color, and clarity different prices?
Because those listed specs do not show the whole diamond. Price can also reflect cut quality, face-up measurements, shape quality, report type, visual appearance, growth details, source, availability, and seller margin. This is why lab-grown diamonds are different prices even when the product grid makes them look nearly identical.
Is the cheapest lab-grown diamond always a bad choice?
No. The answer to “are cheaper lab diamonds worse” is not always yes. A lower price may come from a flexible grade choice, efficient sourcing, less popular shape, or promotional pricing. It becomes a concern when the report is missing, visuals are weak, measurements are unclear, or the seller cannot confirm the exact stone.
Does a grading report make a lab-grown diamond more expensive?
It can. If you are asking, “does documentation affect lab diamond price,” the practical answer is that recognized documentation may increase buyer confidence and influence price. A grading report helps confirm important details, but it does not prove the diamond has strong visual performance or that the price is fair.
Which factors matter most when comparing loose lab-grown diamond prices?
Prioritize cut and visual performance first, then carat and measurements, report verification, eye-clean appearance, color suitability, setting compatibility, and total cost. A strong value is usually the stone with the fewest meaningful compromises, not simply the lowest listed price.
Put Your Price Comparison Into Practice
Build a shortlist of loose lab-grown diamonds with comparable shape, carat weight, color, and clarity. Compare each grading report, face-up measurements, actual images or video, and seller terms before deciding whether a higher or lower price is justified.
Use report-reading guidance when report numbers, inscriptions, or measurements need clarification. Review shape-specific guidance for outline, proportions, and visible pattern differences, including bow-tie visibility in elongated shapes. If the growth method raises a question, review HPHT and CVD information separately from the price comparison.
For a ring or custom piece, confirm that the stone's dimensions and shape work with the intended setting, prongs, and band proportions. Compare the total project cost as well as the loose-stone price. Pause for more information when the documentation, visual evidence, or setting fit is unclear.
Disclosure: This article is for general educational purposes only. Diamond grading, pricing, availability, specifications, and seller policies can change, and readers should verify important details through grading reports, official laboratory tools, seller documentation, or qualified professionals before making a purchase decision. Laboratory-grown diamonds should be clearly distinguished from natural diamonds, and environmental or sourcing claims should be supported by specific documentation.