
Choosing between a round and an oval lab-grown diamond is not just a question of which shape costs less. Round diamonds often carry higher prices because their demand is strong, their cut standards are easier to compare, and a diamond shape price comparison can help clarify how sparkle, outline, and market preference affect value. Oval diamonds can offer more visible size for the same budget, but that value depends heavily on how bright, balanced, and well-proportioned the individual stone looks.
For the full framework, read Lab-Grown Diamond Price Guide.
This comparison helps you judge value beyond carat weight and headline price. You will learn when a round is worth paying more for, when an oval may give better finger coverage, and which details matter before buying: grading report information, millimeter measurements, cut quality, length-to-width ratio, bow-tie appearance, video, and setting choice.
Throughout this guide, “lab-grown diamond” means a laboratory-grown diamond with the same diamond material category as diamond, but with a laboratory-created origin rather than a natural mined origin. Laboratory-grown diamonds should be clearly identified as laboratory-grown, and they should not be presented as mined diamonds. Diamond simulants are a separate category and are not the same as lab-grown diamonds.
Price comparisons in this article are general buyer guidance, not fixed market quotes. Prices can change with market conditions, report type, seller channel, and stone-specific details, so exact comparisons should be verified at the time of purchase.
| Buying Priority | Round Lab-Grown Diamond | Oval Lab-Grown Diamond |
|---|---|---|
| Most predictable sparkle | Usually stronger choice due to standardized cut grading | Can sparkle well, but must be judged visually |
| Larger look for budget | May face up smaller at the same carat weight | Often appears larger because of elongated spread |
| Risk to check closely | Poor cut or weak proportions can reduce brilliance | Dark bow-tie, uneven shape, or dull center |
| Best comparison method | Prioritize cut grade, proportions, grading report, and video | Compare millimeters, ratio, symmetry, depth, and motion video |
| Setting impact | Works easily with most classic and modern settings | Needs good stone-to-setting fit to keep shape balanced |
Quick Questions Before You Read
Q: Are oval lab-grown diamonds always better value than rounds?
No. Ovals can look larger for the money, but only if the stone is bright, balanced, and free of a distracting bow-tie.
Q: Why do round lab-grown diamonds usually cost more?
Rounds tend to have stronger demand and more established cut expectations, which can make well-cut examples easier to price and compare.
Q: Can a grading report show whether an oval has a bad bow-tie?
Not reliably. Photos, videos, and viewing the diamond in different lighting are more useful for judging bow-tie severity.
Q: Should I compare round and oval diamonds by carat weight?
Not by carat alone. Compare millimeter size, proportions, cut quality, visual brightness, and how the stone looks in its intended setting.
Round vs Oval Lab-Grown Diamond Price: The Short Answer
The quick comparison most buyers need first
For a similar carat weight, color, clarity, and grading report profile, a round lab-grown diamond usually costs more than an oval lab-grown diamond. The round shape is the classic benchmark for diamond sparkle, and demand for round brilliant stones remains strong in many buying situations. Oval diamonds, by contrast, often give buyers more visible size for the same budget because their elongated shape covers more space across the finger.
That makes the round vs oval lab-grown diamond price comparison less about which shape is “better” and more about what kind of value you want. If your priority is reliable brilliance and an easy-to-compare shape, round may justify the higher price. If your priority is a larger-looking engagement ring without increasing carat weight, oval can be the stronger visual value.
Why “better value” depends on what you want to see
Better value does not always mean the lowest listed price. A cheaper oval is not automatically a smarter buy if it has weak light return, poor symmetry, or a distracting dark area through the center. A more expensive round is not automatically worth the premium if the extra cost is going toward clarity or color grades you cannot meaningfully see in daily wear.
The practical question is what you will notice most once the diamond is set. Some buyers notice sparkle first. Others notice size, finger coverage, and overall shape. A round lab-grown diamond tends to make sense when the buyer wants a classic look with predictable visual performance. An oval lab-grown diamond tends to make sense when the buyer wants the stone to appear larger from the top and is willing to review the diamond more carefully before choosing.
For buyers, the practical point is not just what the report says, but how the stone performs visually and fits the intended design. A grading report can help you compare documented characteristics, but it does not prove that one diamond will look better on the hand. The more useful value question is whether the price difference is buying something visible, such as better light return, more pleasing proportions, or a stronger fit with the setting.
The main tradeoff: sparkle consistency vs visual size
Round brilliant diamonds have a major advantage in consistency. Their cut standards are more established, their proportions are easier to compare, and their sparkle pattern is familiar to most buyers. This does not mean every round is beautiful, but it does mean buyers usually have clearer grading signals when narrowing options.
Oval diamonds can be more rewarding visually for the budget, but they ask more from the buyer. Because the shape is elongated, two ovals with the same carat weight can look noticeably different in size, outline, brightness, and balance. The strongest oval value usually comes from finding a stone that looks generous face-up without sacrificing visual performance.
What to Check Before You Decide
Before deciding between round and oval, compare more than the headline price. Look at cut quality where applicable, grading report details, millimeter measurements, proportions, and available video or imagery. Also think about the setting, because the same diamond can look larger, smaller, more balanced, or more exposed depending on how it is mounted.
If you want a simpler comparison process and strong sparkle is the first priority, round is usually the safer value path. If you want a larger visual footprint and are comfortable screening the stone more closely, oval can stretch the budget in a way round usually cannot.
Important Buying Boundaries Before Comparing Prices
What a lab-grown diamond comparison can and cannot tell you
A round-versus-oval comparison can help you decide how to allocate budget, but it should not be treated as a universal rule. Shape affects pricing, spread, and buying risk, yet each individual diamond still needs to be judged on its own specifications, appearance, documentation, and intended jewelry use. A well-selected oval may be a stronger visual choice than a weak round, while a well-cut round may justify a higher price when sparkle consistency is the main priority.
It is also important to keep origin language clear. A laboratory-grown diamond has a different origin from a natural diamond, even when both are described as diamonds. If a listing, invoice, grading report, or seller description does not clearly disclose laboratory-grown origin, buyers should ask for clarification before comparing the stone against natural diamonds or other lab-grown diamonds.
Why value claims need context
“Value” in this guide means usefulness for a buyer’s priorities, not guaranteed resale value, investment performance, or a fixed discount against another market. Lab-grown diamond prices can vary because of cut precision, report type, seller channel, size, shape, availability, visual performance, and documentation. Buyers should compare like-for-like specifications before treating one stone as a better value.
Environmental, sourcing, or ethics-related claims should also be handled carefully. Lab-grown diamonds may appeal to buyers looking for an alternative to mined origin, but broad claims such as sustainable, carbon-neutral, or ethically superior require specific documentation. Environmental and sustainability claims should be specific, documented, and limited to what can be substantiated.
Why Round Lab-Grown Diamonds Often Cost More
Round brilliant demand keeps pricing strong
Round lab-grown diamond price strength starts with demand. The round brilliant cut is still the shape many buyers picture first for an engagement ring, which keeps competition high for well-cut stones. Even in lab-grown diamonds, where supply dynamics differ from natural diamonds, popular shapes do not all price the same way.
The round shape also carries a built-in expectation: buyers want it to sparkle strongly. That expectation pushes better round stones into a more competitive part of the market. A round diamond that combines strong cut quality, attractive color and clarity, and a desirable carat weight is not priced only as a piece of lab-grown material. It is priced as a high-demand shape with a proven visual result.
Cut consistency makes round diamonds easier to compare
Round diamonds benefit from more standardized cut evaluation than fancy shapes. A grading report for a round brilliant often gives clearer cut information, making it easier to compare one stone against another. Buyers can filter more confidently because the cut grade, table, depth, and proportions offer useful screening signals.
This matters because easier comparison reduces one of the biggest risks in diamond shopping: paying less for a stone that only looks good on paper. With round diamonds, the relationship between cut quality and visual performance is more established. The grading report still does not tell the whole story, but it usually gives a more reliable starting point than it does for many elongated fancy shapes.
Why strong sparkle can justify a higher price
The strongest argument for paying more for a round lab-grown diamond is not tradition. It is visual consistency. A well-cut round brilliant is designed to return light in a balanced, lively pattern, and that performance is often noticeable in everyday lighting. If sparkle is the feature you care about most, choosing round can be a better use of budget than chasing extra face-up size in a shape that needs more visual screening.
The mistake is assuming any round diamond deserves the premium. A round stone with weak cut quality can lose the very advantage that makes the shape worth paying for. If the added price is not supported by strong cut, balanced proportions, and a look you actually like in video or in person, the premium becomes harder to justify.
Grading Report and Visual Review Check
Use the grading report to narrow the field, then use visuals to confirm the diamond. For round diamonds, prioritize cut quality before overpaying for extremely high clarity grades that may not change the appearance to the naked eye. Compare stones with similar grade profiles so the price difference reflects meaningful factors, not mismatched specifications.
A round diamond is often the better value when its higher price buys visible performance. If the premium only buys a label upgrade that does not improve the look, the better value may be elsewhere.
Why Oval Lab-Grown Diamonds Can Look Larger for the Budget
Face-up size matters more than carat alone
An oval lab-grown diamond can look larger than a round diamond of the same carat weight because of its elongated outline. Carat measures weight, not visible size. What the eye sees from above is face-up size, and that depends on the stone’s length, width, depth, and overall spread.
This is where oval diamonds can change the value equation. A buyer comparing a 2-carat round and a 2-carat oval may find that the oval gives more finger coverage even though both stones weigh the same. For engagement ring shoppers who want presence without moving into a higher carat category, that extra visual length can matter more than the number on the grading report.
How oval spread changes the value equation
Diamond spread refers to how large the stone appears from the top relative to its weight. Ovals often have strong spread because their weight is distributed across a longer shape. This can make an oval feel like a better budget choice, especially for buyers who want a noticeable center stone in a solitaire or slim pavé setting.
The risk is choosing an oval only because it looks big in measurements. An overly shallow oval may show impressive length and width, but if the stone does not handle light well, it can look flat or watery. A larger-looking diamond is only a better value if it still has enough brightness, contrast, and balance to look attractive in real wear.
Length-to-width ratio and the look of an oval diamond
The length-to-width ratio has a major effect on how an oval reads on the hand. Many buyers prefer oval diamonds around 1.35 to 1.50, with 1.40 to 1.45 often appearing balanced to shoppers who want an elongated look without an overly narrow shape. This is not a rule, but it is a useful starting point when comparing options.
A shorter oval can look softer and closer to a rounded shape, while a longer oval can create more finger coverage and a slimmer visual line. Neither is automatically better. The best choice depends on the wearer’s style, finger shape, setting design, and how much elongation feels intentional rather than exaggerated.
In practical buying, this is where many comparisons become misleading. A seller may highlight that one oval is longer than another, but length alone does not equal beauty or value. The outline should look even, the ends should not appear overly dark or lifeless, and the ratio should make sense with the ring style rather than simply maximizing spread on paper.
Stone Measurement Check
Do not compare oval lab-grown diamond price by carat alone. Compare the millimeter measurements, especially length and width, and check how the stone looks in motion. Two ovals with the same carat weight can have different outlines, different brightness patterns, and very different visual presence.
If the question is “does an oval lab-grown diamond look bigger than a round,” the answer is often yes from the top view, but lab grown diamond price thresholds can change sharply at popular carat marks. The better question is whether that larger look comes with the visual quality you are willing to see every day.
The Bow-Tie Effect: The Main Oval Value Risk
What the bow-tie effect looks like in an oval diamond
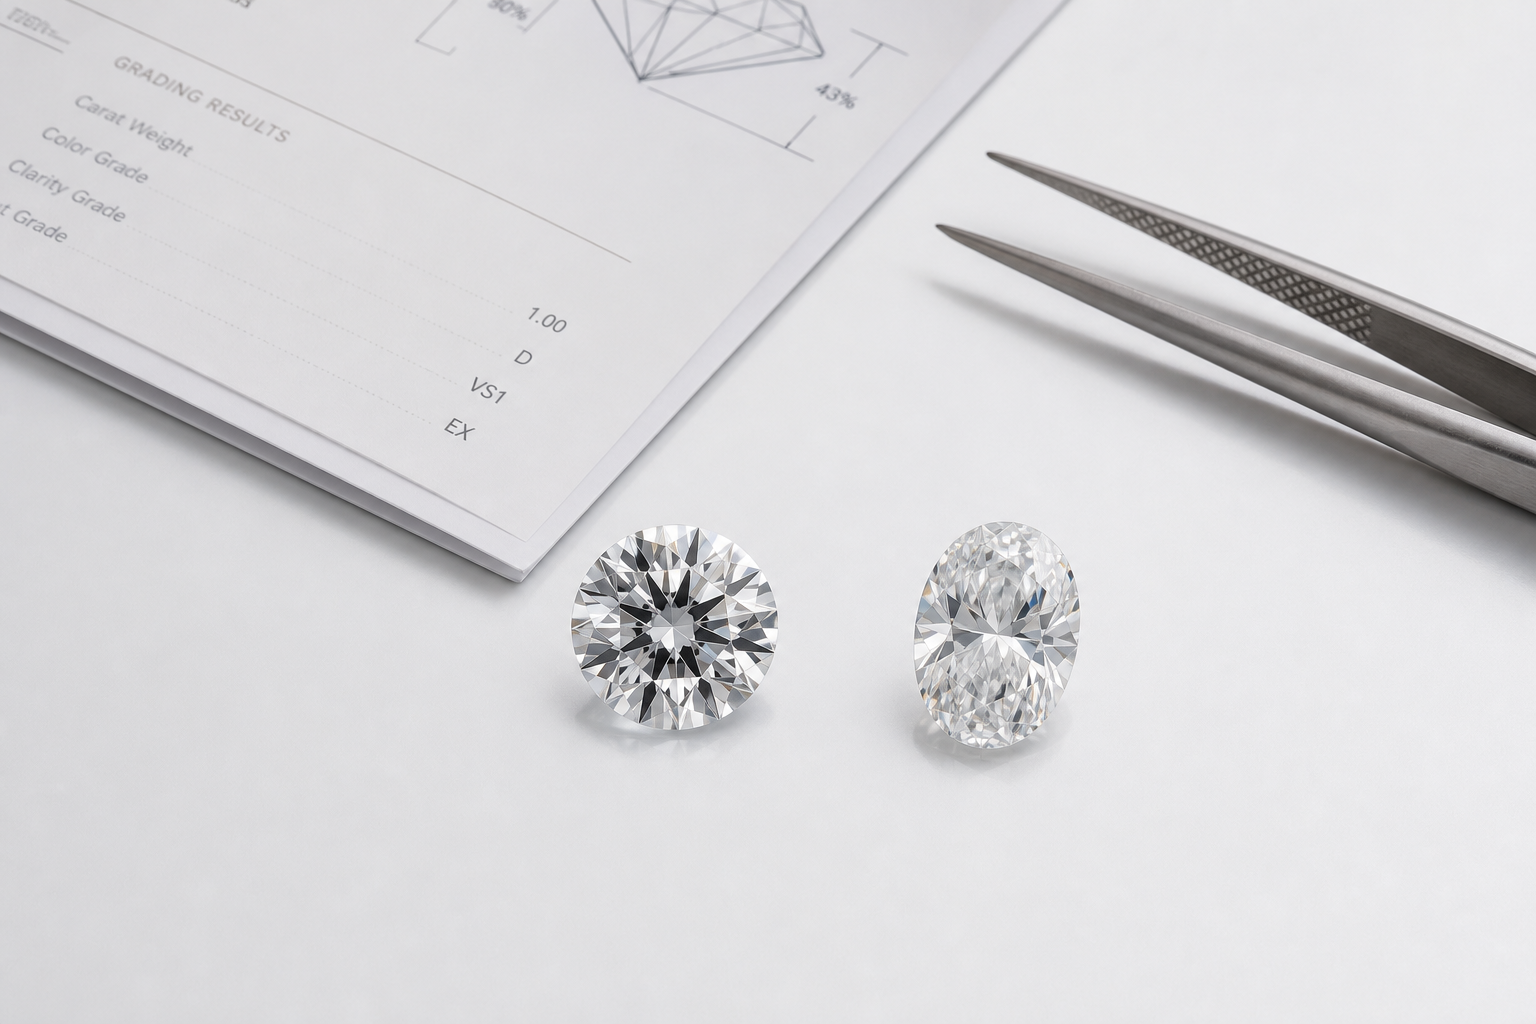
The oval diamond bow-tie effect is a darkened area that can appear across the center of the stone, usually shaped like a narrow hourglass or bow tie. It is most visible when the middle of the oval looks noticeably darker than the ends, even when the rest of the diamond has good brightness.
This matters because an oval lab-grown diamond can look like a strong price opportunity on paper while still feeling dull or uneven in person. A lower price is not automatically a better value if the center of the diamond draws your eye for the wrong reason. The risk is not that every oval has a bow tie; many elongated fancy shapes show some version of it. The real question is whether it blends into the stone’s overall contrast pattern or dominates the diamond’s appearance.
A slight bow tie can be normal and may not bother most buyers once the diamond is set. A severe dark center is different. It can make the oval look less lively, especially in a solitaire setting where the center stone has nowhere to hide. For buyers choosing oval because they want more visible size, a heavy bow tie can undercut that advantage because the eye notices darkness before it appreciates spread.
When a bow-tie is acceptable and when it hurts value
An acceptable bow tie usually appears as soft contrast that shifts as the diamond moves. It should not look like a fixed black band across the center in every view. In a well-selected oval, the center may show some shadow, but the stone still looks bright, balanced, and active across the full outline.
A bow tie starts to hurt value when it is dark, wide, or visually louder than the rest of the diamond. If the center looks flat while the tips sparkle, the stone may feel less expensive than its grade suggests. This is one reason an oval lab-grown diamond bow tie cannot be judged by price alone. A cheaper oval with a distracting bow tie may be a worse buy than a slightly higher-priced oval with cleaner visual performance.
The buyer’s tolerance also matters. If you are choosing an oval for a larger-looking engagement ring and plan to view it every day from normal hand distance, a subtle bow tie may be acceptable. If you are sensitive to center darkness or want the diamond to look bright in photos, videos, and direct viewing, this becomes a higher-priority screening point. The mistake is treating bow tie as a minor detail after carat, color, and clarity have already made the decision.
Why a grading report will not show the full visual picture
A grading report can confirm useful facts, including carat weight, measurements, color, clarity, and symmetry, but it will not tell you how distracting the oval diamond bow-tie effect looks in real viewing. Two ovals with similar grades and similar proportions can behave differently because facet arrangement and light return are not fully captured by the report.
This is where oval diamond quality becomes more visual than numerical. The report helps narrow the field, but it cannot show whether the center goes dark in common lighting, whether the bow tie breaks up as the diamond moves, or whether the stone looks balanced from tip to tip. A static report can make two diamonds look equivalent when one is clearly more attractive in motion.
At NUVU, we usually treat the grading report as a starting point for oval comparisons, not the final decision. For this shape, photos and video often carry more practical value than one more small improvement in a listed grade, especially when the price difference is being justified by appearance rather than rarity.
How to Verify This Before Buying
Before choosing an oval, ask for clear visual media whenever possible. A straight-on photo is helpful, but video is better because the bow tie may become more or less visible as the stone moves. Look at the center of the diamond compared with the shoulders, tips, and outer edges. If the middle stays heavily dark while the rest of the stone flashes, that is a warning sign.
Different lighting views also help. A diamond that looks balanced in one studio image may reveal a stronger dark center in another angle or under more ordinary lighting. Do not judge only by the most flattering image, and do not assume that a higher clarity grade solves a bow-tie issue. Bow tie is primarily a light-performance concern, not an inclusion problem.
A practical test is simple: if your eye goes first to the outline and overall sparkle, the oval is likely worth considering. If your eye keeps returning to a dark band across the middle, the lower price may not be enough to make it a strong value.
Cut, Proportions, and Measurements: The Specs That Change the Comparison
Round diamonds: why cut grade carries more weight
Round diamonds are easier to compare because the round brilliant cut has more standardized performance expectations. When a round diamond has a strong cut grade, the buyer has a more reliable starting point for predicting sparkle, brightness, and overall balance. That does not mean every Excellent or Ideal round looks identical, but it does mean cut grade carries more decision weight than it does with most fancy shapes.
For round lab-grown diamond value, protecting cut quality usually matters more than chasing a slightly higher color or clarity grade. A round diamond with weak cut can lose the main reason buyers pay more for the shape: consistent sparkle. If the goal is maximum brilliance, it rarely makes sense to save money by compromising cut first.
This is also why round diamonds can feel more straightforward in a price comparison. If two round stones have similar carat, color, clarity, and grading context, the cut grade and proportions can help explain why one is priced higher. With ovals, that same neat comparison is harder because the grading report does not evaluate cut performance in the same standardized way.
Oval diamonds: why measurements and video matter more
Oval diamond proportions require a different kind of judgment. The listed carat weight tells you how much the diamond weighs, but the measurements tell you how it spreads across the finger. A 2.00 carat oval can look meaningfully different from another 2.00 carat oval if one carries more weight in depth while the other distributes more size across length and width.
Video matters because an oval’s value is tied to how the stone handles light across an elongated outline. Symmetry, center brightness, tip brightness, and bow-tie visibility are all easier to judge when the diamond moves. A stone with attractive measurements but weak visual performance can be overpriced even if its grading report looks competitive.
The key tradeoff is spread versus liveliness. A shallow oval may look large from the top, but if it sacrifices brightness or creates a washed-out look, the size advantage becomes less persuasive. A deeper oval may face up slightly smaller, but it can be the better value if the stone looks more balanced and lively in real viewing.
Useful proportion ranges without overtrusting the numbers
Numbers are useful screening tools, not proof that a diamond is beautiful. For round brilliants, many buyers start by looking for an Excellent or Ideal cut grade where available, with a table percentage roughly in the mid-50% to low-60% range and depth percentage around 59% to 63%, depending on the full proportion set. These ranges can help eliminate obvious mismatches, but they should not replace visual judgment.
For ovals, the most useful numbers are usually the millimeter measurements, length-to-width ratio, depth percentage, and symmetry information. Many buyers find oval ratios around 1.35 to 1.50 appealing, with 1.40 to 1.45 often reading as balanced, but preference changes with hand shape, setting style, and whether the buyer wants a softer oval or a more elongated look.
The warning sign is when the numbers are used to excuse what the eye does not like. If an oval has the “right” ratio but a distracting dark center, the ratio does not make it a better stone. If a round has a strong cut grade but looks underwhelming in available media, it still deserves a closer look before purchase.
Specification Check Before Comparing Prices
- For round diamonds: prioritize cut grade first, then check table, depth, measurements, and visual media to confirm the stone looks bright and balanced.
- For oval diamonds: compare millimeter dimensions, length-to-width ratio, depth, symmetry, and video before deciding that a lower price is better value.
- For both shapes: use the grading report to narrow options, then use visual review to decide whether the price makes sense for the actual appearance.
The most reliable comparison is not “same carat, lower price.” It is “similar grade profile, strong measurements, and better appearance for the money.” That distinction matters because shape-driven value is about what the diamond looks like once it is worn, not just what the listing says.
A Realistic Buyer Scenario: Same Budget, Two Different Outcomes
The buyer problem: one budget, two appealing shapes
Maya is shopping for an engagement ring with a fixed budget. She is not trying to buy the largest diamond on the page, and she is not chasing the highest possible grades. She wants the ring to look bright, balanced, and substantial on the hand without paying for details she will not notice in daily wear.
Her short list comes down to two lab-grown diamonds: a round stone with strong cut performance and an oval stone that appears larger from the top. On paper, both look competitive. The decision is not simply round or oval lab diamond. It is whether she would rather pay for predictable sparkle or stretch the visual size of the center stone.
Path one: choosing the round for predictable sparkle
If Maya chooses the round, she is choosing the safer visual path. A well-cut round brilliant tends to deliver consistent sparkle across different lighting environments, and it is easier to compare against other round diamonds because the cut information is more standardized. That matters if she wants fewer unknowns in the buying process.
The tradeoff is that the round may not look as large as the oval at the same budget. If she is comparing photos or trying rings on side by side, the round could feel more compact even if the carat weight is similar. Paying more for the round makes sense if sparkle quality is the feature she will notice most, but it is less compelling if her main goal is finger coverage.
Path two: choosing the oval for stronger face-up presence
If Maya chooses the oval, she may get a larger-looking engagement ring without moving to a higher carat bracket. The elongated outline gives the stone more visual reach across the finger, which can make the ring feel more substantial in a solitaire or slim pavé setting.
The risk is that the oval needs closer screening. A lower price is not automatically better value if the center looks dark, the outline feels uneven, or the bow-tie effect pulls attention away from the rest of the stone. The oval path works best when the diamond has appealing proportions, clean visual symmetry, and a bow-tie that is minimal enough not to dominate the look.
The tradeoff that decides the better value
For Maya, the better value depends on which compromise would bother her more. If she would regret losing crisp, consistent brilliance, the round is the stronger choice even if it looks slightly smaller. If she would regret a ring that feels visually modest on the hand, the oval may be the smarter use of budget, provided the actual stone passes visual review.
The mistake would be treating the cheaper option as the better option without asking why it is cheaper. A round can be worth the premium when its cut performance is clearly stronger. An oval can be worth choosing when its larger face-up look does not come with distracting visual tradeoffs.
Engagement Ring Settings Can Change the Value Perception
Why round diamonds work easily across classic settings
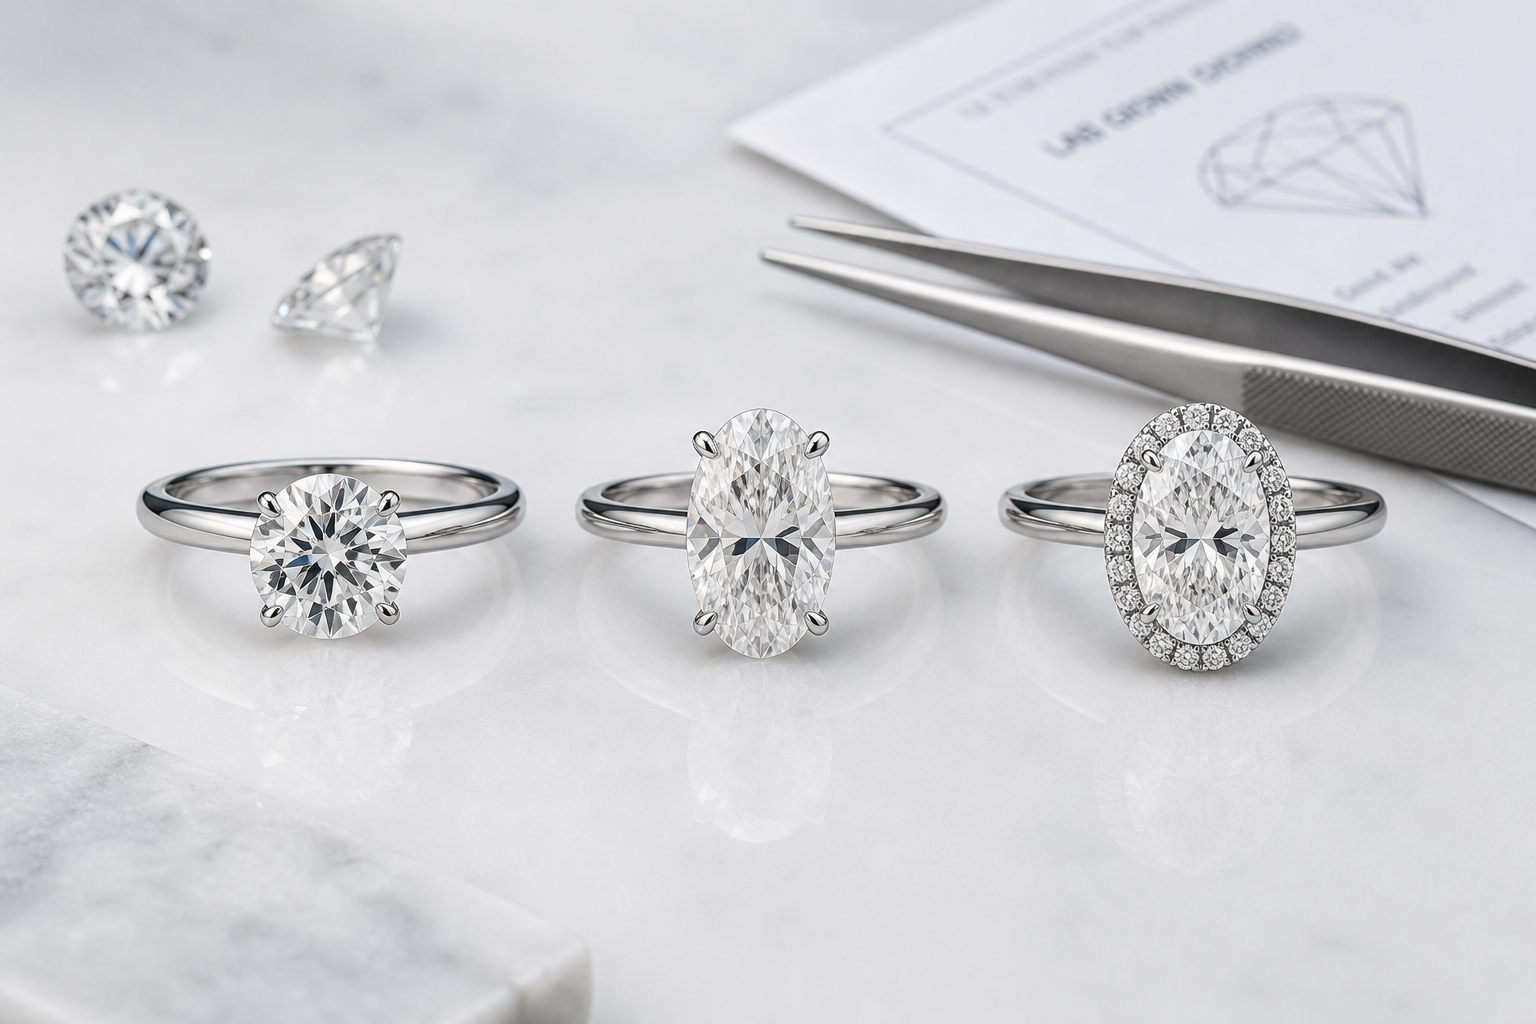
A round engagement ring setting is usually the more forgiving design choice. The shape is symmetrical from every angle, so it works cleanly in solitaire, pavé, halo, bezel, cathedral, and three-stone designs. This does not make round diamonds automatically better, but it does reduce the risk that the setting will make the stone look awkward or visually unbalanced.
That easy compatibility can protect value in a practical way. If a buyer wants a classic setting now but may reset the diamond later, a round stone offers more flexibility. The setting is less likely to expose proportion issues, and the stone does not depend as heavily on orientation or prong placement to look centered.
Why oval diamonds can create more finger coverage
An oval engagement ring setting can make the center stone feel larger because the shape extends along the finger. This is one reason oval lab-grown diamonds often appeal to buyers who want stronger visual presence without moving into a much higher budget. In a simple solitaire, the outline itself does a lot of the visual work.
The setting has to support that advantage rather than work against it. Poor prong placement can make an oval look slightly tilted, pinched, or uneven. A very elongated oval may look elegant on one hand but too narrow on another, especially if the band is wide or the setting sits high. For oval diamonds, stone-to-setting fit is not a detail to leave until the end.
How halos, pavé, and bezels affect the budget comparison
A halo setting can make either shape look larger, but it changes the value equation. If a buyer chooses an oval because it already gives more face-up coverage, adding a halo may create an even bigger look, but part of the budget shifts away from the center diamond and into the setting. That can be worthwhile if the goal is maximum visual spread, but not if the buyer would rather invest more in the center stone itself.
Pavé bands add brightness around the center, but they do not fix a weak center stone. A bezel can make a round or oval look more defined and slightly larger at the outline, but it may also soften the open sparkle some buyers expect from a prong setting. The best setting is not the one that adds the most detail; it is the one that makes the chosen diamond look intentional.
For custom design, the stone cannot be evaluated separately from the setting. Prong location, basket shape, band width, halo spacing, and stone orientation can all change how large or balanced the diamond appears. A value-focused choice should therefore include both the loose diamond’s documented characteristics and the physical realities of how that diamond will be held, protected, and viewed in the finished ring.
For custom design, trust comes from matching the stone to the setting, budget, and wearer’s daily use—not from choosing grades in isolation. Before finalizing a made-to-order ring, buyers should confirm the stone dimensions, head size, prong layout, and overall proportions with the seller or jeweler so the finished piece reflects the actual diamond, not just the listing image.
For custom jewelry, stone measurements and setting compatibility should be confirmed before finalizing a purchase. This is especially important for oval stones, where small differences in length, width, depth, and tip shape can affect prong placement, protection, and how centered the diamond appears in the finished ring.
Stone-to-Setting Fit Check
Before deciding that one shape gives better lab-grown diamond ring value, compare the stone and setting together. A round diamond is usually easier to place across many designs. An oval can deliver stronger finger coverage, but only if the setting holds it straight, protects the tips, and keeps the outline visually balanced.
For custom design conversations, this is where NUVU typically treats the diamond and setting as one decision rather than two separate purchases. A stone can look attractive on its own and still be the wrong physical match for the ring design a buyer has in mind.
When a grading report is available, buyers should verify the report details through the issuing laboratory’s official report-check tool where available, then use the lab grown diamond price guide as a reference to compare those details with the stone’s measurements and visual media.
What Documentation Can and Cannot Prove
Why paperwork is useful, but not the whole value story
In lab-grown diamond shopping, documentation is best understood as a verification tool, not a finish line. A grading report helps confirm the stone’s basic identity and specifications, and that makes it easier to compare options with similar headline grades. But the report cannot tell you how the diamond will behave in your lighting, in your setting, or from the angle other people will see most often.
This matters because round and oval diamonds are not judged the same way. For a round, the paperwork gives you stronger guidance because cut performance is more standardized. For an oval, the paperwork is only the starting point, because shape-driven issues like center darkness, outline balance, and perceived spread are visual questions first and document questions second.
How buyers can use paperwork without overtrusting it
The smartest approach is to use the grading report to eliminate obvious mismatches, then use images, video, and measurements to identify the stone that actually looks the best. That keeps the price comparison grounded in real differences rather than in assumptions about which paper trail sounds more impressive.
Buyers should also be careful not to treat a well-presented listing as proof of value. A polished description can still hide a stone that looks less appealing in motion. Likewise, a lower-priced diamond is not automatically a bargain if the missing piece is clear visual evidence. In shape comparisons, the better value is often the one that has both useful documentation and good real-world appearance.
A grading report helps document key characteristics, but it should not be treated as a guarantee of beauty, value, or sourcing ethics. Report details should be read alongside visual evidence, measurements, seller documentation, and the intended jewelry use.
Questions that help separate real value from marketing
Before deciding that a round or oval is truly the better buy, ask a few simple questions: Does the price difference reflect a visible advantage, or just a different shape? Does the stone look balanced in motion? Is the setting likely to help or hurt the appearance? And if the seller highlights one feature, is that feature something you will actually notice once the ring is worn?
Those questions are useful because they keep the comparison focused on the wearer’s experience. The best diamond purchase is rarely the one with the most dramatic description. It is the one whose size, sparkle, proportions, and setting make sense together after the ring is finished.
Practical Document Review Checklist
Confirm that the listed measurements, carat weight, and shape match the same stone shown in images or video.
Use the report to compare basic specifications, but do not treat it as proof of visual beauty.
For oval stones, put more weight on videos and side-by-side images than on the paper grade alone.
For round stones, use the report to screen cut quality, then confirm the look through visual media.
Let the setting design be part of the value decision, not an afterthought.
How to Compare Round and Oval Prices Without Being Misled
Compare equivalent grades before comparing price
The first rule is to compare like with like. A round and an oval should not be judged as a fair price comparison unless the carat weight, color, clarity, grading lab context, and documentation are reasonably aligned. Otherwise, the cheaper stone may simply be carrying a lower grade, weaker documentation, or a visual issue that is not obvious at first glance.
This is especially important when comparing round vs oval diamond price because shape already affects value perception. If one diamond has stronger grading support or cleaner visual performance, the price difference may be justified. If the only advantage is a lower number on the listing, the comparison is incomplete.
Documentation should be used carefully rather than treated as a shortcut. A report can verify the listed identity and grading information of a diamond, but buyers should still check that the measurements, inscription details where applicable, images, and seller-provided media all refer to the same stone. This is especially useful when comparing several similar lab-grown diamonds, where small differences in documentation, proportions, or visual media can explain what first looks like an unexplained price gap.
Use millimeter measurements, not only carat weight
Carat weight tells you how much the diamond weighs, not how large it will look from the top. Millimeter measurements show the visible footprint, which is where round and oval comparisons become more useful. A one-size comparison based only on carat can make an oval look like a clear winner or make a round look overpriced before the actual dimensions are considered.
For a practical value comparison, look at the diameter of the round and the length and width of the oval. If the oval has a larger visual footprint but still looks bright and balanced, the price advantage may be real. If it gets that spread by looking too shallow, narrow, or visually dark, the extra size may not be worth the savings.
Check visual media before assuming the cheaper stone is better
A diamond grading report is useful, but it does not show the whole appearance of the stone. It will not fully reveal how an oval handles the bow-tie effect, how lively the diamond looks in motion, or whether the outline feels pleasing to the eye. For round diamonds, visual media still matters, but the standardized cut information usually gives buyers a stronger starting point.
Photos and videos should be treated as part of the price comparison, not an optional extra. A cheaper oval can be the better value if it looks bright, has appealing symmetry, and gives the size impression the buyer wants. It becomes a poor value when the discount is really compensation for distracting darkness, weak light return, or proportions that only look good as numbers.
Buyer Verification Checklist
Compare diamonds with similar carat weight, color, clarity, grading lab context, and documentation before judging the price gap.
Check millimeter measurements to understand face-up size, not just listed carat weight.
Review photos or video whenever available, especially for oval diamonds where the visual result can vary more from stone to stone.
Watch for discounts that come from visible tradeoffs rather than true value.
Decide whether the premium for round sparkle or the size advantage of an oval matters more in the actual ring design.
Seller, Report, and Policy Questions to Confirm Before Purchase
Ask for the details that affect the finished ring
Before committing to either shape, buyers should confirm the practical details that can affect confidence in the purchase. These include the grading report source, report number or verification method where available, laboratory-grown origin disclosure, exact measurements, available imagery, and whether the stone shown in media is the same stone being offered. If growth method or post-growth treatment is relevant, buyers should look for clear disclosure in the grading report or seller documentation.
For custom or made-to-order jewelry, the questions should extend beyond the loose diamond. Confirm setting metal, prong layout, head size, band width, stone orientation, and whether the design can physically support the chosen diamond’s measurements. This is especially useful for ovals because a stone that looks good loose can appear tilted, too narrow, or visually unbalanced if the setting is not built around its actual dimensions.
Do not assume policies or protections from marketing language
Return terms, resizing, warranties, shipping timelines, after-sales support, and other service details vary by seller and should be confirmed directly before purchase. A useful diamond comparison should not rely on assumed guarantees or broad promises. If those details matter to your decision, ask for the applicable terms in writing and make sure they match the specific ring, stone, and order type being considered.
NUVU’s buyer-first approach is to make comparison clearer, especially around report details, visual evidence, setting fit, and documentation. That type of review can help buyers ask better questions, but it does not replace checking the actual seller documents, grading report details, and final order terms for the specific diamond and ring.
Which Shape Gives Better Value for Your Priorities?
Choose round if sparkle consistency matters most
A round lab-grown diamond is usually the stronger value if your main priority is dependable brilliance. The round brilliant cut has the clearest performance expectations, which makes it easier to compare one stone against another and harder to hide weak cutting behind an attractive headline price.
This matters most for buyers who want a classic engagement ring look, strong sparkle in varied lighting, and a simpler comparison process. If two diamonds are close in budget and the round has noticeably better light return, paying more for the round can be the better decision. The extra cost is not just for the outline; it is often for predictability.
The mistake is assuming round means automatically better. A poorly chosen round diamond can still be overpriced if the cut, proportions, or visual performance do not support the premium. Round offers a cleaner path to comparison, but it does not remove the need to review the actual stone.
Choose oval if visual size matters most
An oval lab-grown diamond can be the better value if your priority is a larger face-up look for the budget. Its elongated shape can create more finger coverage than a round diamond of similar carat weight, which is why many buyers see oval as a smart choice for visual impact.
That value depends on screening. An oval that looks bigger but has a distracting dark center, uneven outline, or awkward proportions is not a strong buy just because the listed price is lower. The best oval value comes from a stone that combines spread with balanced appearance, not from chasing the largest measurements at the lowest price.
Oval is especially appealing for buyers who like an elongated engagement ring style, want the diamond to appear larger from the top, or are willing to compare videos and measurements more carefully. If you want a quick, grade-driven purchase with fewer visual variables, round may feel easier. If you are comfortable judging appearance beyond the grading report, oval can stretch the budget more visibly.
Choose based on the tradeoff you will notice every day
The real round or oval lab-grown diamond decision is not simply price. It is sparkle vs size. Round usually wins when the daily payoff is consistent brilliance and a timeless shape. Oval usually wins when the daily payoff is a larger-looking stone and a more elongated silhouette.
For many buyers, the better value is the shape that protects the feature they care about most. If you would be bothered by less lively sparkle, prioritize the round and protect cut quality before upgrading size. If you would be bothered by a diamond that feels smaller on the hand, consider an oval, but do not treat every larger-looking oval as a better deal.
The strongest engagement ring value comes from matching the stone to the wearer’s actual priorities. A round diamond that costs more can still be the smarter purchase if it delivers the look you expect every day. An oval diamond that costs less can be the smarter purchase if it looks balanced, faces up beautifully, and avoids the visual issues that make some ovals disappointing in person.
Final Shape Decision Check
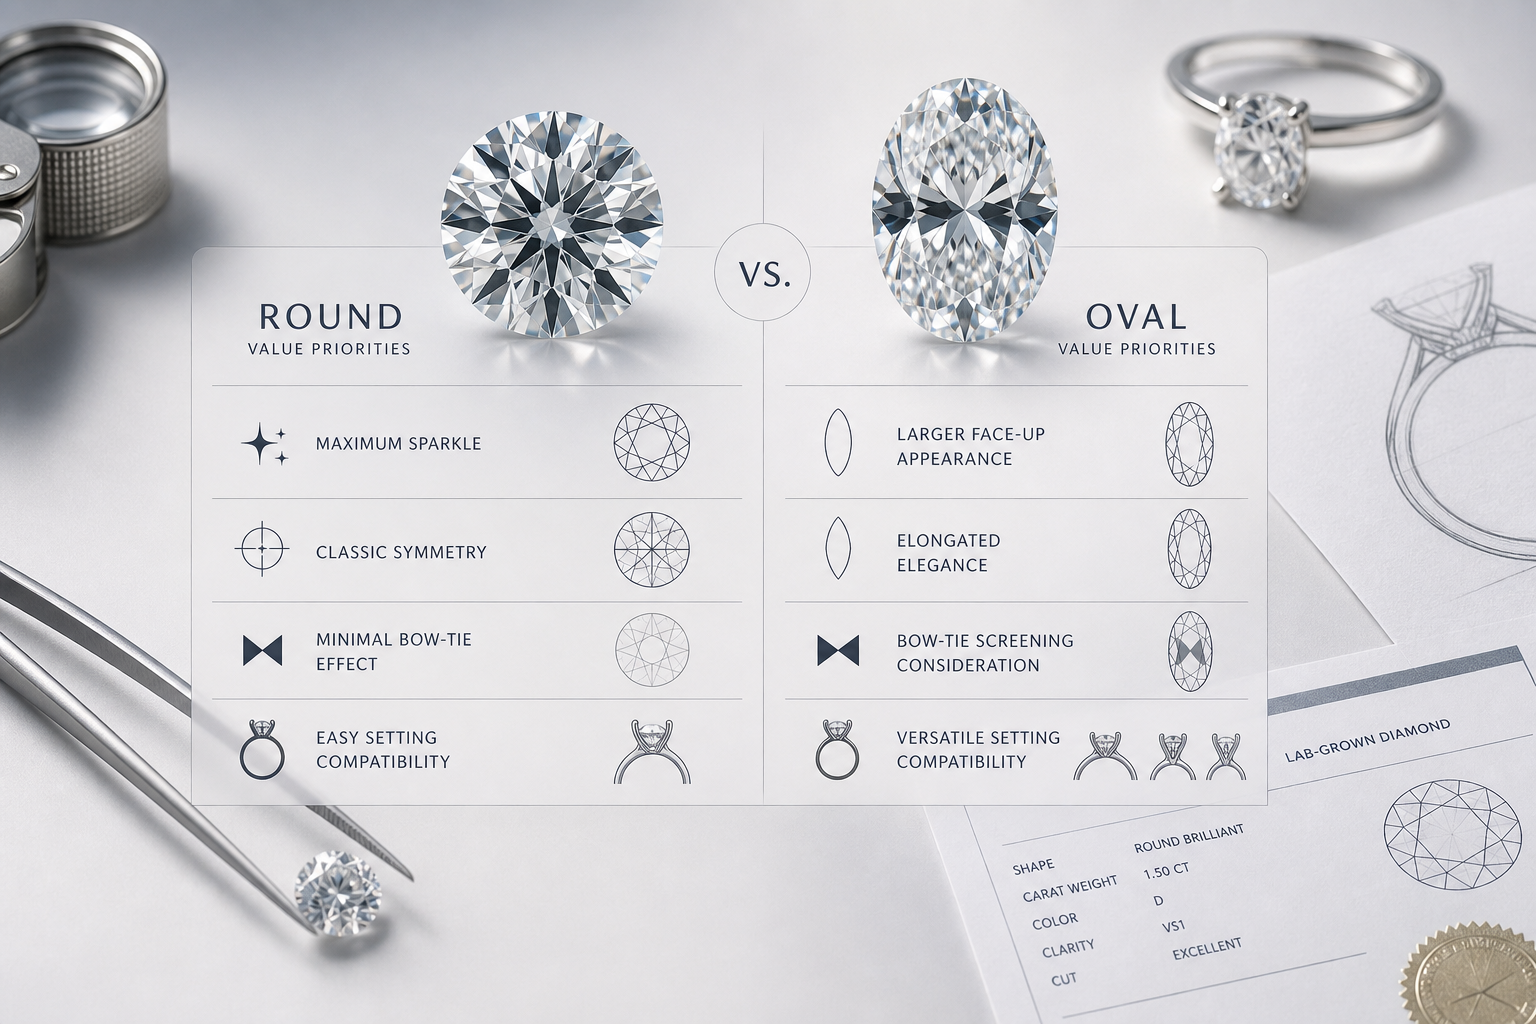
Choose round if you want the most straightforward comparison, classic symmetry, and sparkle consistency as the top priority. Choose oval if you want more face-up presence, an elongated look, and are willing to screen the stone more carefully before buying.
Do not choose oval only because it appears cheaper, and do not choose round only because it is considered the standard. The best diamond shape for budget is the one where the tradeoff works in your favor: round when performance predictability matters more, oval when visual spread matters more and the individual stone holds up under review.
If you are still deciding, compare one strong round and one strong oval side by side using the same budget. Look at what changes first: the sparkle, the size impression, the setting fit, or your confidence in the stone. That reaction will usually tell you which shape gives better value for your priorities.
Disclosure: This article is for general educational purposes only. Diamond grading, pricing, availability, specifications, and seller policies can change, and readers should verify important details through grading reports, official laboratory tools, seller documentation, or qualified professionals before making a purchase decision. Laboratory-grown diamonds should be clearly distinguished from natural diamonds, and environmental or sourcing claims should be supported by specific documentation.